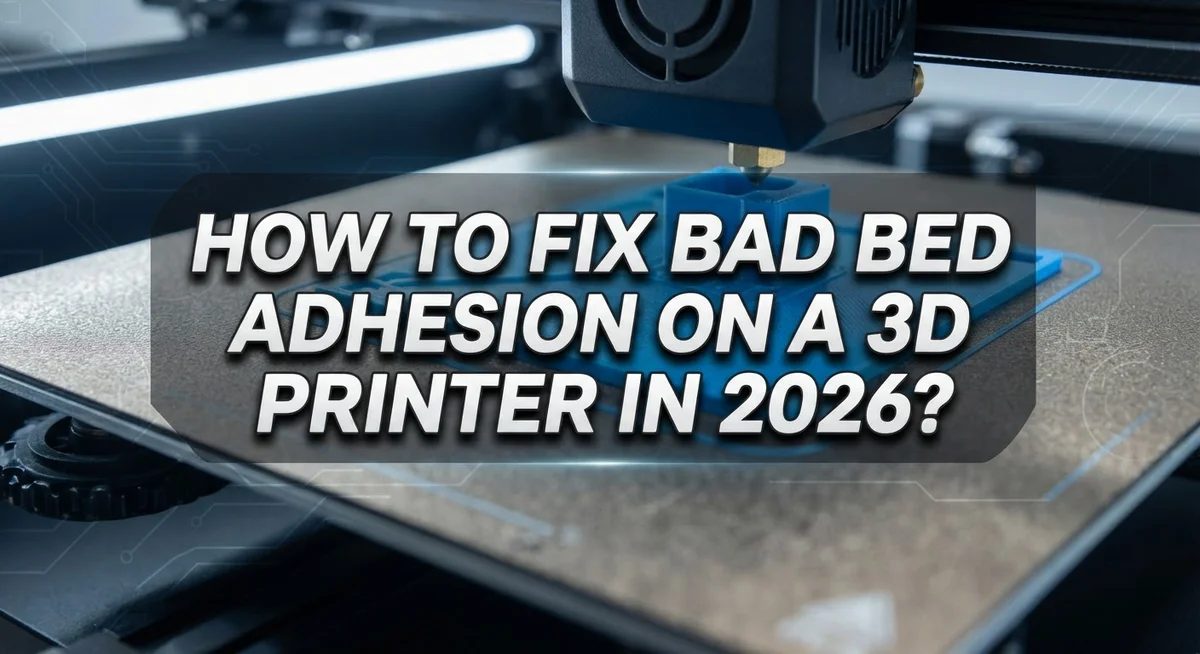
How to Fix Bad Bed Adhesion on a 3D Printer in 2026?
Bad bed adhesion can ruin your 3D printing experience. Your print starts fine, but then it lifts, warps, or detaches from the bed. This problem frustrates beginners and experts alike.
Poor adhesion happens for many reasons. A dirty surface, wrong Z-offset, or uneven bed leveling can all cause failed prints. Even room temperature changes can affect how well your filament sticks.
The good news? You can fix this problem quickly. This guide will show you simple steps to solve bed adhesion issues in 2026.
By the end of this article, you will understand why prints fail to stick. You will also know how to prevent it every time. Your 3D printer will produce clean, successful prints without frustrating lift offs or warping.
Let’s get your bed adhesion sorted once and for all.
In a Nutshell
- Level your bed first. An uneven bed causes gaps or squishing that leads to poor sticking. This step fixes many problems right away.
- Set the correct Z-offset. Your nozzle needs the right distance from the bed. Too high or too low ruins the first layer.
- Clean the surface every time. Dust, oils, and fingerprints block adhesion. Wipe with rubbing alcohol before each print.
- Check your bed temperature. Different materials need different heat levels. Room temperature changes can affect this too.
- Treat your surface properly. A glue stick, PEI sheet, or light sanding helps prints grip better. Wash new surfaces with warm water and soap first.
- Avoid common mistakes. Skipping leveling, using dirty surfaces, and wrong Z-offset settings cause most failures.
Understanding Why Bed Adhesion Fails
Bad bed adhesion happens when your print doesn’t stick to the build surface. Understanding the root causes helps you fix the problem faster.
Temperature plays a major role in adhesion success. Your bed needs to reach the right heat for your specific material. If the bed temperature is too low, the plastic won’t soften enough to bond with the surface. If it’s too high, the material can warp or bubble. Different materials require different temperatures, so check your filament guidelines.
Surface contamination stops adhesion immediately. Dust, oils from your fingers, and residue from previous prints create a barrier between the plastic and the bed. These contaminants prevent the melted filament from making direct contact with the surface. Even tiny amounts of dirt can cause partial lifting on one side of your print.
Bed leveling problems cause uneven adhesion. When your bed isn’t level, some areas sit too close to the nozzle while others sit too far away. The nozzle can’t deposit filament properly on uneven surfaces. This leads to poor contact in certain zones.
Z-offset settings control first layer thickness. An incorrect Z-offset means your nozzle either squishes the plastic too hard or sits too high above the bed. Both situations destroy adhesion. The first layer needs consistent pressure across the entire surface.
Material type affects adhesion needs. PLA, ABS, and TPU all behave differently on build surfaces. Some materials grip better on certain surfaces than others. Your surface treatment choice matters based on what you’re printing.
Seasonal changes impact bed temperature stability. Cold rooms make it harder for beds to maintain consistent heat. Your printer might reach the target temperature, but environmental factors can cause fluctuations during printing.
These factors work together. Fixing one problem without addressing the others won’t solve your adhesion issues completely. You need to tackle all of them systematically.
Leveling Your Bed and Setting the Correct Z-Offset
Your bed leveling process determines whether your first layer sticks or fails. A level bed means consistent distance between your nozzle and build surface across the entire platform.
Start by heating your bed to printing temperature. Cold beds give false readings because they expand when heated. Wait five minutes after reaching target temperature before you begin leveling.
Move your nozzle to one corner of the bed. Slide a piece of standard paper under the nozzle. The paper should create slight resistance as you pull it back and forth. This resistance tells you the gap is correct. Adjust your bed height up or down until you feel this resistance.
Repeat this process at all four corners and the center point. Your bed should feel equally tight at every location. If one corner feels too loose while another feels too tight, your bed is unlevel. Make small adjustments and test again.
Z-offset controls how close your nozzle sits to the bed during printing. Your printer uses this setting to fine-tune the distance after you level manually. A Z-offset that’s too high causes poor adhesion because the plastic doesn’t compress into the surface. A Z-offset that’s too low can crash your nozzle into the bed and damage both.
Print a test pattern to check your Z-offset. Watch the first layer as it prints. Plastic should stick firmly and form smooth lines without gaps. If plastic balls up or doesn’t stick, raise your Z-offset slightly. If plastic looks too flat or scratched, lower your Z-offset.
Make small adjustments between test prints. Changes of 0.05mm make a real difference. Keep adjusting until your first layer looks perfect and sticks completely.
Proper leveling and Z-offset work together. You cannot skip either step. Spend time getting this right, and your adhesion problems disappear.
Cleaning and Preparing Your Build Surface
Your build surface is where everything starts. A clean, well prepared surface makes the difference between successful prints and failed ones. Let’s walk through the process step by step.
Start with a thorough wash. Use warm water and dish soap to remove oils and residue from your build surface. Rinse completely and dry with a clean cloth. This removes invisible contaminants that block adhesion. Do this before your first print of the day.
For deeper cleaning, use rubbing alcohol on a lint free cloth. Wipe the entire surface in circular motions. Alcohol evaporates quickly and leaves no residue behind. This works especially well if your printer sits in a dusty environment.
Sand your surface regularly. Use fine sandpaper around 1000 grit. Make gentle circular motions across the entire bed. This creates a slightly rough texture that helps prints grip better. Don’t press hard or you’ll damage the surface. Light, even pressure works best.
Remove dust after sanding. A soft brush or compressed air works well. Any dust particles can interfere with adhesion and ruin your print quality.
Check your surface material. PEI sheets work great for most printers. Glue sticks provide temporary adhesion for glass beds. Both need regular maintenance. PEI sheets last longer but need occasional cleaning. Glue sticks require reapplication between prints.
Let your surface cool completely before the next print. This allows any residue to settle and helps you see problem areas clearly.
Timing matters too. Clean your bed between every few prints, not just when problems appear. This prevents buildup and keeps adhesion consistent. A quick wipe takes just 30 seconds but saves hours of failed prints.
Your build surface needs attention like any other part of your printer. Regular cleaning and maintenance prevent most adhesion problems before they start.
Dialing In Bed Temperature and First Layer Settings
Your bed temperature and first layer settings work together to make prints stick. Getting these right fixes most adhesion problems quickly.
Start by checking your printer’s manual for the recommended bed temperature for your material. PLA typically needs 50 to 60 degrees Celsius. ABS requires 80 to 100 degrees. PETG falls somewhere between at 70 to 80 degrees. These are starting points, not final answers.
Heat your bed to the target temperature before you level it. A cold bed gives you false measurements. Your nozzle position changes when the bed warms up, so leveling a cold surface wastes your time.
Once heated, watch your first layer print carefully. Your nozzle should leave a thin line of plastic on the bed. The line should be flat and consistent across the entire surface. If the nozzle is too high, plastic won’t stick. If it’s too low, the nozzle scrapes the bed.
Adjust your Z-offset in small steps. Most printers let you change this during printing. Move it down by 0.1 millimeters at a time if plastic isn’t sticking. Move it up by 0.1 millimeters if the nozzle drags on the surface.
Temperature affects adhesion throughout your print, not just the first layer. A bed that cools down mid print causes lifting at the edges. Keep your bed temperature stable by checking your printer’s heating system regularly.
Print temperature towers help you find the sweet spot for your specific material and printer combination. These test prints show you exactly which temperature works best.
Some materials need a temperature boost for the first layer only. Your printer software might let you set different temperatures for layer one versus the rest of the print. This technique improves adhesion without warping later layers.
Choosing and Applying Surface Treatments
Your build surface needs the right treatment to grip your prints successfully. Different surface materials require different approaches, so start by identifying what you have on your printer.
PEI sheets offer excellent adhesion for most materials. These textured surfaces grab prints firmly during printing and release them easily once cooled. If you use a PEI sheet, sand it regularly with fine sandpaper in circular motions. This keeps the texture fresh and ready to hold your next print.
Glass beds work well too, but they need a different strategy. Apply a thin layer of glue stick before printing. The glue creates a temporary bond that holds your print during the job and releases cleanly afterward.
Wash your chosen surface with warm water and dish soap before each printing session. This removes oils from your hands, dust from the air, and residue from previous prints. Dry everything completely with a lint free cloth. Even small amounts of moisture or oil prevent good adhesion.
For deeper cleaning, use rubbing alcohol on a cloth. Wipe your entire build surface and let it air dry. This removes stubborn contaminants that water alone cannot lift.
Sand your surface every few weeks if you print regularly. Use 1000 grit sandpaper and work in circular motions across the whole surface. This restores texture that wears down over time. Wipe away all dust before your next print.
Your surface treatment choice depends on your material and printer type. Some people prefer glue sticks for flexibility. Others love PEI sheets for convenience. Test both methods to see which works best for you.
Store your build surface carefully between uses. Keep it flat and protected from dust. A clean, properly treated surface is your foundation for successful prints every single time.
Troubleshooting Persistent Adhesion Problems
When your prints keep lifting or not sticking properly, you need a systematic approach to find the real cause. Start by checking one thing at a time so you know what actually fixes the problem.
First, level your bed again. Many adhesion failures happen because the bed isn’t level anymore. Heat your bed to operating temperature first. The metal expands when warm, which changes the distance between your nozzle and surface. Use a piece of paper and adjust each corner until you feel slight resistance. This simple step fixes most adhesion issues.
Next, examine your Z-offset setting. This controls how close your nozzle sits to the bed during the first layer. If your offset is too high, plastic won’t squeeze onto the surface properly. If it’s too low, your nozzle crashes into the bed. Make small adjustments of 0.1mm at a time and print test patterns between changes.
Check if the problem happens on one side only. Partial lifting usually means your bed isn’t level. Uneven surfaces cause prints to stick on one end but fail on the other. This points directly back to leveling as your solution.
Watch your first layer print closely. You should see plastic flowing smoothly without gaps or ridges. Plastic that looks thin and stringy means your nozzle is too far away. Plastic that looks squished flat means you’re too close.
Temperature can cause seasonal adhesion problems. Winter cold or summer heat affects how materials behave. If adhesion suddenly fails when weather changes, try raising your bed temperature by 5 degrees.
Finally, rule out surface contamination. Even small amounts of dust or residue prevent sticking. Wipe your build surface before every print session.
Work through these checks methodically. Most persistent adhesion problems disappear once you identify which factor needs adjustment.
Common Mistakes That Cause Bed Adhesion Failures
You skip bed leveling and your prints fail immediately. This is the most common mistake. Your nozzle sits too far from the bed, so plastic doesn’t stick. Or it sits too close and scratches your surface. Leveling takes five minutes but saves you hours of failed prints.
Neglecting surface cleaning causes adhesion problems you can’t fix with settings alone. Dust, fingerprints, and old plastic residue create a barrier between your nozzle and bed. Your print material can’t grip a dirty surface. Clean your build surface before every single print.
Incorrect Z-offset settings ruin more prints than you’d expect. Your first layer needs to squish slightly against the bed. Too high and nothing sticks. Too low and your nozzle digs into the surface. You adjust this in tiny steps, usually 0.05mm at a time.
Using oily or contaminated build surfaces prevents adhesion completely. Touching your bed with bare hands transfers skin oils. These oils block the print material from making contact. Wear clean gloves or wash your hands first.
Many people ignore one sided lifting. This happens when your bed isn’t level. One corner sits higher than another. Your nozzle sticks to the high side but misses the low side. This signals you need to relevel immediately.
Temperature problems vary by season. Winter air is drier and cooler. Your bed might not reach the right temperature. Summer heat can make materials too sticky. Check your actual bed temperature with a thermal camera if prints stick unevenly.
Rushing through setup causes cascading failures. You level quickly without heating the bed first. Metal expands when hot, so a cold level doesn’t match a hot print. Heat your bed to working temperature before leveling. This single step prevents most adhesion headaches.
Final Thoughts
Fixing bed adhesion problems does not need to feel hard. Most issues come from a few simple causes. Once you know these causes, you can fix them fast.
Bed leveling stays the most important step. Check it often, even if you have not moved your printer. Small changes in temperature or handling can shift things.
Your Z-offset deserves regular attention too. A tiny adjustment here can turn a failed print into a perfect one. Do not guess this setting. Test it carefully each time you switch materials.
Surface cleaning matters more than most people think. Oils from your hands build up fast. A quick wipe with rubbing alcohol before each print saves you from many headaches.
Temperature changes throughout the year affect your prints. Your garage or room gets colder in winter. This shift can cause sudden adhesion failures even when nothing else changed.
Watch your first layer print closely. This layer tells you everything about your setup. If it looks messy or thin, stop the print and check your settings again.
Partial lifting on one side almost always points to bed leveling. Do not skip this check, even when you feel confident about your setup.
Building good habits now saves you time later. Clean your surface often. Check your level before big prints. Test your Z-offset when you switch filament types.
3D printing rewards patience and consistency. Small checks prevent big failures. Follow these steps each time, and your prints will stick reliably.
Bed adhesion problems do not need to control your printing experience. With the right routine, you gain confidence and consistent results every time you print.
Frequently Asked Questions
Why does my bed adhesion fail on just one side of the print?
One side lifting almost always means your bed isn’t level. Your nozzle sits too far from the surface on that side. Start by releveling your entire bed using a piece of paper. Move slowly across all corners and the center. Pay special attention to the side where lifting happens.
Temperature can also play a role. If your room gets cold, one side may cool faster than the other. Check if the problem appears during certain seasons or times of day.
How often should I clean my build surface?
Clean your surface between every print or at minimum once a week if you print regularly. Use warm water and dish soap to remove oils and dust. Dry it completely with a clean cloth before your next print.
For deeper cleaning, use rubbing alcohol on a cloth. This removes stubborn residue that water alone misses. Let the surface dry fully before printing.
Can temperature changes affect how my prints stick?
Yes. Temperature variations throughout the year impact adhesion significantly. Colder rooms reduce bed stickiness. Warmer environments help most materials adhere better.
If you notice seasonal problems, adjust your bed temperature up by 5 degrees during cold months. Monitor your first layer closely to see if this helps. Consistent room temperature makes printing much easier.
What’s the best way to prepare my build surface?
Start with fine sandpaper at 1000 grit. Use circular motions across the entire surface. This creates texture that helps materials grip better.
After sanding, wash with warm soapy water. Rinse thoroughly and dry completely. Let the surface sit for a few minutes before printing. A clean, textured surface gives you the best chance for success.

I’m the voice behind Device Dossier. As a printing technology enthusiast, I spend my time testing printers, comparing specs, and writing honest reviews to help you find the perfect printing solution. When I’m not geeking out over print quality and page yields, you’ll find me exploring the latest in tech.