Why Is My Copier Cutting Off the Bottom of the Page?
Has your copier ever printed a page that looks almost perfect — except the last line or two got swallowed up? You are not alone. Copiers cutting off the bottom of the page is one of the most reported printing problems in homes, small offices, and large workplaces alike.
The good news is that this problem is almost always fixable. In most cases, it comes down to a setting that is slightly off, a paper configuration that does not match the document, or a small hardware issue that is easy to correct. You do not need a technician for most of these fixes.
This guide walks you through every major cause and solution — step by step — so you can get your copier printing full, clean pages again. Whether you use a home inkjet, a laser copier, or a commercial multifunction printer, the fixes here apply to you.
Key Takeaways
- Paper size mismatch is the most common cause. If your document is set to A4 but your tray holds Letter-sized paper, the bottom content gets cut off. Always match your document size to the loaded paper size.
- Incorrect margin settings push content outside the printable area. Increasing bottom margins slightly in your document or application settings often solves the problem immediately.
- Scaling settings set to values other than 100% can shrink or stretch content so that it no longer fits on the page. Setting your print scaling to “Fit to Page” or “100%” is a reliable fix.
- Misaligned paper tray guides cause paper to feed at an angle or shift position, which physically cuts off the bottom portion during printing. Always make sure the tray guides sit snugly against the paper edges.
- Outdated or corrupt printer drivers cause communication errors between your computer and the copier, leading to layout problems like bottom cutoffs. Updating or reinstalling the driver resolves this in many cases.
- The copier’s unprintable zone — the physical boundary the machine cannot print on — may be larger than you expect. Designing documents that respect this boundary prevents content loss at the bottom.
Why Is Your Copier Cutting Off the Bottom of the Page?
Before jumping into fixes, it helps to understand why this problem happens at all. A copier does not randomly decide to ignore the bottom of your page. There is always a logical reason rooted in a setting, a hardware condition, or a software configuration. The copier is doing exactly what it is told to do — the problem is that the instructions are wrong.
Copiers use a combination of your document settings, the printer driver, the paper tray configuration, and the machine’s internal firmware to decide how content lands on the page. When any one of these elements is out of sync with the others, the result is a print job where part of the content disappears. Most often, it is the bottom of the page that suffers because content naturally flows from top to bottom, and whatever does not fit simply gets cropped.
Understanding the source of the problem saves you time. Instead of changing ten different settings blindly, you can identify the likely cause and go straight to the right fix.
Check Your Paper Size Settings First
The very first thing to check is whether your document’s paper size matches the paper loaded in your copier tray. This mismatch is the leading cause of content being cut off at the bottom of the page, and it is also the easiest to fix.
Here is how to check and correct this on Windows:
- Open your document and click File, then Print.
- Look at the paper size setting in the print dialog. Common options are A4, Letter (8.5 x 11 inches), Legal (8.5 x 14 inches), and others.
- Open your copier’s paper tray and confirm the actual size of the paper loaded inside.
- If the sizes do not match, change either the document’s paper size setting or swap the paper in the tray to match.
On Mac, go to File > Page Setup, then check the Paper Size dropdown. Make sure it reflects what is physically in your machine.
A very common scenario is using a document formatted for A4 paper on a machine loaded with Letter-sized paper. A4 is slightly taller than Letter, so when you print an A4 document on Letter paper, the bottom content gets chopped off. Switching the document to Letter size, or loading A4 paper, solves this instantly.
On the copier itself, check the paper size setting inside the tray menu. Many copiers let you configure the paper size per tray directly on the control panel. Navigate to Settings > Paper > Tray Settings and confirm the paper size displayed matches what is loaded.
Adjust Your Document’s Bottom Margin
Even when the paper sizes match, a document can still lose content at the bottom if the text or images extend into a zone that the copier physically cannot print on. Every printer and copier has what is called an unprintable zone — a small border around all edges of the page that the machine cannot reach.
Most copiers have an unprintable zone of about 3mm to 6mm (roughly 0.12 to 0.25 inches) at the bottom of the page. If your document has content that extends all the way to the very bottom edge, that content will be cut off no matter what.
To fix this, adjust your document’s bottom margin:
- In Microsoft Word: Click Layout > Margins > Custom Margins. Set the bottom margin to at least 0.5 inches (1.27 cm). Click OK and try printing again.
- In Google Docs: Go to File > Page Setup and adjust the bottom margin value.
- In Adobe Acrobat: Use File > Print > Page Setup and increase the bottom margin.
If you are copying a physical document (not printing from a computer), make sure the original is placed correctly on the scanner glass. Place the original firmly in the corner marked by the arrow indicator on your copier’s glass. If the original is placed crooked or positioned too low, the scanned image will shift and the copied output will cut off the bottom.
Fix the Scaling Settings on Your Copier
Scaling is a setting that tells the copier how large or small to make the printed content relative to the paper. When scaling is set to a value greater than 100%, the content expands beyond the paper’s edges. When it is less than 100%, content shrinks and may appear oddly positioned. But the most damaging error is when the scaling setting causes the document to overflow at the bottom.
The safest scaling setting is 100% or “Actual Size.” Use “Fit to Page” only when you intentionally want the machine to resize content to fill the paper.
To fix scaling settings on Windows:
- Open Control Panel > Devices and Printers.
- Right-click your copier and select Printing Preferences.
- Go to the Advanced or Layout tab.
- Find the Scale or Scaling option and set it to 100%.
- Click Apply, then OK.
On Mac, go to File > Print, and look for a Scale field under the paper handling options. Set it to 100%.
If you are using a copy function directly on the machine (walk-up copying), check the Reduce/Enlarge setting on the copier’s control panel. Make sure it is set to 100% or 1:1. An accidental 110% or 120% enlargement will push content beyond the page boundary.
Many users accidentally activate the zoom function while adjusting other settings on the control panel. It only takes one mispress on the scaling button to enlarge the output and cut off the bottom.
Update or Reinstall Your Printer Driver
The printer driver is the software that translates your document into a format the copier understands. When the driver is outdated, incorrectly installed, or corrupt, it sends bad layout instructions to the machine. The result can be content that is cut off, shifted, or printed at the wrong size.
This is a more common cause than most people realize. An old driver may not fully support the paper size you are using, or it may calculate the printable area incorrectly.
To update your printer driver on Windows:
- Press Windows + X and select Device Manager.
- Expand the Printers section and find your copier.
- Right-click it and select Update Driver.
- Choose Search automatically for drivers and follow the prompts.
To reinstall from scratch:
- Go to Control Panel > Devices and Printers.
- Right-click your copier and select Remove Device.
- Visit your copier manufacturer’s official website (HP, Canon, Brother, Ricoh, Xerox, etc.).
- Download the latest driver for your exact model and operating system.
- Run the installer and follow the on-screen steps.
After reinstalling the driver, restart your computer and run a test print. In many reported cases, reinstalling the driver alone resolves the bottom-cutoff issue without any other changes needed.
Align the Paper Tray Guides Properly
The paper guides inside your copier’s paper tray are the small plastic or metal pieces that keep the paper stack aligned as it feeds into the machine. When these guides are too loose, the paper can shift sideways or forward during feeding. This misalignment causes the printed content to land in the wrong position on the page, which often results in the bottom being cut off.
Think of it like a picture frame that is crooked — even a small shift changes what you see.
Here is how to check and correct your paper tray guides:
- Remove the paper tray from the copier completely.
- Take out all the paper from the tray.
- Look at the guide rails on the sides, back, and front of the tray.
- Reinsert the paper stack and slide each guide snugly against the edge of the paper — not so tight that it bends the paper, but firm enough that the stack cannot shift.
- Make sure the rear guide is correctly positioned to reflect the paper size.
- Slowly push the tray back into the machine until it clicks into place.
Many copier trays also have printed size indicators along the side. Make sure the guide’s position lines up with the correct paper size label (such as A4 or Letter). If the guides are set to A4 but you loaded Letter paper, the paper will not feed straight, and the output will be misaligned.
Check the Print Mode and Copy Mode Settings
Copiers that also function as multifunction printers have two separate modes: copy mode (for walk-up copying using the scanner glass or document feeder) and print mode (for documents sent from a computer). Each mode has its own set of configuration options, and sometimes the settings in one mode are out of sync with what the document requires.
A setting that works fine in print mode may cause problems in copy mode, and vice versa.
If you are copying from the copier’s panel and getting cut-off output, check these specific settings on the control panel:
- Paper Size: Make sure the selected size matches the paper in the tray.
- Zoom / Reduce-Enlarge: Set to 100% or “Auto” only if you want automatic sizing.
- Image Quality Mode: Some copiers in “Text” mode crop image-heavy documents differently than “Photo” mode.
- Auto Fit: Some machines have a setting that automatically fits the scanned image to the paper. Enable this if it is available.
If you are printing from a computer and the issue is in the driver settings, those settings are separate from the copy mode settings on the machine’s control panel. You need to check both independently.
Inspect the Scanner Glass and Lid Alignment
If the problem occurs specifically during copying (not when printing from a computer), the issue may be with the scanner itself rather than the print mechanism. A dirty or misaligned scanner glass can cause the copied image to appear shifted or cropped.
Dust, smudges, or debris on the scanner glass can interfere with how the machine reads the original document. When the scanner reads the page incorrectly, the resulting copy will be a mirror of that error — including cutting off the bottom.
Follow these steps to clean and inspect the scanner glass:
- Turn off the copier and open the scanner lid.
- Use a clean, dry microfiber cloth to wipe the glass from top to bottom.
- For stubborn smudges, lightly dampen the cloth with water. Do not use alcohol-based cleaners unless the manufacturer specifically allows it.
- Also clean the white underside of the lid, which acts as a background reference for the scanner.
- Check the edges of the scanner glass for any crack or chip, as this can distort the scan.
- Place your original document firmly in the correct corner (usually the top-left corner with a small arrow icon).
If your copier uses an Automatic Document Feeder (ADF), also check that the ADF rollers are clean and that the document is loaded correctly. A dirty ADF roller can pull the page unevenly, causing the bottom to be missed entirely.
Resolve Paper Size Conflicts in the Print Dialog
Sometimes the conflict is not between the copier and the paper — it is between different software applications and the print dialog itself. When you send a document to print, it passes through the application, the operating system, and then the driver. Each layer has its own paper size setting, and they do not always agree.
For example, a Word document may be set to A4 in the document properties, but the Windows print dialog may default to Letter. The copier then receives conflicting instructions and picks the wrong one.
Here is how to make sure all three layers match:
- In the document: Check the page size setting in your application (Word, Google Docs, Excel, etc.).
- In the print dialog: When you press print, check the paper size in the dialog before hitting OK.
- In the driver settings: Open the advanced properties in the print dialog and confirm the paper size there too.
For PDF documents printed from Adobe Acrobat Reader, use File > Print and look for the Page Sizing and Handling section. Set it to “Actual Size” rather than “Fit” or “Shrink Oversized Pages” to prevent unexpected resizing. Using “Fit” can sometimes scale the PDF to a size that causes the bottom content to overflow.
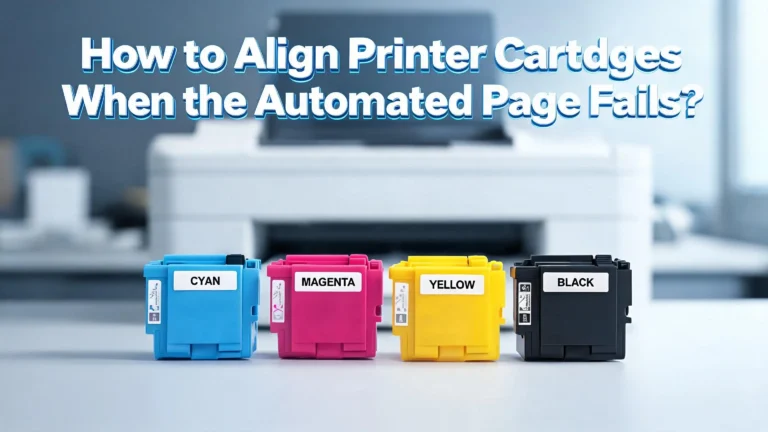
Perform a Printer Alignment or Calibration
Many copiers and printers include a built-in alignment or calibration tool. This tool adjusts how the print head (or drum, in laser copiers) aligns content on the page. When the alignment is off, even by a small amount, the printed output can shift — often downward, which cuts off the bottom content.
Think of alignment like the calibration of a camera lens: a tiny offset produces a noticeably skewed result.
To run an alignment on most copiers:
- On the machine’s control panel, go to Settings > Maintenance or Settings > Tools.
- Look for Align Cartridges, Print Head Alignment, or Calibration.
- Follow the on-screen instructions. Most copiers will print an alignment test page.
- For inkjet printers, some models (like HP) have an alignment tool inside the printer software on your computer. Open the HP Smart app or the printer’s toolbox and look for Align Cartridges or Align Print Head.
Run the alignment test and then print a test page to see if the bottom cutoff is resolved. This step is especially effective if the problem appeared suddenly after you replaced a toner cartridge or ink tank.
Update the Copier’s Firmware
Firmware is the internal software that runs on the copier itself — not on your computer, but inside the machine. Manufacturers release firmware updates to fix bugs, improve performance, and address known printing issues. A copier running outdated firmware can develop strange behavior, including cutting off page content.
One documented issue involved HP printers where a firmware version caused the printable area to be calculated incorrectly, resulting in bottom content being cut off.
To check and update firmware:
- On the copier’s control panel, go to Settings > About or Settings > System Information to find the current firmware version.
- Visit the manufacturer’s official support website and search for your exact model number.
- Download the latest firmware update file.
- Follow the manufacturer’s specific instructions to install it. Some machines allow over-the-air updates from the control panel by going to Settings > Firmware Update > Check for Updates.
Always keep your copier plugged in and do not turn it off during a firmware update. Interrupting a firmware update can corrupt the machine’s software and create bigger problems. After updating, print a test page to see if the issue is resolved.
Check for Web Page or Application-Specific Print Issues
If the bottom-cutoff problem only happens with certain documents or web pages — and not all the time — the issue may be specific to how that content is formatted for printing, not a problem with the copier itself.
Web pages are a common culprit. Most web pages are not designed for print. They use fluid layouts that can extend far beyond a single page, and when you print them, the content overflows in unpredictable ways.
Here is how to handle application-specific print issues:
- For web pages: Look for a “Print-Friendly Version” or “Print This Page” link on the website. Some sites offer a cleaner printable format. Alternatively, use your browser’s Reader Mode before printing, as it strips away ads and extra formatting.
- For Excel spreadsheets: Go to File > Print Preview first. If content is cut off, adjust the Page Layout > Scale to Fit settings. Set the width and height to “1 page” to force all content onto one sheet.
- For Google Docs: Before printing, go to File > Print and check the preview carefully. Adjust margins in File > Page Setup if needed.
- For PDFs: Open with Adobe Acrobat Reader (free) and print using “Actual Size.” Avoid using browser-built-in PDF viewers, as they sometimes apply their own scaling.
Switching to a different browser can also help with web pages. Chrome, Firefox, Edge, and Safari each handle print differently. If one browser cuts off the bottom, try printing the same page from a different one.
Perform a Factory Reset on the Copier
If you have tried all the settings-based fixes and the problem persists, a factory reset on the copier can clear out any corrupt configurations that are causing the issue. A factory reset returns all settings to the original defaults, which eliminates any accidental or unknown setting that may have been changed.
Keep in mind that a factory reset will erase custom settings like network configurations, address books, and saved jobs. Make a note of your current settings before resetting.
To factory reset most copiers:
- On the control panel, go to Settings > Maintenance or Settings > System Setup.
- Look for Restore Factory Defaults, Reset All Settings, or Initialize All Settings.
- Confirm the reset when prompted.
- Wait for the machine to restart.
- Reconfigure your paper size settings, network settings, and any other custom options.
- Print a test page.
For HP printers specifically: navigate to Setup > Printer Maintenance > Restore, then select Restore Factory Defaults. For Brother machines, go to Menu > Initial Setup > Reset > Factory Reset.
After the reset, install the latest firmware and driver before reconfiguring everything else. This ensures you are starting with the cleanest possible foundation.
When to Call a Technician
Most bottom-cutoff problems are software or settings issues that you can fix yourself. But in some cases, the problem is hardware-related and requires professional attention. Knowing when to stop troubleshooting on your own saves time and prevents accidental damage to the machine.
Consider calling a technician if:
- The problem persists after you have tried all the fixes above, including reinstalling the driver and performing a factory reset.
- The copier produces consistent mechanical noise during printing, which can indicate a roller or belt problem that is physically misfeeding the paper.
- The misalignment is always exactly the same (e.g., exactly 1 inch of content is always cut off), which points to a hardware calibration issue inside the machine.
- You notice physical damage to the paper tray, the scanner glass, or the feed rollers.
- The machine shows error codes related to paper path, fuser, or scanner hardware.
A certified copier technician can run internal diagnostic tests that consumer-level software cannot perform. For commercial copiers (Ricoh, Xerox, Konica Minolta, etc.), most manufacturers offer service contracts that include regular maintenance visits. If your machine is under warranty, contact the manufacturer’s support line before attempting any hardware repairs yourself.
FAQs
Why does my copier cut off the bottom of the page when copying, but not when printing from a computer?
When this happens, the issue is usually with the scanner glass placement or the copy mode settings, not the printer driver. Make sure you place the original document in the correct corner of the scanner glass and that the copy mode’s paper size setting matches the tray. Also check the “Reduce/Enlarge” setting in copy mode and set it to 100%.
Why does my printer cut off the last line of text every time I print?
This usually happens because the document’s bottom margin is set too small, pushing the last line into the copier’s unprintable zone. Increase the bottom margin to at least 0.5 inches in your document’s page setup and try printing again. Also confirm that the paper size in the document matches the paper loaded in the tray.
Does paper type affect whether the bottom of the page gets cut off?
Yes, it can. Thick paper (like cardstock) feeds differently than standard copy paper. If the paper is too thick for the tray’s specifications, it may not feed all the way through the print path, causing the bottom to be missed. Check your copier’s manual for supported paper weights and types for each tray.
My copier cuts off the bottom only when printing PDFs. What is wrong?
PDF print scaling is the most likely cause. Open the PDF in Adobe Acrobat Reader, go to File > Print, and under “Page Sizing and Handling,” select “Actual Size.” Avoid using “Fit” or “Shrink Oversized Pages.” Browser-based PDF viewers (like Chrome’s built-in viewer) sometimes apply their own scaling, so try printing through the full Acrobat Reader instead.
How do I know if my copier’s printable zone is causing the cutoff?
Create a test document with a filled rectangle that covers the entire page edge to edge. Print it. The areas that do not print represent your copier’s unprintable zone. Compare that to where your document’s content ends. If your content falls within that zone, you need to increase your document’s margins to compensate.
Can a bad toner cartridge or drum cause the bottom of the page to be cut off?
A failing drum unit or toner cartridge typically causes quality issues like streaks, fading, or blank patches — not a clean cutoff of the bottom portion. A clean cutoff is almost always a settings or alignment issue. However, a drum that is physically misaligned inside the machine can occasionally cause positioning errors. Reinstalling the cartridge and drum properly is worth trying if other fixes fail.
Why did this problem start suddenly after I changed my paper?
Different brands and weights of paper can behave slightly differently in the paper tray. A new batch of paper may be slightly shorter or thicker, which can affect how far it feeds into the machine. Re-adjust your paper tray guides to fit the new paper snugly and check that the paper size setting on the copier matches.
I’m the voice behind Device Dossier. As a printing technology enthusiast, I spend my time testing printers, comparing specs, and writing honest reviews to help you find the perfect printing solution. When I’m not geeking out over print quality and page yields, you’ll find me exploring the latest in tech.