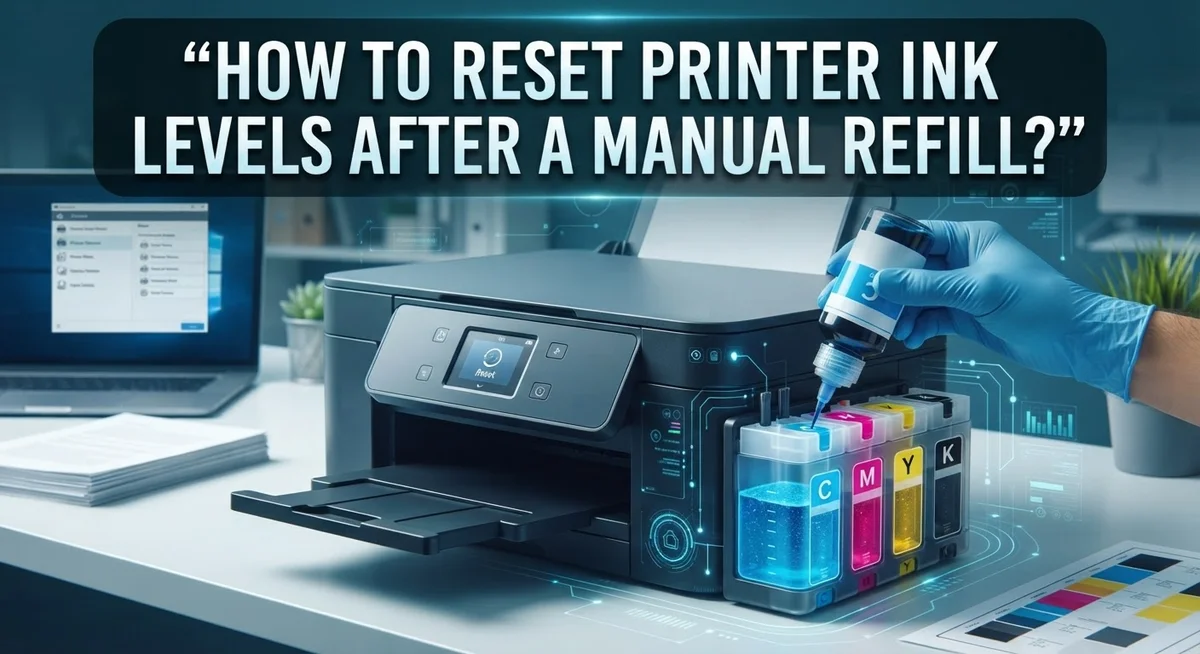
How to Reset Printer Ink Levels After a Manual Refill?
Refilling your printer ink saves money. But your printer often does not know it has fresh ink.
It still shows that annoying “low ink” warning. Sometimes it even refuses to print at all.
This happens because printers track ink through a chip or internal counter. Refilling the tank does not automatically update this counter.
You need to reset it manually. This step tells your printer that ink levels are full again.
The good news? It is simple once you know the right steps.
This guide walks you through the entire process. We cover both HP and Epson printers in detail.
Plus, we highlight common mistakes people make. Avoiding these errors saves you time and frustration.
By the end, you will reset ink levels confidently. Your printer will recognize that fresh ink and print normally again.
Let’s get your printer back to full working order.
In a Nutshell
-
Fill the tank first. Always refill your ink cartridges completely before you start the reset process. Resetting too early can cause tracking errors later.
-
Power cycle matters. Turn off your printer and unplug it for about five minutes. This clears the internal memory and prepares it for a fresh reset.
-
Check your brand’s menu. For HP printers, go to the Setup or Tools menu and find the Ink Cartridge Reset option. For Epson printers, open the software and click Maintenance, then Reset Ink Levels.
-
Try the button trick. Many printers let you reset ink levels by holding the “OK” or “Resume” button for about ten seconds.
-
Finish the alignment. Always complete the alignment steps when your printer prompts you. Skipping this can leave print quality uneven.
-
Avoid common slip ups. Don’t skip the power down wait time or ignore your printer’s specific reset steps. Each brand works a little differently.
Why Printers Show False Low Ink Warnings
Printers track ink levels using a chip or internal counter built into each cartridge. This counter starts at 100% when the cartridge is new. As you print, the printer records how much ink flows out and updates the counter accordingly.
Here’s the problem: when you manually refill a cartridge, the chip doesn’t know you added new ink. The counter stays at whatever level it was before the refill. Your printer still thinks the cartridge is empty or nearly empty, so it keeps showing those annoying low ink warnings.
The chip works like a mileage counter in a car. Once it records 50,000 miles, it doesn’t automatically reset just because you fill up the gas tank. You have to manually reset it. Your printer operates the same way.
Different printer brands use different chip systems. HP printers use one type of counter. Epson uses another. Canon and Brother have their own methods too. This is why the reset process varies between brands.
The false warning appears because your printer’s software doesn’t distinguish between an empty cartridge and a full one that just needs its counter reset. It only reads the chip’s data. If the chip says 5% ink remains, your printer displays that warning regardless of the actual ink inside.
Some modern printers have sensors that detect ink physically. These still rely on chips for accurate tracking. Manual refills bypass the normal detection process, which is why the warning persists.
Understanding this system helps you see why a simple reset is necessary. You’re not tricking your printer. You’re just telling it the truth about what’s actually inside the cartridge now.
What to Do Before Resetting Ink Levels
Before you reset your printer’s ink levels, take a few important steps. These actions prevent mistakes and ensure the reset works correctly.
Fill your cartridges completely first. Your printer needs full tanks before any reset happens. Partial refills cause the reset to fail or create new problems. Check each cartridge until ink reaches the maximum line. Wait a few minutes after filling so the ink settles properly inside the cartridge.
Power down your printer completely. Turn off the device using the power button. Then unplug it from the electrical outlet. Leave it unplugged for about five minutes. This step clears your printer’s memory and removes any stuck error messages. After five minutes, plug it back in and power it on normally.
Locate your printer’s control panel. Find the menu buttons on your device. Most printers have buttons labeled “Menu,” “OK,” “Home,” or “Settings.” You will use these to access the reset function. Familiarize yourself with their locations now so you move faster later.
Check your printer’s brand and model number. Different manufacturers use different reset procedures. HP printers work differently than Epson models. Canon, Brother, and other brands each have their own steps. Write down your exact model number before you start. You can find this information on the printer itself or in your manual.
Gather your printer manual or find online instructions. Brand specific guides matter greatly. Your manual contains the exact menu path for your model. If you don’t have the physical manual, search online using your model number. Having these instructions ready prevents confusion during the reset process.
How to Reset Ink Levels on HP Printers
After you manually refill your HP printer cartridges, the printer’s internal counter still thinks the tanks are empty. The reset process tells your printer that fresh ink is now available. This eliminates those annoying false low ink warnings.
Start with the power cycle method. Turn off your HP printer using the power button. Unplug the device from the electrical outlet. Wait approximately five minutes. This pause clears your printer’s memory and prepares it for the reset. Plug the printer back in and power it on normally.
Access the setup menu next. Look for the Setup or Tools button on your printer’s control panel. Press it to open the main menu. Navigate through the options using your arrow buttons. You’re looking for an option labeled “Ink Cartridge Reset,” “Cartridge Reset,” or sometimes “Maintenance.” The exact wording varies by HP model.
Follow the on screen prompts carefully. Your printer will guide you through the reset sequence. It may ask you to confirm that cartridges are installed and full. Answer yes to each prompt. Your printer might also start an automatic alignment process. Let this complete without interruption.
Use the button shortcut if menu navigation seems difficult. Many HP printers allow you to hold the “OK” or “Resume” button for approximately ten seconds. This triggers a quick reset without menu navigation. Listen for a beep sound, which signals the reset is complete.
Verify the reset worked. Print a test page to confirm the ink level warning is gone. Your printer should now display accurate ink status. If warnings persist, repeat the power cycle and try the reset again.
How to Reset Ink Levels on Epson Printers
Epson printers store ink level information in their internal memory. When you refill a cartridge manually, the printer’s software doesn’t recognize the new ink. You need to reset this counter so your printer stops showing false warnings.
Access your printer software first. Open the application on your computer that came with your Epson printer. This software connects your computer to your printer wirelessly or through a USB cable. Look for an icon on your desktop or find it through your computer’s applications folder.
Navigate to the Maintenance tab. Once the software opens, find the section labeled “Maintenance” or “Tools.” This area contains all the functions that help keep your printer working properly. Click on this tab to see your options.
Select the Reset Ink Levels option. Inside the Maintenance section, you’ll find a button or link that says “Reset Ink Levels” or similar wording. Click this option directly. Your printer will begin the reset process immediately.
Follow any on screen prompts. Some Epson models ask you to confirm your choice or complete an alignment process. Stay with your printer during this time. The alignment ensures your print quality remains sharp after the reset.
Alternative method using the control panel. If you prefer not to use computer software, try pressing and holding the “OK” or “Resume” button on your printer’s front panel for about 10 seconds. This manual approach works on many Epson models. Your printer will beep when the reset completes successfully.
Verify the reset worked. Print a test page to confirm the ink level warning has disappeared. Your printer should now show accurate ink levels.
Universal Reset Method for Other Printer Brands
When your printer brand isn’t HP or Epson, you still have straightforward options to reset ink levels. Many universal methods work across different manufacturers.
The button press method works on most printer models. Locate the “OK,” “Resume,” or “Start” button on your printer’s control panel. Press and hold this button for approximately 10 seconds. You should see lights flash or hear a beep sound. This indicates the reset process has started. Release the button and wait for the printer to complete the cycle.
Some printers use a different approach through their display menu. Press the “Menu” or “Settings” button on your control panel. Look for options labeled “Maintenance,” “Tools,” or “Service.” Navigate to “Reset Ink Levels” or “Clear Ink Counter.” Select this option using the arrow buttons. Confirm your choice when prompted.
Another effective method involves a complete power cycle. Turn off your printer completely using the power button. Unplug the device from the electrical outlet. Wait for 5 to 10 minutes. This waiting period clears the printer’s internal memory. Plug the printer back in and power it on normally.
Your printer manual contains the exact reset procedure for your specific model. Check the troubleshooting section or index for “ink level” or “counter reset.” Many manufacturers also post this information on their support websites.
Before attempting any reset, ensure your refilled cartridges are completely full. An empty cartridge may cause the reset to fail or trigger new warnings.
Print a test page after resetting to verify the ink level warning has disappeared. If the warning returns immediately, repeat the reset process or consult your manual for additional troubleshooting steps.
Common Mistakes to Avoid When Resetting Ink Levels
Resetting ink levels incorrectly can cause bigger problems than the ones you’re trying to fix. Understanding what not to do saves you time and frustration.
The biggest mistake is resetting before your cartridges are actually full. Many people rush this step. Your printer’s counter needs full tanks to recalibrate properly. Empty or partially filled cartridges will give you false readings again within days. Fill everything completely before you start any reset process.
Skipping the power down period is another common error. Some printers require you to turn off the device and unplug it for at least five minutes. This step clears the printer’s memory completely. Ignoring this cooldown period means the reset might not stick. Your printer’s internal system needs that break to refresh itself properly.
Don’t assume all printers reset the same way. HP and Epson use completely different procedures. Using an HP method on an Epson printer won’t work. Check your specific brand before you begin. Your printer manual has the exact steps for your model.
Rushing through alignment prompts causes problems too. When your printer asks you to complete an alignment process after resetting, don’t skip it. This calibration ensures ink flow works correctly. Skipping alignment leads to printing issues and inaccurate ink level readings.
Never reset multiple times in quick succession. If the first reset doesn’t work, wait several hours before trying again. Repeated resets confuse your printer’s system. One patient attempt with the correct method beats five rushed attempts with wrong steps.
Troubleshooting a Failed Ink Level Reset
When your ink level reset fails, several issues could be blocking success. The most common problem is attempting to reset before your cartridges are actually full. Your printer counts ink volume, so empty or partially filled tanks confuse the system. Fill each cartridge completely and wait a few minutes before trying again.
Another frequent cause involves skipping the power cycle step. Some printers need a complete shutdown to clear their memory properly. Turn off your device, unplug it for five minutes, then power it back on. This action resets the printer’s internal circuits and removes temporary glitches.
Your printer may also require specific alignment after resetting. When on screen prompts appear, follow them completely. Skipping these steps leaves the ink level counter stuck in its previous state. Print a test page after finishing to confirm the warning disappeared.
If your brand uses a button press method, holding the button for insufficient time causes failure. Most printers need 10 to 15 seconds of continuous pressure. Count slowly to ensure you meet the time requirement.
Never reset multiple times in quick succession. This can corrupt your printer’s memory further. Wait several hours between attempts if the first reset doesn’t work.
Check your printer manual for brand specific instructions. HP, Epson, and other manufacturers use different procedures. Your manual shows the exact steps for your model number.
If problems persist after following all steps correctly, your cartridge sensors may need professional cleaning. Dust or residue on sensor contacts prevents accurate ink detection. A qualified technician can inspect and clean these components safely.
Tips for Maintaining Accurate Ink Level Readings
Accurate ink level readings depend on proper maintenance after you refill your cartridges. Start by filling your tanks completely before you attempt any reset. Partial refills confuse your printer’s sensor system and create false warnings later.
Keep your printer’s sensor contacts clean. Dust and dried ink accumulate on these small metal points inside your printer. Gently wipe them with a soft, lint-free cloth every few months. This simple step prevents reading errors and extends sensor life.
Use the correct reset method for your specific brand. HP printers need the full power-down cycle. Epson printers work through their maintenance menu. Other brands may respond to button combinations. Mixing these methods wastes your time and can trigger error codes.
After you reset, run the alignment process completely. Don’t skip or rush through these prompts. Your printer calibrates its sensors during alignment, which ensures accurate readings going forward.
Check your ink levels regularly after refilling. Print a test page within the first week. This confirms your reset worked and your sensor recognizes the new ink volume. If warnings reappear too quickly, your sensor may need professional attention.
Store your refilled cartridges upright when not in use. Ink settling inside the tank affects sensor readings. Keep cartridges away from extreme heat or cold, which changes ink viscosity and confuses detection systems.
Document your reset dates and methods. Write down which procedure worked for your printer model. This reference helps you avoid mistakes during future refills.
Replace cartridge chips if your printer uses them. Some models require chip replacement alongside ink refilling. Old chips contain old level data and override your manual reset attempts.
Final Thoughts
Resetting ink levels after a manual refill is a simple process once you know your printer’s steps. HP and Epson use different menus, but the core idea stays the same. You clear old data so your printer shows correct ink levels again.
The key to success is patience. Follow each step in order. Don’t rush through the power cycle or skip the alignment process.
Always refill your cartridges fully before you start the reset. This single habit prevents most problems people face. A reset only works well when your ink levels match what you tell the printer.
Check your printer’s manual for exact button names or menu options. Brands change their interfaces often. What worked on an older model might look different on a newer one.
If your first attempt does not work, stay calm. Small mistakes happen, like missing a prompt or unplugging too early. You can always try again after a short wait.
Regular maintenance makes future resets easier too. Clean sensor contacts and properly stored cartridges help your printer read ink levels correctly every time.
Think of this process as routine care for your printer. Just like changing oil in a car, resetting ink levels keeps everything running smoothly.
Once you get familiar with your printer’s specific reset method, the whole task takes just a few minutes. You save money by refilling cartridges yourself, and you avoid annoying false warnings blocking your print jobs.
With the right approach, you get accurate readings and smooth printing every time. Take your time, follow the correct order, and your printer will reward you with reliable performance for years to come.
Frequently Asked Questions
Why does my printer still show low ink after I refilled it?
Your printer’s counter hasn’t been reset yet. Printers track ink levels electronically, not by checking the actual cartridge fullness. After manual refilling, you must reset this counter through your printer’s menu or control panel. The counter resets the printer’s memory so it recognizes your fresh ink supply.
Can I reset ink levels without using the printer software?
Yes. Most printers have a physical button method. Look for your “OK,” “Resume,” or “Start” button on the control panel. Hold it down for about 10 seconds until you see a response on the display. This works on many HP, Epson, and Canon models, though your specific model may vary slightly.
What’s the correct order: refill first, then reset?
Always refill your cartridges completely before resetting. Never reset an empty cartridge. Your printer needs full tanks so the alignment process works correctly after the reset. Skipping this step causes false readings and printing problems down the road.
Do I need to unplug my printer before resetting?
For HP printers, yes. Power off your device and unplug it for about 5 minutes. This clears the printer’s temporary memory completely. After plugging it back in, navigate to your Setup or Tools menu and select the ink cartridge reset option. Epson users typically skip this step and go straight to the software maintenance tab instead.
How long does the reset process take?
The actual reset takes 2 to 5 minutes. Your printer may run an alignment cycle afterward, which adds another 5 to 10 minutes. Let the process finish completely without interruption. Don’t open any covers or press buttons during alignment.

I’m the voice behind Device Dossier. As a printing technology enthusiast, I spend my time testing printers, comparing specs, and writing honest reviews to help you find the perfect printing solution. When I’m not geeking out over print quality and page yields, you’ll find me exploring the latest in tech.