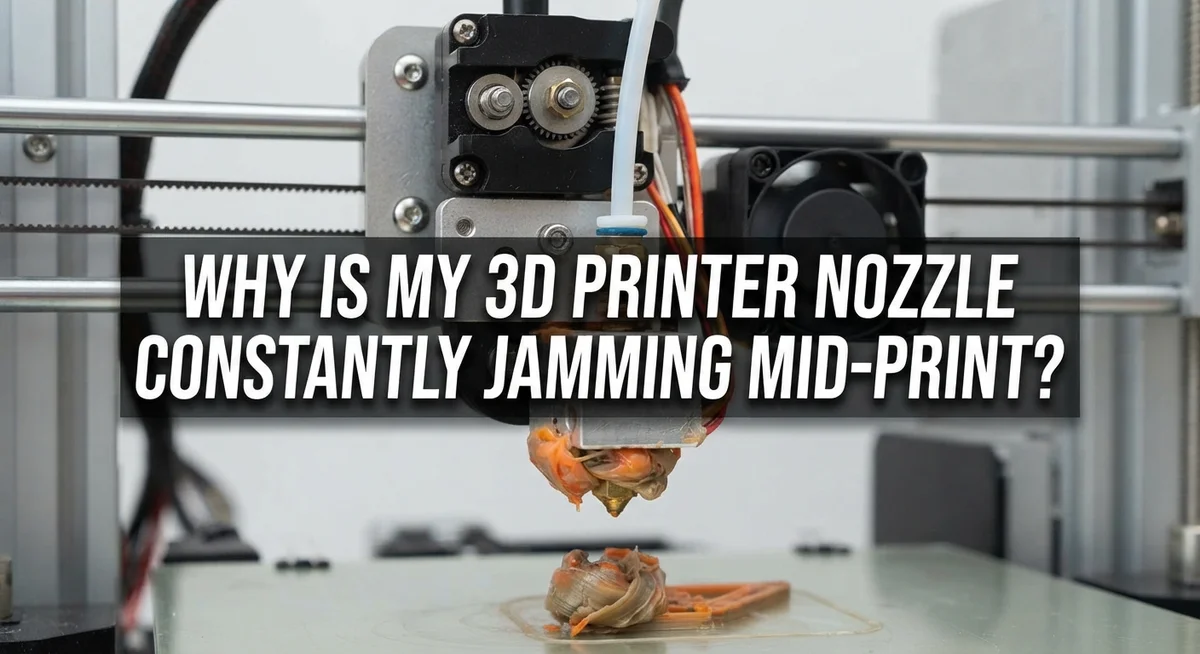
Why Is My 3D Printer Nozzle Constantly Jamming Mid-Print?
Your print starts great. Then it stops. Layers turn thin, stringy, or just stop coming out.
Sound familiar? Nozzle jamming is one of the most frustrating problems in 3D printing.
It can strike halfway through a long print. All that time and filament feels wasted.
The good news is that jamming rarely happens without a reason. Heat creep, wrong print speed, or a partially clogged nozzle often cause it.
This article breaks down why your nozzle keeps jamming mid-print. We will look at the core causes, from temperature issues to mechanical wear.
By the end, you will understand your printer better. You will also know how to keep prints running smoothly from start to finish.
In a Nutshell
- Temperature and speed matter most. If your nozzle temp is too low or your print speed is too high, filament cannot melt properly. This causes it to jam inside the hotend.
- Heat creep is a silent culprit. Warm rooms above 35°C or enclosed printers trap heat. This softens filament too early and blocks the path.
- Debris builds up over time. Small bits of dust or old filament create partial clogs. These clogs slowly worsen until your nozzle jams completely.
- Loose parts cause big problems. A nozzle that is not hot tightened often lets filament leak into small gaps. This leads to backpressure and jams.
- Your extruder needs attention too. Weak fans, worn gears, or poor idler tension can strip filament. This stops smooth feeding into the hotend.
- Small checks prevent big failures. Regular cleaning and quick inspections catch problems before they stop your print.
Understanding How Nozzle Jams Happen
A nozzle jam happens when melted filament cannot flow through the tiny opening at your printer’s tip. Understanding the mechanics helps you stop jams before they ruin your prints.
Temperature and flow rate create the first problem. When your nozzle runs too cold, filament does not melt completely. At the same time, if you print too fast, the extruder pushes material through before it reaches the right consistency. The filament hardens inside the nozzle, and flow stops completely.
Heat creep works silently in the background. Your hotend has a heater block and a heat break designed to keep warmth where you need it. When your room stays above 35°C or your printer sits inside an enclosure, ambient heat creeps up the nozzle assembly. The filament softens too early, expands slightly, and gets stuck before reaching the tip.
Debris accumulates gradually. Each time you load or unload filament, tiny particles can enter the hotend. Old filament bits, dust, or burnt material create partial blockages. These small clogs worsen over time and eventually cause complete jams.
Mechanical issues compound the problem. A loose nozzle lets filament escape into gaps around the heater block instead of flowing downward. Worn extruder gears cannot grip the filament properly, causing it to slip and strip. Weak cooling fans fail to keep the heat break cold, allowing heat to travel where it should not.
Backpressure builds when paths narrow. A worn Bowden tube creates friction inside. Misaligned nozzles force filament at odd angles. Poor idler tension means the drive gear cannot push filament with enough force.
Each factor alone might not cause a jam. Combined together, they guarantee failure. Your printer tells you which issue exists through the type of jam it produces. Recognizing these mechanics helps you diagnose the real culprit quickly.
Top Causes of Mid-Print Nozzle Jamming
A nozzle jam during printing stops everything. Your print fails, and you waste filament and time. Understanding why this happens helps you fix it fast.
Print speed and temperature work together. When your nozzle runs too cold, filament moves through too quickly to melt properly. The plastic hardens before it exits, creating a blockage. Raising your nozzle temperature by 5 to 10 degrees often solves this instantly. Slowing down your print speed gives filament more time to heat and flow smoothly.
Heat creep sneaks up on you. Your hotend has a heat break designed to stop warmth from traveling upward. If your room stays above 35°C or you use an enclosed printer, extra heat climbs into the cold zone. Filament softens before reaching the nozzle tip and gets stuck inside. Better cooling fans and lower room temperatures prevent this problem.
Debris builds up gradually over time. Dust, old filament bits, and oxidized plastic collect inside your hotend. Each load and unload cycle introduces tiny particles. A partial clog forms slowly, then suddenly your nozzle jams mid-print. Regular cleaning removes this buildup before it causes failure.
Mechanical issues create backpressure. A loose nozzle lets melted filament escape sideways into gaps. Your extruder motor then works harder to push filament through, causing the drive gear to slip or strip. A worn Bowden tube increases friction too. Worn idler springs fail to grip filament firmly enough.
Check these three things first. Verify your nozzle sits tight against the heater block when hot. Inspect your extruder drive gear for flat spots or wear marks. Test your cooling fan to confirm it runs properly. These simple checks catch most jamming problems before they wreck another print.
Step-by-Step: Diagnosing a Jammed Nozzle
A jammed nozzle requires a systematic approach to find the root cause. Start by stopping your print and letting the hotend cool completely. Do not force the filament out while hot, as this can damage internal components.
Step 1: Visual Inspection Look at the nozzle tip under good light. Check for plastic buildup, discoloration, or leaking material around the base. A nozzle that appears wet or has filament oozing from the sides suggests a loose connection rather than an internal clog.
Step 2: Test the Hotend Temperature Heat your nozzle to your normal printing temperature. Try to extrude filament manually using your printer’s menu. If nothing comes out, the jam is likely inside the nozzle or heat break. If filament oozes from gaps around the nozzle base, your nozzle is not seated properly.
Step 3: Check Filament Path Remove your filament and inspect the Bowden tube for cracks or discoloration. Look inside the tube opening for debris. A worn tube can create excessive friction and backpressure, mimicking a nozzle jam.
Step 4: Examine Extruder Mechanics Listen to your extruder motor during manual extrusion. Clicking or grinding sounds mean your drive gear is slipping against the filament. This happens when the filament is already jammed upstream or when idler tension is too loose.
Step 5: Monitor Ambient Temperature Use a thermometer near your printer. If the room exceeds 35°C or your printer sits in an enclosed space, heat creep may be pulling warm filament up into the heat break. This creates a partial jam that feels like a total blockage.
Document what you observe at each step. This information helps you identify whether the problem is thermal, mechanical, or debris related. Knowing the actual cause prevents the same jam from happening again on your next print.
Preventive Maintenance to Stop Future Jams
Preventing future jams means stopping problems before they start. The best approach combines regular upkeep with smart printing habits.
Start by hot tightening your nozzle. Heat your hotend to printing temperature, then use a wrench to tighten the nozzle firmly against the heater block. Do this every 10 to 15 print jobs. A loose nozzle creates gaps where filament escapes and hardens, causing blockages.
Clean your hotend interior regularly. Every month, heat your nozzle to 200°C and use a small brass brush to scrub the outside gently. For deeper cleaning, remove the nozzle completely and soak it in acetone for 30 minutes if you use PLA or ABS. This removes oxidized plastic that narrows the opening.
Check your extruder fan constantly. This fan cools the heat break and stops heat from creeping upward. A failing fan is a silent jam maker. Listen for unusual sounds and feel for airflow with your hand during printing.
Monitor your filament supply before each print. Run your extruder manually and watch for smooth, consistent extrusion. If filament strips against the drive gear, your tension is too tight. Adjust the idler pressure so the gear grips firmly but does not crush the plastic.
Verify your Bowden tube condition every few weeks. Look for cracks, discoloration, or flattening inside the tube. A worn tube creates friction that blocks filament flow. Replace it if you see damage.
Keep your printer cool. Ambient temperatures above 35°C cause heat creep. If you use an enclosure for ABS printing, add ventilation or a cooling duct aimed at the hotend. Lower room temperature alone prevents many jams.
Finally, reduce print speed slightly on new materials. Slower speeds give filament time to melt completely. Start 10 to 15 percent slower than maximum speed, then increase gradually once prints succeed consistently.
On-the-Fly Fixes When a Jam Starts Mid-Print
When your nozzle jams mid-print, you need quick action to save your print job. The first thing you should do is pause your print immediately rather than letting it continue. A stuck nozzle will only make the problem worse.
Increase your nozzle temperature by 5 to 10 degrees Celsius. This simple adjustment helps filament flow more smoothly through the hotend. Wait about 30 seconds for the temperature to stabilize. Try pushing filament through manually using your printer’s extrude command. If material flows freely, your jam may have cleared.
Reduce your print speed significantly. Lower your feed rate to 50% of your original speed. This gives filament more time to melt completely before exiting the nozzle. Slower speeds reduce pressure buildup that causes jams.
Check your printer’s ambient temperature. If your workshop feels warm or your printer sits in an enclosed space, heat creep may be your culprit. Open windows or remove any enclosure around your machine. Even a small fan pointing at your printer helps.
If these steps don’t work, you may need to stop the print. Let your nozzle cool completely, then remove the filament. Heat the nozzle again to normal printing temperature and try pushing new filament through with gentle pressure.
Never force filament through a jammed nozzle. Excessive pressure can damage your drive gear or extruder motor. If nothing flows after heating, your nozzle likely needs a deep cleaning or replacement.
Document what temperature and speed worked when the jam cleared. This information helps you adjust your settings for future prints with the same filament. Each material behaves differently, so what works for one type may not work for another.
Common Mistakes That Make Jamming Worse
Many people make mistakes that turn a small problem into a big one. Understanding what NOT to do helps you avoid repeated jams.
Ignoring partial clogs early is the biggest error. You notice extrusion getting weaker or filament moving slower. Instead of stopping to investigate, you keep printing. The partial clog gets worse. Eventually, complete blockage happens mid print, wasting time and material.
A loose nozzle installation causes constant trouble. Your nozzle must sit tight against the heater block when heated. Many users tighten it cold, then heat causes expansion gaps. Melted filament escapes sideways into those gaps. This creates leaks inside your hotend that lead to jams. Always tighten your nozzle while it’s hot.
Inadequate hotend cooling makes jamming worse. Your extruder fan must run constantly during printing. If this fan fails or runs too slow, heat creeps up into areas where it shouldn’t be. Filament softens in the wrong spot and gets stuck. Check your fan spins freely and makes noise during every print.
Overheating your extruder motor driver also causes problems. When your motor gets too hot, it loses power to push filament. The drive gear slips against filament. This creates backpressure that forces filament into gaps. Your printer struggles harder, and the motor gets hotter. A vicious cycle begins.
Never force filament through a suspected jam. Pushing hard damages your drive gear teeth and can break your extruder motor. You’ll need replacement parts instead of just clearing a clog.
Ignoring your ambient temperature is another mistake. If your room stays above 35°C, heat creep accelerates. An enclosed printer without proper ventilation traps heat. Both situations make jams more likely.
Stop printing as soon as you notice extrusion problems. Investigate immediately. Document what you find. These small actions prevent major headaches later.
Troubleshooting Persistent or Recurring Jams
When your nozzle jams repeatedly, the problem usually runs deeper than a one-time clog. Persistent jamming points to systematic issues that need careful diagnosis rather than quick fixes.
Start by examining your nozzle installation itself. A loose nozzle is the sneaky culprit behind recurring jams. Even slight gaps allow filament to leak into spaces between the nozzle and heater block. This creates partial blockages that get worse with each print. Tighten your nozzle while it’s heated to working temperature. This creates a proper seal that cold tightening cannot achieve.
Next, inspect your drive gear and extruder mechanism closely. Worn or damaged gears strip filament instead of pushing it smoothly. Look for shiny flat spots on your drive gear or plastic flakes in your extruder housing. Stripped filament cannot move forward, creating backpressure that leads to jams. Replace worn gears before attempting more prints.
Your Bowden tube deserves serious attention too. A worn or kinked tube creates friction that blocks filament movement. Pull out your filament and look inside the tube for cracks, discoloration, or debris. A damaged tube forces your extruder motor to work harder, eventually causing jams.
Heat creep is another frequent cause of recurring problems. Your extruder cooling fan must run constantly during printing. Check that it spins freely and produces strong airflow. If your printer sits in a warm room or inside an enclosure, ambient heat travels up the hotend and softens filament before it reaches the nozzle.
Finally, examine your filament path from spool to nozzle. Tangled filament, sharp bends, or a stuck spool bearing all create resistance. This resistance accumulates and causes jams that seem random but actually follow a pattern.
Document everything you observe. Write down when jams occur, what temperature and speed were running, and what room temperature was. This information reveals patterns that point directly to your specific problem.
Final Thoughts
Nozzle jams feel frustrating. But most causes trace back to simple things like heat, speed, or filament quality.
Your printer tells you a story every time it jams. Listen to the pattern instead of just clearing the clog and moving on.
Temperature control matters more than most people think. Too cold, and filament cannot flow smoothly. Too hot, and it degrades inside the barrel.
Speed and temperature work together. If you raise your speed, your nozzle needs more heat to keep pace with the filament flow.
Regular maintenance saves you time later. A clean hotend and tight nozzle prevent most jams before they start.
Check your filament path often. Debris, moisture, and worn tubes cause more problems than a bad batch of filament ever will.
Your drive gear deserves attention too. A stripped gear or loose idler tension leads to inconsistent extrusion and sudden jams.
Ambient temperature plays a bigger role than many realize. Hot rooms and enclosures trap heat near the extruder motor and cause heat creep.
Small fixes work best when caught early. Bumping your temperature slightly or slowing your print often clears a partial clog fast.
Never force filament through resistance. This damages your drive gear and often makes the jam worse instead of better.
If jams keep returning, look deeper. Check your nozzle alignment, hotend cleanliness, and filament quality together, not separately.
Every printer behaves differently based on its environment and setup. What works for one machine might need adjusting on another.
Keep notes on temperature, speed, and conditions when jams happen. This record helps you spot patterns faster.
With steady care, most jamming issues become rare. Your printer runs smoother once you understand its habits and respond to early warning signs quickly.
Frequently Asked Questions
Why does my nozzle jam even after I clean it?
Cleaning alone doesn’t always fix the root cause. Your nozzle may jam again because the underlying problem still exists. Common culprits include a loose nozzle that wasn’t properly tightened while hot, a worn Bowden tube allowing filament to slip, or heat creep building up inside your hotend.
Check your nozzle installation first. Tighten it while the printer is heated to ensure a secure fit. Then inspect your entire filament path from the spool to the nozzle for any debris or wear.
Can ambient temperature really cause nozzle jams?
Yes, absolutely. When your room temperature exceeds 35°C or your printer sits inside an enclosed space, heat creep occurs. This means heat travels up the hotend and softens filament before it reaches the nozzle.
Soft filament gets stuck in the nozzle instead of flowing smoothly. Lower your room temperature or remove any enclosure around your printer. Even opening a window or using a fan can help prevent this issue.
Should I increase temperature or decrease speed when my nozzle jams?
Try both, but start with temperature. Increase your nozzle temperature by 5 to 10 degrees Celsius. If jamming continues, reduce your print speed or feed rate instead.
These two settings work together. High speed with low temperature creates backpressure that clogs your nozzle. Finding the right balance prevents jams from starting.
What does a stripped filament against the drive gear mean?
Your drive gear grips the filament to push it forward. When the gear teeth wear down or the filament becomes too thin, the gear can’t grip properly. The filament slips instead of moving, which stops extrusion and causes a jam.
Inspect your drive gear regularly for wear or damage. Check that your idler tension isn’t too tight, which can crush the filament. Replace worn gears before they cause repeated failures.

I’m the voice behind Device Dossier. As a printing technology enthusiast, I spend my time testing printers, comparing specs, and writing honest reviews to help you find the perfect printing solution. When I’m not geeking out over print quality and page yields, you’ll find me exploring the latest in tech.