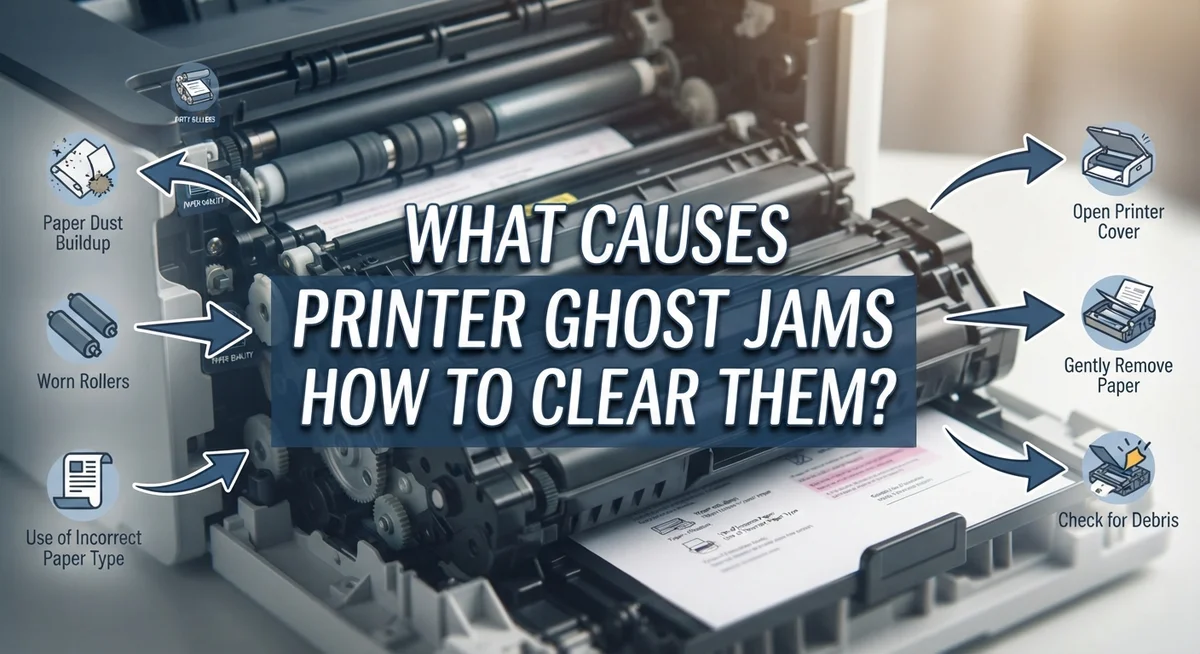
What Causes Printer Ghost Jams and How to Clear Them?
Your printer says there’s a paper jam. But when you open the tray, you see nothing there. This strange problem is called a ghost jam.
Ghost jams frustrate many printer owners. The error message stays on your screen. Yet no paper is stuck inside the machine. These phantom errors happen for several reasons.
The good news? You can fix this issue yourself. No need to call a repair technician right away.
This guide walks you through the real causes behind ghost jams. You will learn simple steps to clear them fast. We cover everything from checking paper guides to cleaning rollers properly.
In a Nutshell
- Dust and debris build up inside sensors and rollers. This tricks your printer into thinking paper is stuck.
- Paper guides that sit too loose or too tight also confuse the sensors. Always check their position first.
- Loading mismatched paper thickness or the wrong paper type causes false jam signals too. Your printer settings must match the paper you use.
- An overloaded paper tray puts extra pressure on the feed mechanism. This often triggers ghost errors.
- To clear these jams, open the access panels and inspect every corner. Use compressed air to blow away dust and a vacuum for loose debris.
- Wipe the rollers with alcohol wipes for a deeper clean. This step removes sticky residue that sensors pick up.
- If the error persists, clean the sensors again and double check paper guide alignment. Phantom errors often need this extra step even after you remove visible paper.
What Is a Printer Ghost Jam?
A printer ghost jam is an error message that appears on your printer’s display even though no actual paper is stuck inside. Your printer thinks there’s a jam, but when you open the panels and look around, you find nothing blocking the paper path.
This happens because your printer relies on sensors to detect when paper moves through the machine. These sensors sit in different locations along the paper feed path. When they send false signals to your printer’s computer, the device assumes something is wrong and displays a jam error.
The key difference between a real jam and a ghost jam matters a lot. A real jam means physical paper is actually stuck somewhere. You can see it, touch it, and remove it. A ghost jam means the sensors are confused or malfunctioning. The paper flows fine, but your printer refuses to work anyway.
Ghost jams frustrate users because they stop your printer from working even though nothing is actually broken. You waste time opening panels and searching for paper that isn’t there. Meanwhile, your printing queue backs up and your workflow stops.
Why do these phantom errors happen? Several factors trigger false jam signals. Dust particles on sensors fool the detection system. Misaligned paper guides send confusing messages to the printer’s brain. Wrong paper settings combined with different paper types create sensor confusion. Loose rollers or worn feed mechanisms also generate false alerts.
Understanding what a ghost jam is helps you respond correctly when it happens. Instead of assuming your printer is broken, you know the issue is likely a sensor problem or a settings mismatch. This knowledge saves you time and frustration. You can troubleshoot systematically rather than panic about expensive repairs.
Common Causes Behind Ghost Jams
Printer ghost jams occur when your machine reports a paper jam that doesn’t actually exist. Your printer uses sensors throughout its feed path to detect when paper moves through the system. When these sensors send false signals, you get an error message despite having no stuck paper inside.
Several mechanical issues trigger ghost jams. Incorrect paper loading ranks as the top cause. When you place paper in the tray at an angle or stack it unevenly, the feed rollers struggle to grab sheets properly. The sensors then detect this feeding problem as a jam.
Paper thickness mismatches also create false alarms. If you load standard copy paper but your printer settings expect cardstock, the machine gets confused. The feed mechanism expects resistance that doesn’t match reality, triggering an error.
Dust and debris accumulation inside your printer causes many ghost jams. Sensors become covered with paper dust over time. When a sensor can’t detect paper movement clearly, it assumes a jam has occurred. This happens even though paper flows through normally.
Loose or overly tight paper guides contribute to the problem too. Paper guides position sheets so rollers grip them correctly. If guides sit too loose, paper wobbles during feeding. If guides sit too tight, they pinch paper unnaturally. Either situation confuses your printer’s detection system.
An overloaded paper tray puts excessive pressure on the feed mechanism. When you stack too many sheets, the bottom sheets compress. This changes how the first sheet feeds into the printer, creating irregular movement that sensors misinterpret.
Understanding these causes helps you prevent future errors. Most ghost jams result from simple setup mistakes rather than actual mechanical failure. By loading paper correctly, matching your settings to your paper type, and keeping sensors clean, you avoid these frustrating false alarms. Regular maintenance catches problems before they trigger phantom errors.
Step-by-Step: How to Clear a Ghost Jam
Start by turning off your printer completely. Wait about 30 seconds before powering it back on. This simple reset often clears phantom jam errors from the system memory.
Next, open all access panels on your printer. Most models have panels on the front, back, and sides. Look carefully inside each compartment for any visible paper scraps or torn pieces. Even tiny paper fragments can trigger false jam signals.
Use a compressed air blower to remove dust from hard to reach areas. Blow air gently around the paper path, rollers, and sensor locations. Never use a vacuum cleaner directly on internal components, as static electricity can damage circuits.
For loose debris, use a handheld vacuum with a soft brush attachment. Carefully vacuum around the paper feed area and tray. Pay special attention to corners where dust accumulates.
Clean the rubber rollers with alcohol wipes next. These rollers move paper through the machine, and dirty rollers confuse sensors. Wipe each roller thoroughly and let them dry completely before closing panels.
Check your paper guides carefully. These small plastic or metal pieces keep paper straight during feeding. Guides that sit too loose or too tight cause jam errors. Adjust them so paper slides smoothly without excessive pressure.
Reload your paper tray correctly. Remove all paper and fan the stack to separate sheets. Place paper flat in the tray and adjust guides to fit snugly against the stack edges. Don’t overfill the tray past the maximum fill line.
Close all access panels and power on your printer. Run a test print to confirm the error disappeared. If the ghost jam error returns, repeat the sensor cleaning process. Sometimes sensors need multiple cleanings to work properly again.
Cleaning Rollers and Sensors for Lasting Fixes
Cleaning your rollers and sensors is the most effective way to stop ghost jams from coming back. These parts wear down over time, and dirt buildup prevents them from working correctly.
Your printer’s rollers grab and move paper through the machine. When they get dirty, they can’t grip paper properly. This causes the printer to think paper is stuck when it actually isn’t. The rubber material on rollers attracts dust and paper particles easily.
Start by opening all access panels on your printer. Look for the rubber rollers inside. These are usually dark colored and cylindrical shaped. Gently wipe each roller with an alcohol wipe. Use light pressure so you don’t damage the rubber. Make several passes until the wipe comes away clean. Repeat this process for every roller you can reach.
Sensors tell your printer where paper is located. They use light beams or switches to detect paper movement. When sensors get covered in dust, they send false signals to your printer. Your printer then thinks paper is jammed when nothing is wrong.
Find the sensors near your paper path. They look like small plastic pieces with a lens or button. Use a dry, lint free cloth to gently clean each sensor. Avoid using liquid on sensors. If dust is stuck, use compressed air to blow it away from the sensor opening.
After cleaning, make sure your paper guides sit properly. These small plastic pieces hold paper in the right position. Loose guides cause paper to move sideways, triggering false jam errors. Check that guides touch the paper edge without bending it.
Once everything is clean and aligned, reload your paper tray correctly. Place paper flat and straight. Don’t overfill the tray. Close all panels and power on your printer. Regular cleaning every few months prevents most ghost jam errors from returning.
Preventive Tips to Avoid Future Ghost Jams
Regular maintenance stops most ghost jams before they start. The key is preventing the conditions that trigger false jam signals in your printer.
Start with proper paper handling. Load only one paper type and weight into your tray at a time. When you switch from thick cardstock to regular paper, change your printer’s paper type settings first. This simple step prevents your machine from misreading the paper and throwing a ghost jam error.
Never overfill your paper tray. Fill it about three quarters full, then gently fan the stack before loading. Overstuffed trays create pressure that confuses your paper sensors and causes false alarms.
Keep your printer clean on a schedule. Use compressed air monthly to blow dust from internal areas. Pay special attention to the paper path where rollers and sensors sit. Dust buildup is one of the biggest culprits behind phantom errors.
Check your paper guides regularly. These small plastic rails should sit snug against your paper stack without being too tight. Loose guides let paper shift and trigger sensors incorrectly. Overly tight guides damage paper edges and cause similar problems.
Inspect your rollers every few months. These rubber wheels grab paper and move it through your machine. When they get sticky or dirty, they can’t grip paper properly, leading to false jam messages. Wipe them gently with slightly damp cloth or alcohol wipes.
Store your paper correctly too. Keep it in a cool, dry place in its original ream package. Humid air makes paper expand slightly, which can cause feeding issues.
Finally, run your printer’s cleaning cycle regularly. Most machines have a built in head cleaning or nozzle check function. Use it monthly to keep everything functioning smoothly and prevent ghost jams from appearing unexpectedly.
Mistakes That Make Ghost Jams Worse
Ghost jams get worse when you make common setup errors. Understanding these mistakes helps you avoid repeating them.
Loading different paper types together is a major problem. Your printer expects one thickness and weight at a time. When you mix thick cardstock with thin copy paper in the same tray, the feed mechanism struggles. It can’t grab sheets consistently. This confusion triggers phantom errors that stick around even after you clear visible jams.
Ignoring your paper type settings causes real trouble too. You load premium paper but forget to update your printer settings. The machine expects standard weight. It pulls sheets too fast or too slow. Sensors get confused about paper position. Ghost jams follow quickly.
Neglecting sensor and roller cleaning makes problems repeat. Dust builds up on these parts over time. Your printer can’t detect where paper actually is. It reports a jam that doesn’t exist physically. You clear the tray and reload paper, but the error returns. The real issue sits inside waiting for cleaning.
Overstuffing your paper tray creates constant problems. Too much paper puts pressure on the feed mechanism. Sheets don’t sit flat. The rollers can’t grab them properly. Some sheets jam partially. Others trigger false jam alerts.
Misaligned paper guides are another common mistake. Guides that sit too loose or too tight cause sheets to feed crooked. Paper catches on internal parts. Your printer detects resistance and reports a jam.
The key is fixing root causes, not just clearing visible jams. When you experience ghost jams repeatedly, stop and check your setup. Verify your paper type matches your settings. Clean your sensors and rollers. Adjust your guides. Load paper correctly into a half full tray. These steps break the cycle of repeated errors and keep your printer running smoothly.
Troubleshooting Persistent Phantom Errors
Phantom errors happen when your printer says there’s a jam, but you can’t find any paper stuck inside. This frustrating situation occurs because sensors detect a problem that no longer exists. Understanding what triggers these errors helps you fix them permanently.
Sensor contamination is the most common culprit. Paper dust and debris collect on the sensors that detect paper position. When these sensors get dirty, they send false jam signals to your printer. Your machine thinks paper is jammed even though the path is completely clear.
Misaligned paper guides also cause phantom errors frequently. If guides sit too loose or too tight, sensors detect incorrect paper positioning. Your printer responds by displaying a jam message. Guides need to sit snug against your paper stack without crushing it.
Incorrect paper settings create another major source of phantom errors. When you load a different paper weight or type, you must update your printer settings. If settings don’t match your actual paper, sensors misread the paper thickness. Your printer then reports a jam that doesn’t exist.
To clear phantom errors, start by opening all access panels and inspecting the paper path thoroughly. Use compressed air to blow out dust from sensor areas. Wipe sensors gently with a dry, lint free cloth. Check that paper guides align properly on both sides.
Next, verify your paper type and weight settings match what’s actually in your tray. Reload your paper carefully, making sure it sits flat and straight. Close all panels and power your printer off completely for 30 seconds, then turn it back on.
If the error returns immediately, your sensors likely need deeper cleaning. Use slightly dampened alcohol wipes to clean sensor lenses carefully. Allow them to dry completely before powering on again. This simple step resolves most persistent phantom jam errors.
Final Thoughts
Ghost jams feel frustrating, but they don’t have to control your printing day. Most causes trace back to simple things like paper loading and dust buildup.
You now understand why your printer flags jams that don’t exist. Sensors get dirty. Guides shift out of place. Settings don’t match your paper.
The good news is that these problems are fixable. You don’t need special tools or technical skills. A little attention solves most issues quickly.
Start with the basics every time you print. Load one paper type at a time. Check that guides sit snug against your paper’s edges. Confirm your settings match what’s actually in the tray.
When phantom errors show up, don’t panic. Open your printer and look carefully. Check the sensors first since they cause most repeat errors.
Clean your rollers and blow out dust on a regular schedule. This simple habit prevents many jams before they start. Your printer will thank you with smoother performance.
Remember that ghost jams often signal small problems building up over time. Catching them early saves you time and stress later.
Regular maintenance beats emergency troubleshooting every single time. Set a reminder to clean your printer monthly. Check paper guides each time you switch paper types.
If jams keep happening despite your efforts, don’t ignore the pattern. Something specific triggers those errors repeatedly. Track when they happen and what paper you used.
Printer maintenance doesn’t require expert knowledge. It just needs consistency and attention to detail.
Your printer will run smoother once you address root causes instead of just clearing visible paper. Keep these tips handy for future reference.
With patience and the right approach, ghost jams become rare instead of routine. Your printing experience improves, and frustration fades away completely.
Frequently Asked Questions
Why does my printer say there’s a jam when I can’t find any paper stuck?
This is called a ghost jam or phantom error. Your printer has sensors that detect paper position as it moves through the machine. When these sensors get dirty, they send false signals to your printer. Dust and paper debris collect on sensors over time, causing them to misread the paper path.
Another common cause is misaligned paper guides. If the guides don’t sit flush against your paper, the printer thinks something is wrong. Incorrect paper settings also trigger these errors. Your printer expects specific paper weights and types, so switching between different papers without updating settings confuses the machine.
How do I fix a ghost jam error?
Start by opening all access panels on your printer. Look carefully through the entire paper path for any stuck pieces. Even small scraps can trigger errors.
Next, clean your sensors and rollers. Use a soft, dry cloth or alcohol wipes to gently wipe sensor areas. Compressed air works well for blowing out dust from tight spaces. Make sure your paper guides are positioned correctly and sit snugly against the paper stack.
Finally, check your printer settings. Verify that your paper type and weight settings match what’s actually in your tray. If you just switched paper types, update these settings before printing again.
Can I prevent ghost jams from happening?
Yes. Regular maintenance stops most phantom errors before they start. Load only one paper type and weight at a time into your tray. Never mix different papers together.
Keep your paper tray from getting overstuffed. Adjust your paper guides so they hold the stack firmly without bending it. Clean your rollers and sensors monthly using compressed air and soft cloths.
Update your paper settings whenever you load a different type of paper. These simple habits catch problems early and keep your printer running smoothly.

I’m the voice behind Device Dossier. As a printing technology enthusiast, I spend my time testing printers, comparing specs, and writing honest reviews to help you find the perfect printing solution. When I’m not geeking out over print quality and page yields, you’ll find me exploring the latest in tech.