How to Clean a Clogged Printhead Without Damaging It?
A clogged printhead can turn a simple print job into a frustrating mess. You press print, and streaky lines or faded text show up instead of clear documents. Dried ink is usually the culprit, blocking the tiny nozzles that spray ink onto paper.
The good news? You can fix this problem at home. This guide shows you exactly how to clean a clogged printhead safely.
We will walk through two main methods. The first uses your printer’s built in cleaning software. The second involves manually removing the printhead for a deeper clean.
In a Nutshell
- Two cleaning methods exist: automatic (through printer software) and manual (physical removal and soaking). Try automatic first since it’s easier and safer.
- Dried ink causes clogs. Cleaning the printhead restores proper ink flow and fixes streaky or blank prints.
- Automatic cleaning is simple. Open your printer’s utility settings, select the head cleaning option, and follow the prompts on screen.
- Manual cleaning takes more care. Remove the printhead, soak it in an approved solution, pat it dry with a soft cloth, then reinstall carefully.
- Only use safe solutions. Water or manufacturer approved cleaners work best. Isopropyl alcohol, ammonia based cleaners, and acetone are acceptable too.
- Avoid common mistakes. Don’t use harsh chemicals, apply rough pressure, or reinstall a printhead that isn’t fully dry. Never touch other printer parts during cleaning.
Understanding Printhead Clogs and What Causes Them
A printhead clog happens when ink dries inside the tiny nozzles. These nozzles spray microscopic droplets of ink onto your paper. When ink sits unused for weeks or months, it hardens and blocks the flow.
Several factors cause clogs. Infrequent printing is the biggest culprit. If you don’t use your printer regularly, ink evaporates inside the nozzles. Leaving your printer powered off for long periods speeds up this process.
Low quality ink can also cause problems. Some inks contain more water or fewer additives. These formulas dry faster and clog more easily than premium inks.
Environmental conditions matter too. Hot, dry air pulls moisture from ink sitting in the nozzles. If your printer sits near a heating vent or in a low humidity room, clogs develop faster.
Dust and debris can enter the printhead during normal operation. Particles mix with ink and create blockages. This is especially common if your printer sits in a dusty workspace.
Paper quality affects printhead health as well. Using cheap or damaged paper creates more dust. This dust gets sucked into the printhead mechanism.
Improper storage between uses causes problems. Leaving the printhead exposed to air lets ink evaporate. Some printers have a capping station that covers the printhead when not in use. Make sure this cover seals properly.
Power cycling issues can contribute too. Turning your printer off suddenly sometimes prevents the printhead from sealing correctly. The nozzles remain exposed to air, and ink dries out.
Understanding these causes helps you prevent future clogs. Regular printing keeps ink flowing through the nozzles. Proper storage protects the printhead when you’re not printing. Using quality supplies reduces blockages. By addressing these factors, you avoid most clogging problems before they start.
Automatic Cleaning: Using Your Printer’s Built-In Utility
Your printer has a built in cleaning utility designed specifically for this job. This feature uses software to trigger automated cleaning cycles that push cleaning solution through the printhead nozzles. This is your first line of defense because it requires no disassembly or manual handling.
Start by locating your printer’s utility program on your computer. Most printers include software that installs automatically when you set up the device. Open this software and look for a menu labeled “Maintenance,” “Tools,” or “Printer Setup.” You should find a “Head Cleaning” or “Nozzle Check” option here.
Click the cleaning option and let the printer run its cycle. The entire process takes just a few minutes. Your printer will use its internal pump system to force cleaning solution through each nozzle. You may hear unusual sounds or see the printhead moving. This is completely normal behavior.
After the automatic cycle finishes, run a nozzle check test. This prints a pattern that shows which nozzles are now clear. If the pattern looks complete with no missing lines or gaps, your clog is solved. If some nozzles still appear clogged, run the cleaning cycle again.
Most printers allow you to repeat automatic cleaning up to three times before you need to try manual methods. Each cycle uses a small amount of cleaning solution, so multiple attempts are safe. Allow at least 30 minutes between cycles to give the solution time to work.
This method is gentle and effective because the printer controls all pressure and solution amounts. You avoid the risk of damaging delicate components through rough handling. If automatic cleaning doesn’t fully restore your printhead after three attempts, you can then move forward with manual cleaning techniques for more intensive treatment.
Manual Cleaning: Step-by-Step Printhead Removal and Soaking Process
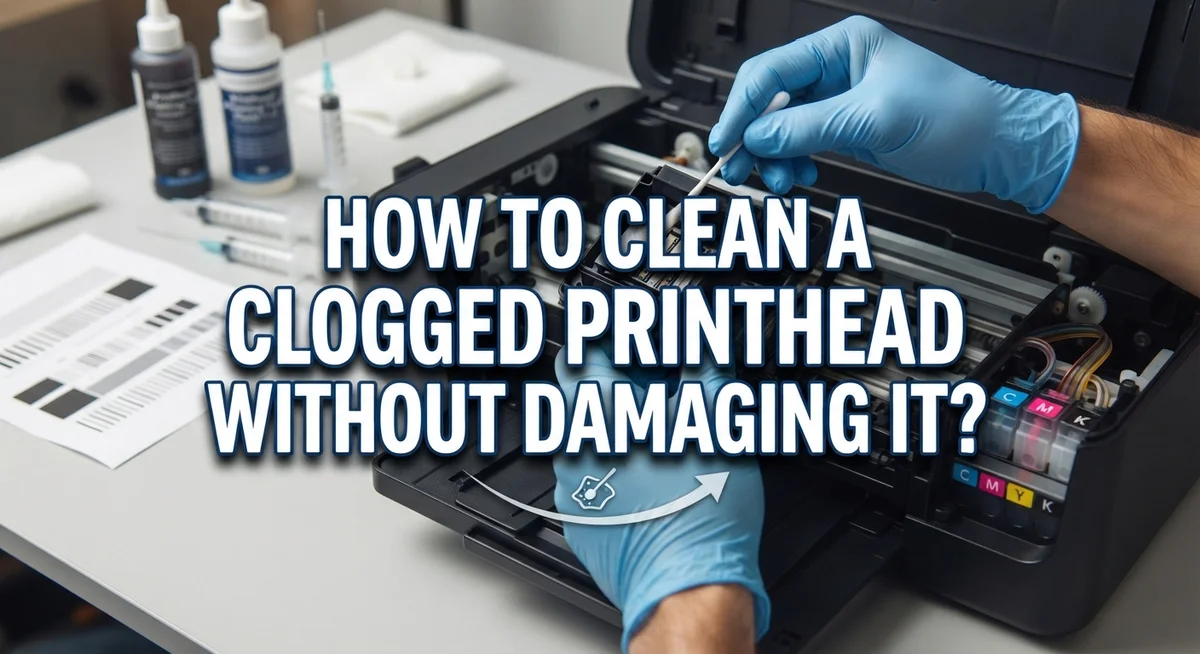
Manual cleaning gives you direct control over the process. This method works best when automatic cleaning fails. Start by turning off your printer and unplugging it from the power source. Safety comes first.
Locate your printhead. Different printer brands store it in different places. Check your printer’s manual for the exact location. Most printheads sit near the ink cartridge area. Some printers require you to remove the cartridges first.
Gently remove the printhead by following your manual’s instructions. Handle it carefully. Avoid touching the metal contacts or nozzles. These parts are delicate and easily damaged. Place the printhead on a clean, soft cloth.
Prepare your cleaning solution. Use only water or manufacturer approved solutions. Isopropyl alcohol works well. Ammonia based cleaners like window spray are acceptable. Acetone is also safe for most printheads. Avoid harsh chemicals or abrasive cleaners.
Fill a shallow container with your cleaning solution. Make the liquid about half an inch deep. Gently immerse the printhead in the solution. Let it soak for 15 to 30 minutes. This allows dried ink to soften and dissolve.
After soaking, remove the printhead carefully. Pat it dry with a soft, lint free cloth. Do not rub or apply pressure. Gentle dabbing works best. Allow the printhead to air dry completely for at least one hour before reinstalling.
Never touch the nozzles or electrical contacts during this process. Keep the printhead away from dust and debris while it dries. Store it on a clean surface.
Once completely dry, reinstall the printhead exactly as you removed it. Follow your manual’s instructions carefully. Reconnect your printer and run a nozzle check test. This confirms the cleaning worked. If problems persist, you may need to repeat the process or seek professional help.
Approved Cleaning Solutions and What to Avoid
Safe cleaning solutions protect your printhead while removing dried ink effectively. Water is your safest starting point for gentle cleaning. Distilled water works best because it contains no minerals that could leave deposits on delicate nozzles.
Isopropyl alcohol is widely accepted for printhead cleaning. This solution evaporates quickly and breaks down stubborn ink buildup. Use concentrations between 70% and 99% for best results. The higher concentration dries faster, reducing the risk of corrosion on electrical contacts.
Ammonia based cleaners like window spray work well for tough clogs. These solutions cut through dried ink effectively. However, use them sparingly and ensure complete rinsing with distilled water afterward. The ammonia smell indicates strong cleaning power, but it requires careful handling.
Acetone removes extremely stubborn ink deposits. This powerful solvent works quickly but demands extra caution. Use acetone only as a last resort before considering professional service. Always work in ventilated areas when using acetone.
Nano filtered solutions with preservatives offer professional grade cleaning. These formulations prevent bacterial growth and microbial contamination during soaking. They’re specifically designed for printhead materials and won’t degrade components over time.
Never use tap water alone. Minerals in regular water cause deposits that worsen clogs. Avoid bleach, harsh degreasers, and petroleum based products entirely. These damage printhead materials and electrical connections permanently.
Avoid mixing different cleaning solutions. Chemical reactions create unpredictable results that harm your printhead. Never use hot water, as heat warps plastic components and damages ink residue bonds in harmful ways.
Apply solutions with restraint. Use only small amounts on soft cloths. Oversaturation leads to liquid seeping into electrical areas, causing shorts and permanent failure. Pat the printhead gently rather than scrubbing aggressively.
Allow complete drying between cleaning steps. Moisture trapped inside nozzles causes corrosion and new clogs. Patience during the drying phase prevents costly damage and ensures successful cleaning results.
Best Practices for Handling and Drying the Printhead Safely
Handling your printhead requires a gentle touch throughout the entire cleaning process. Think of it like caring for delicate electronics. Your hands should be clean and dry before you start, and you should work in a dust-free area when possible.
When you remove the printhead, support it firmly but without squeezing. Hold it by the sides or designated grip areas only. Never grip the nozzles, electrical contacts, or any internal components. These parts are extremely sensitive and can break easily.
During soaking, let the cleaning solution do the work for you. You don’t need to scrub or apply pressure. Simply immerse the printhead in your shallow container and wait. The solution softens dried ink naturally over time. Most soaking sessions take between 15 to 30 minutes, depending on how severe the clog is.
After soaking, use a soft cloth to gently pat the printhead dry. Pat means light touches, not rubbing motions. Rubbing can push residual ink back into the nozzles or damage delicate components. Work from top to bottom, and rotate the cloth frequently so you’re always using a clean section.
Complete drying is absolutely critical before reinstallation. Moisture left inside can cause electrical problems or create new clogs. Place your cleaned printhead on a clean, lint-free surface. Allow it to air dry for at least one to two hours. Some people prefer overnight drying for maximum safety. You can verify dryness by checking that no moisture beads remain on the surface.
Once dry, handle the printhead minimally. Avoid touching any surfaces you just cleaned. Keep your workspace organized so you don’t accidentally bump it against other items. When you’re ready to reinstall, follow your printer manual’s exact instructions for placement and alignment. Proper reinstallation ensures good ink flow and prevents future problems.
Common Mistakes That Damage Printheads During Cleaning
Many people damage their printheads during cleaning by making simple but costly mistakes. Understanding what not to do protects your equipment and saves money.
The biggest mistake is using unapproved chemicals. Tap water contains minerals that leave deposits inside the printhead. Harsh solvents like bleach or strong degreasers dissolve internal components. Even some commercial cleaners contain additives that corrode delicate nozzles.
Excessive pressure ruins printheads quickly. People scrub hard thinking it removes stubborn ink faster. This actually forces cleaning solution into electrical contacts and damages the tiny nozzles permanently. The solution does the cleaning work, not your scrubbing force.
Reinstalling a wet printhead causes electrical shorts. Moisture trapped inside creates problems that won’t show up immediately. Your printer might work fine for a few days, then fail suddenly. Always wait until the printhead is completely dry before reinstalling it.
Touching the wrong parts causes serious damage. The nozzles are extremely fragile and shouldn’t be touched at all. Electrical contacts corrode when your fingers transfer oils and salts to them. Even brushing against surrounding printer components can knock loose connections.
Mixing different cleaning solutions creates chemical reactions that damage the printhead. Each solution has specific properties. Combining them produces unpredictable results that harm internal structures.
Soaking for too long weakens seals and gaskets. Extended exposure to cleaning solutions breaks down the materials holding everything together. A short soak of 15 to 30 minutes works best. Longer soaking doesn’t clean better and risks permanent damage.
Incomplete drying before reinstallation tops the mistake list. People rush this step and cause the most preventable failures. Set your printhead aside in a clean, dry location. Wait at least 24 hours before reinstalling it.
These mistakes transform a simple cleaning task into an expensive repair. Patience and gentleness keep your printhead working properly for years.
Troubleshooting Persistent Clogs After Cleaning
When your printhead still clogs after initial cleaning, the problem usually runs deeper than surface dried ink. Persistent clogs signal that ink residue has hardened inside the nozzle channels or that cleaning solution didn’t fully penetrate the blockage.
Your first step is to repeat the automatic cleaning cycle two or three times. Run your printer’s built in cleaning utility again. Wait 15 minutes between cycles to let any loosened ink drain naturally. This gives the system time to work without forcing pressure through stubborn deposits.
If automatic cleaning fails, switch to manual soaking. Remove the printhead and soak it in cleaning solution for 30 to 60 minutes. Longer soaking times help dissolve stubborn ink that won’t budge with quick wipes. After soaking, gently pat the nozzles with a soft cloth. Do not rub or apply pressure.
Check the nozzle plate carefully under good lighting. Look for any visible ink blockage or crystallized deposits. If you see hard buildup, use a soft cloth barely dampened with cleaning solution to gently wipe only the nozzle area. Avoid touching the electrical contacts or internal components.
Try a different cleaning solution if the first one didn’t work. Switch from isopropyl alcohol to an ammonia based cleaner, or vice versa. Different solutions dissolve various ink types more effectively. Some inks respond better to specific chemical compositions.
Allow the printhead to dry completely between every attempt. Moisture interferes with electrical connections and prevents proper ink flow. Set the printhead on a clean, lint free surface for at least two hours.
If clogs persist after three cleaning cycles and manual soaking, the printhead may have internal damage or permanent ink crystallization. At this point, replacement becomes more practical than continued cleaning attempts. Continuing aggressive cleaning risks damaging the electrical components beyond repair.
Final Thoughts
Cleaning a clogged printhead does not need to feel scary. With patience and the right approach, you can restore your printer’s performance safely.
Start with automatic cleaning every time. This built-in tool solves most clogs without any risk to your printhead. Only move to manual cleaning when software methods fail.
Remember that gentle handling matters more than anything else. Your printhead contains delicate parts that break easily under pressure. Treat it with care during every step.
Stick to approved cleaning solutions only. Water works well for light clogs. Isopropyl alcohol or ammonia based cleaners handle tougher buildup. Never mix chemicals or experiment with random household products.
Drying time deserves your full attention. A printhead that looks dry might still hold moisture inside. Give it extra time before you reinstall it into your printer.
Small mistakes cause big problems. Rushing through steps, applying too much pressure, or skipping drying time can turn a simple fix into a costly replacement. Slow down and follow each step carefully.
If clogs keep coming back after several cleaning attempts, your printhead may have deeper damage. At this point, replacement often costs less than repeated repair attempts.
Regular maintenance prevents most clogging issues from happening in the first place. Run cleaning cycles routinely, even when your printer seems fine. This simple habit saves you time and money later.
Your printer performs best when you treat the printhead right. Clean it correctly, dry it fully, and handle it gently. These three habits will keep your prints sharp and your printhead working for years.
Printhead care is not complicated once you know the basics. Follow these guidelines, stay patient, and your printer will reward you with reliable, clean prints every time you need them.
Frequently Asked Questions
What cleaning solution works best for printhead clogs?
Water is your safest starting point. Use distilled water or manufacturer-approved cleaning solutions. If you need something stronger, isopropyl alcohol works well for most printheads. Ammonia-based cleaners like window spray also remove stubborn dried ink effectively.
Avoid mixing different solutions together. Chemical reactions can damage your printhead permanently. Nano-filtered solutions with preservatives offer extra protection against microbial growth during storage.
Can I soak my printhead in cleaning solution?
Yes, soaking works for manual cleaning. Immerse the printhead in your chosen solution for 15 to 30 minutes. This softens dried ink buildup inside the nozzles.
After soaking, pat the printhead dry with a soft cloth. Never rub or apply pressure. Let it air dry completely before reinstalling it back into your printer.
How much cleaning solution should I use?
Use very small amounts only. A few drops on a soft cloth is plenty. You want moisture, not a puddle.
Excessive liquid can seep into electrical components and cause shorts. Light dabbing works better than saturating the printhead with solution.
Why is drying time so important?
Wet printheads cause electrical shorts when you reinstall them. Water conducts electricity and can fry the circuits inside your printer.
Always allow complete air drying before putting the printhead back. This takes at least 24 hours. Patience here saves you from expensive repairs later.
What should I avoid when cleaning?
Never touch the nozzle plate directly with your fingers. Oils from your skin clog the tiny ink channels. Use only soft cloths and gentle pressure.
Skip harsh chemicals, rough scrubbing, and mixing solutions. These mistakes damage the delicate printhead permanently.

I’m the voice behind Device Dossier. As a printing technology enthusiast, I spend my time testing printers, comparing specs, and writing honest reviews to help you find the perfect printing solution. When I’m not geeking out over print quality and page yields, you’ll find me exploring the latest in tech.