How to Print From an Android Phone Without a Third-Party App?
Do you want to print a document from your Android phone? You do not need to download any extra app for that.
Your phone already has the tools it needs. Android comes with a built in feature called Default Print Service. This lets you send files straight to a printer without any hassle.
You can connect your phone to a printer in a few simple ways. Wi-Fi, Bluetooth, and USB are the most common options. Each method works differently, but all of them are easy to set up.
This guide will show you how to print from an Android phone step by step. We will cover how to find the print option in your apps. We will also explain how to connect your phone to a printer safely.
In a Nutshell
- Use the Default Print Service. This is a built in tool on your Android phone. You do not need any extra app for it.
- Choose your connection type. You can link your phone to a printer using Wi-Fi, Bluetooth, or a USB cable.
- Find the print option in your app. Open your file, then tap Share or Other Options. Look for the print icon there.
- Keep devices on the same network. If you use Wi-Fi, your phone and printer must connect to the same network. This step is very important.
- Turn on printer discovery. Many people forget this step. Your phone cannot find the printer if discovery mode is off.
- Check your printer model first. Not all printers work the same way. Compatibility depends on your specific printer brand and model.
Understanding Android’s Built-In Printing Capabilities
Android phones come with built in printing features that most people never discover. Your device has everything needed to send documents straight to a printer without downloading anything extra.
The Default Print Service is your phone’s native printing tool. This service sits in your system settings and handles all communication between your phone and printer. Think of it as a bridge that lets your documents travel from your screen to paper.
Your phone can connect to printers in three main ways. Wi Fi works best for most homes and offices because both devices join the same network. Bluetooth creates a direct wireless connection without needing a network. USB cables offer a wired option if wireless feels unreliable.
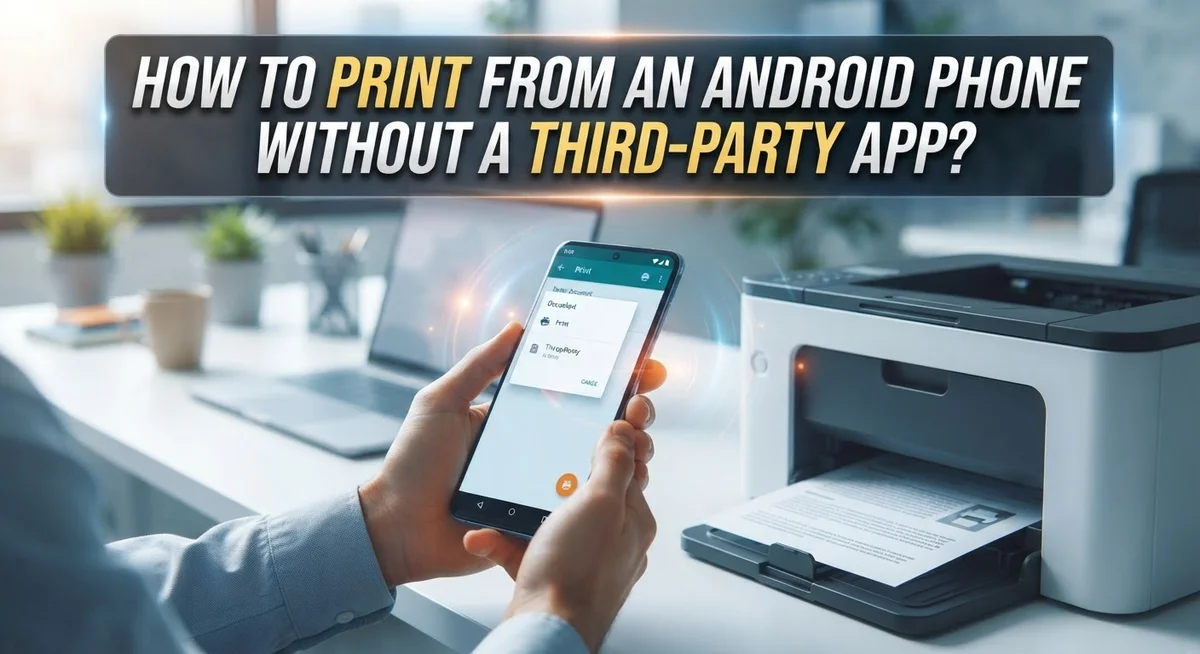
Finding the print option depends on which app you’re using. Open any file, photo, or document you want to print. Look for a Share button, a Print option, or a menu labeled Other Options. Tap it and search for print features.
Once you find the print option, your phone displays available printers. This happens automatically if your devices are properly connected. Select the printer you want, then adjust settings like page range, color options, or paper size.
Printer compatibility matters more than you think. Older printer models may not support wireless printing. Check your printer’s manual or manufacturer website to confirm it works with Android devices.
The most common mistake people make is skipping printer discovery. Many printers need this feature turned on before your phone can find them. Check your printer’s settings menu and enable wireless printing if available.
Another frequent error involves connection problems. Your phone and printer must be on the same Wi Fi network when using that method. Double check your network names match before attempting to print.
Understanding these basics saves time and frustration. Your Android phone’s printing capability works reliably once you know where to look.
Setting Up the Default Print Service on Your Phone
Your Android phone stores printing settings in one central location. You access these settings through your phone’s main menu. Open your phone’s Settings app and search for the word “printing.” This search takes you directly to the printing options without extra steps.
Once you find the printing section, you’ll see Default Print Service listed as an option. This service acts as your phone’s main printing hub. Tap on it to activate this feature. Your phone now recognizes printers automatically when they’re available nearby.
The Default Print Service works best when your printer supports wireless connections. Most modern printers include this feature built in. Your phone communicates with the printer through your chosen connection method, whether that’s Wi-Fi, Bluetooth, or USB.
After you set the Default Print Service as active, your phone remembers this choice. You won’t need to change this setting again unless you want to switch printers later. This makes future printing sessions much faster and simpler.
Some Android phones show additional print service options in this same menu. You can ignore these extra choices if the Default Print Service works for your needs. Having multiple options available doesn’t complicate your printing process. Your phone simply uses whichever service you select.
Test your setup by opening a document and finding the print option. The print dialog should display your printer’s name immediately. If your printer doesn’t appear, return to the Default Print Service settings and verify it’s enabled. A quick restart of your phone sometimes helps printers appear in the list.
Keeping this setting active means you’re always ready to print whenever you need to. The Default Print Service runs quietly in the background. Your phone handles all the technical work between you and your printer automatically.
How to Print via Wi-Fi Connection
Wi-Fi printing connects your Android phone directly to your printer over a wireless network. This method works best when both devices sit on the same internet connection.
Start by opening the file or document you want to print. Look for a menu option labeled “Print,” “Share,” or “More Options.” The exact location varies depending on which app you’re using. Tap the print option when you find it.
Your phone will search for available printers on the network. Make sure your printer is powered on and set to discoverable mode. Most printers have a wireless or network button you should press to enable this feature. Check your printer’s manual if you’re unsure where this button is located.
Once your phone detects the printer, select it from the list that appears. You’ll see options to adjust settings like page size, color preferences, and the number of copies. Confirm your selections before submitting the print job.
The connection happens automatically if your printer supports standard Wi-Fi printing protocols. Your phone communicates with the printer without needing any third party software installed. This is part of Android’s built in printing system.
If your printer doesn’t appear in the list, verify that both devices connect to the same Wi-Fi network. Check your router’s name and ensure your printer joined successfully. Restart your printer and try the search again if needed.
Wi-Fi printing offers convenience because you don’t need cables or close proximity to the device. You can print from anywhere in your home or office as long as the network connection remains active. This method works reliably for everyday printing tasks like documents, photos, and web pages.
How to Print via Bluetooth Connection
Bluetooth printing works differently than Wi-Fi printing. Your phone and printer communicate directly without needing a network connection. This method works well when your printer has Bluetooth capability built in.
Start by turning on your printer’s Bluetooth feature. Most printers have a button or menu option to activate Bluetooth mode. Check your printer’s manual if you’re unsure where this setting is located.
Next, enable Bluetooth on your Android phone. Go to Settings and find the Bluetooth option. Turn it on and wait for your phone to search for available devices nearby.
Your printer should appear in the list of available Bluetooth devices. Tap on it to begin the pairing process. Your phone and printer may exchange a confirmation code to complete the connection.
Once paired, open the document or file you want to print. Look for the print option in your app’s menu. This is usually under Share, Print, or a three dot menu icon.
Select your printer from the available options that appear. Your phone will send the print job directly to the printer through the Bluetooth connection. The printing should start within a few seconds.
Keep both devices close together during printing. Bluetooth has a limited range, usually around 30 feet. Obstacles like walls can weaken the signal.
If your printer doesn’t appear during pairing, restart both devices. Make sure your printer’s Bluetooth is still active and in discovery mode. Some printers require you to hold a button to stay discoverable for a limited time.
Bluetooth printing is reliable once you complete the initial setup. You won’t need to pair your devices again after the first time. Your phone remembers the connection and reconnects automatically when both devices are nearby and turned on.
How to Print via USB Cable Connection
USB cable printing gives you a direct connection between your Android phone and printer. This method works when your printer has a USB port and your phone supports USB connectivity through an adapter.
Start by gathering the right cable. You’ll need a USB cable that matches your phone’s charging port. Most modern Android phones use USB Type C, though some older models use Micro USB. Check your phone’s port before purchasing an adapter.
Connect one end of the cable to your phone and the other to your printer’s USB port. Your phone should recognize the connection automatically. Some printers display a notification asking you to confirm the connection type.
Next, open the document or file you want to print. Look for the print option in the app’s menu. This is usually found under Share, More Options, or the three dot menu icon. Tap Print or Print As to open the printing interface.
Your phone will search for connected printers. The USB connected printer should appear in the list automatically. Select it from the available options.
Configure your print settings before sending the job. You can adjust page range, color options, paper size, and number of copies. Check these settings carefully to avoid wasting paper and ink.
Tap the Print button to send your document to the printer. Your phone will display a confirmation message once the job is sent. The printer should begin processing immediately.
Keep the USB cable connected during printing. Disconnecting early may interrupt the print job and cause errors.
This method works reliably without requiring network setup. It’s useful in offices or locations where Wi-Fi isn’t available. USB printing also provides a stable connection that rarely drops or experiences interference, making it ideal for important documents that need to print correctly the first time.
Tips for a Smooth Printing Experience
Before you start printing, take a few minutes to prepare. This prevents frustration and failed print jobs.
Check your printer’s compatibility first. Not all printers work with Android devices. Look at your printer’s manual or visit the manufacturer’s support page. Search for “Android printing support” along with your printer model. This simple step saves time and prevents connection issues.
Ensure your devices are close and ready. If you’re using Bluetooth, keep your phone and printer within 30 feet of each other. For Wi-Fi printing, confirm both devices connect to the same network. For USB printing, have the correct cable nearby. Physical proximity and proper connections make printing smooth.
Update your Android system before printing. Go to your phone’s settings and check for system updates. Updated software includes the latest print drivers and fixes bugs. This improves compatibility with most printers.
Enable your printer’s discovery mode. Most printers have a setting that allows devices to find them. Check your printer’s menu or control panel. Enable wireless printing or discovery mode. Your phone can only find printers that are actively broadcasting their presence.
Clear your print queue if problems occur. Go to Settings, then search for “printing” and select Default Print Service. Look for any stuck or failed print jobs and delete them. A clean queue prevents new jobs from failing.
Keep your printer powered on and ready. Don’t put your printer in sleep mode during printing attempts. Active printers respond faster to connection requests. Make sure your printer has enough paper and ink before sending documents.
Test with a simple document first. Don’t start with complex files or large documents. Print a basic text file or image to confirm everything works. Once successful, move to more complicated printing tasks.
Common Mistakes and Troubleshooting Printing Issues
Printing from your Android phone can fail for several reasons. Understanding these issues helps you fix problems quickly and successfully print your documents.
One major mistake is not enabling printer discovery mode on your printer. Many printers have this feature turned off by default. Check your printer’s menu settings and look for options like “discovery mode” or “network printing.” This allows your phone to find and connect to the printer.
Another common error is attempting to print without establishing a proper connection first. Your phone and printer must communicate before any print job can work. Verify that both devices are connected to the same Wi-Fi network, or that your Bluetooth pairing is active. A weak or missing connection will cause print failures every time.
People often overlook the Default Print Service setting in their Android phone. This built-in feature is essential for printing without extra apps. Go to Settings, search for “printing,” and select Default Print Service. Make sure it’s enabled and set as your default option.
If your printer doesn’t appear in the available devices list, restart both your phone and printer. This simple step resolves most connectivity issues. Wait about 30 seconds after restarting before attempting to reconnect.
Clear your print queue if you experience repeated failures. Navigate to Settings, find the printing section, and select Default Print Service. Look for any stuck or pending print jobs and remove them. This prevents your phone from trying to send old failed jobs repeatedly.
Check your printer’s compatibility with Android devices before troubleshooting further. Some older printers lack native Android support. Review your printer’s manual or manufacturer website to confirm compatibility.
If problems persist after these steps, restart your Android device completely. This refreshes your system’s printing functions and often resolves stubborn issues. Allow your phone to fully boot before attempting to print again.
Final Thoughts
Printing from your Android phone does not need extra apps. You already have three simple options: Bluetooth, Wi-Fi, and USB.
Each method works well in different situations. Choose based on what fits your daily needs.
Wi-Fi printing is great for home or office use. Your phone and printer just need the same network.
Bluetooth works best for quick, short range printing. It skips the need for a network setup.
USB cables offer a dependable backup option. This helps in places without reliable Wi-Fi.
The Default Print Service ties all these methods together. It is Android’s built in tool for managing print jobs.
You do not need to download anything extra. Your phone already has what it takes to print smoothly.
Remember to check printer compatibility first. Not every printer supports every connection type.
Always enable discovery mode on your printer. This helps your phone find and connect properly.
Keep your Android system updated too. Updates often fix bugs that affect printing performance.
If a print job fails, do not panic. Restart your devices and check your settings again.
Small errors like a weak connection or outdated software cause most printing problems. Fixing these usually solves the issue fast.
Printing from Android is now easier than ever. You do not need a computer or extra software to get the job done.
Whether you use Bluetooth, Wi-Fi, or USB, the process stays simple. Just follow the right steps for your chosen method.
Take a moment to test your setup before major print jobs. This saves time and avoids frustration later.
With these built in tools, your phone becomes a powerful printing device. No extra apps. No complicated setup. Just direct, simple printing whenever you need it.
Frequently Asked Questions
Can I print from my Android phone without downloading an app?
Yes, you can. Android phones have a built-in Default Print Service that handles printing natively. You don’t need to install anything extra. Just open your document, find the print option, and select your printer. The service works with Wi-Fi, Bluetooth, and USB connections.
What’s the easiest way to print from Android?
The easiest method depends on your setup. Wi-Fi printing works great for home or office use since your phone and printer connect to the same network. Bluetooth is perfect for quick printing over short distances. USB cables offer a reliable backup if other methods fail.
All three use the same basic steps: open your file, tap print, choose your printer, and confirm.
Do I need a computer to print from my phone?
No. Your Android phone can connect directly to your printer without a computer involved. Use Wi-Fi to connect both devices to the same network, or use Bluetooth for a wireless connection. USB cables also work if you have a compatible printer.
Why doesn’t my printer show up when I try to print?
Your printer likely isn’t in discovery mode. Most printers have a setting that lets devices find them. Turn on this mode in your printer’s menu. Also check that your phone and printer are on the same Wi-Fi network or within Bluetooth range.
If problems continue, restart both devices and clear your print queue through Settings. Search for “printing” in your phone’s settings and select Default Print Service to reset the connection.

I’m the voice behind Device Dossier. As a printing technology enthusiast, I spend my time testing printers, comparing specs, and writing honest reviews to help you find the perfect printing solution. When I’m not geeking out over print quality and page yields, you’ll find me exploring the latest in tech.