How to Override Empty Cartridge Errors to Use Remaining Ink?
Your printer flashes an empty cartridge warning, but you know there’s ink left inside. This happens more often than you think.
Printer sensors sometimes misread cartridge levels. They rely on small chips to track ink usage. These chips can be inaccurate or simply glitch out.
The good news? You don’t have to toss that cartridge right away. Many printers let you override the error and squeeze out every last drop of ink.
This guide walks you through simple fixes. You’ll learn how to power cycle your printer correctly. We’ll show you how to clean contacts and reseat cartridges properly.
We’ll cover chip resets too, including the paperclip trick some users swear by. Plus, we’ll point out common mistakes that waste your time and ink.
By the end, you’ll know exactly how to troubleshoot these annoying errors. You’ll save money and reduce waste along the way. Let’s get your printer working again.
In a Nutshell
- Power cycle first. Unplug your printer for 60 seconds. This simple restart often clears temporary sensor glitches without any extra steps.
- Check cartridge seating. Remove each cartridge and pop it back in firmly. Loose cartridges trigger false empty warnings often.
- Clean the contacts. Use a Q-tip dipped in alcohol to wipe the metal contact points. Dirt and corrosion block proper detection.
- Try Black Only mode. Many HP printers let you print with just black ink when color cartridges show empty. This keeps you printing while you plan a replacement.
- Reset ink levels manually. Your printer’s control panel or software usually has a reset option. This tells the machine to recheck actual ink levels.
- Use the paperclip trick carefully. A bent paperclip can reset stubborn cartridge chips. This works especially well for refilled cartridges that still show errors.
Why Printers Show Empty Cartridge Errors
Your printer displays an empty cartridge error for one simple reason: a sensor detects that the cartridge has reached zero. This sensor sits on the cartridge itself as a tiny chip.
The chip tracks ink levels as you print. When it signals empty, your printer stops and shows an error message. This protection exists to prevent you from damaging the print head by running completely dry.
Here’s the catch: the chip doesn’t always read accurately. Sometimes ink remains inside, but the chip thinks the cartridge is finished. Refilled cartridges cause this problem often. The chip resets to empty after a refill, even though you’ve added fresh ink.
Your printer’s firmware also plays a role. It communicates with the cartridge chip constantly. If that communication breaks down, your printer can’t verify actual ink levels. Dirty contact points on the cartridge prevent proper signals between printer and chip.
Another factor involves cartridge positioning. If a cartridge sits slightly loose in its slot, the contacts don’t align properly. Your printer then receives false empty signals.
Thermal sensors inside some printers add another layer. These devices monitor heat patterns during printing. If they detect unusual patterns, they may trigger empty warnings as a safety measure.
Understanding these causes helps you fix the problem effectively. The error doesn’t always mean your cartridge is truly empty. Your printer simply lost communication with the cartridge, misread the chip data, or received false signals from dirty contacts.
The good news? Most of these issues have simple solutions. Power cycling, reseating cartridges, and cleaning contacts address the vast majority of false empty errors. You can get back to printing without replacing a perfectly good cartridge.
Step-by-Step: Power Cycling Your Printer
Power cycling your printer is the first and easiest fix to try. This simple restart often clears temporary detection glitches that cause false empty cartridge warnings.
Here’s exactly what to do: Locate the power button on your printer and press it to turn the device off completely. Wait a full 60 seconds before doing anything else. This pause allows your printer’s memory to fully reset.
While you wait, unplug the power cable from the back of your printer. Keep it disconnected during those 60 seconds. This ensures all power drains from the system completely.
After 60 seconds have passed, plug the power cable back in firmly. Make sure the connection is secure. Then press the power button to turn your printer back on.
Watch as your printer goes through its startup sequence. You’ll hear some beeping and see lights flash. This is completely normal behavior.
Why does this work? Your printer stores temporary error codes in its memory. A power cycle clears these codes. The sensor readings also reset to their default state. Sometimes the cartridge detection system gets stuck on an old reading, and restarting fixes this immediately.
Once your printer finishes starting up, try printing a test page. Many printers have a built in test page option in their settings menu. This tells you whether the error has cleared.
If the empty cartridge error still appears after power cycling, move on to the next fix. Check your cartridge seating or clean the metal contacts. These steps address physical connection problems that a simple restart cannot solve.
How to Remove, Inspect, and Reseat Cartridges
When your printer flags an empty cartridge error, the problem often lies with how the cartridge sits in its slot. Cartridges must click firmly into place. A loose cartridge sends false signals to your printer’s sensor.
Start by opening your printer’s cartridge access door. Wait for the carriage to stop moving completely before touching anything. Never force a cartridge into position, as this can damage the contacts.
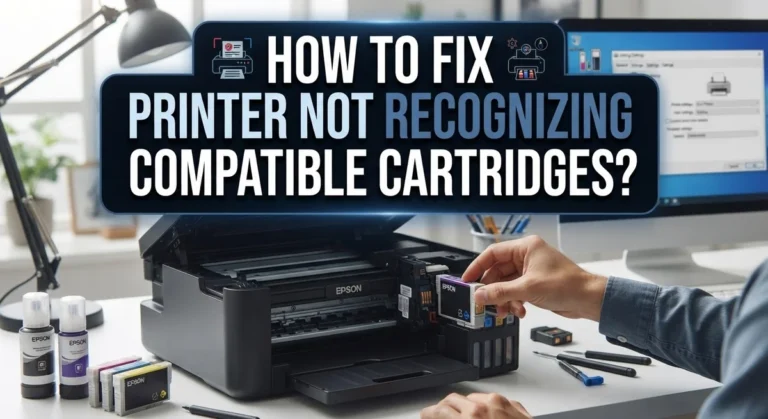
Gently remove the first cartridge by pressing the release tab or lever. Look at the cartridge carefully. You should see metal contact points on the bottom or side. These points communicate with your printer’s sensors.
Now inspect the cartridge for visible damage. Check for cracks, leaks, or dried ink around the contacts. A damaged cartridge may trigger persistent errors even when ink remains inside.
Next, examine the cartridge slot inside your printer. Look for dust, debris, or dried ink buildup around the metal contact points. Use a dry cloth to wipe away any loose particles gently.
Reinsert the cartridge slowly and deliberately. Push it straight in until you hear a distinct click sound. The click confirms proper seating. Repeat this process for every cartridge in your printer.
After reinserting all cartridges, close the access door firmly. Your printer should recognize the cartridges within seconds. If your printer still shows an error, move to cleaning the contact points with an alcohol dampened Q tip.
Proper cartridge seating solves most detection errors. Take your time with this step. Rushing leads to loose cartridges and repeated error messages. Many users find this simple fix eliminates their empty cartridge problems entirely.
Cleaning Cartridge Contacts for Better Detection
Dirty metal contacts are one of the most common reasons your printer fails to recognize cartridges. These tiny metal pins transfer information between your cartridge and printer. Over time, dust, dried ink, and oxidation build up on these contacts. This buildup blocks communication, and your printer thinks the cartridge is empty.
Cleaning these contacts takes just a few minutes and costs nothing. You need a soft cloth or cotton swab and rubbing alcohol. Isopropyl alcohol works best because it evaporates quickly and won’t damage electronics.
Here’s the process: First, power off your printer completely. Open the cartridge access door and remove each cartridge one at a time. Look at the bottom of each cartridge. You’ll see a row of small gold or copper colored squares. These are your contact points.
Dampen your cotton swab with rubbing alcohol. Gently wipe each contact point in a single direction. Don’t scrub back and forth, as this can damage the delicate surface. Use a dry part of the swab to remove any remaining moisture. Let the cartridge air dry for 30 seconds.
Now check inside your printer’s cartridge slot. You’ll see matching metal contacts there too. Clean these the same way with your alcohol dampened swab. Allow everything to dry completely before reinserting cartridges.
This simple cleaning step often resolves detection errors immediately. Your printer regains proper communication with the cartridge. The empty cartridge error disappears, and you can print normally again. If cleaning doesn’t work, move forward with other fixes like power cycling or chip resets.
Resetting Ink Levels via Control Panel or Software
Your printer’s control panel and software offer direct ways to reset ink level readings. These methods tell your printer to ignore the empty cartridge sensor and continue using whatever ink remains in the cartridge.
Start by accessing your printer’s control panel. Look for a menu button or settings icon on the device itself. Navigate to the maintenance or supplies section. Most printers display current ink levels here. You’ll find an option to reset or override the cartridge status. Select this option and confirm your choice. Your printer will recalibrate its sensors and clear the error message.
If your printer doesn’t have this feature on the control panel, use the software installed on your computer instead. Open the printer management application on your desktop. This program typically shows ink status for all cartridges. Look for a “Reset Ink Levels” or “Override Empty Cartridge” button. Click this option to reset the cartridge chip reading. The software communicates directly with your printer’s memory and updates the status.
Some printers require you to hold down specific buttons simultaneously during startup to access reset mode. Check your printer’s manual for the exact button combination. This approach works when software access isn’t available.
Important note: resetting ink levels doesn’t actually add ink to your cartridge. It simply tells your printer to stop blocking print jobs based on the sensor reading. You can continue printing until the cartridge truly runs dry and produces no output.
After resetting, monitor your print quality closely. When ink output becomes faint or disappears entirely, replace the cartridge. This prevents damage to your printer’s internal components from running completely dry.
Using Black Only Mode When Color Cartridges Report Empty
When your color cartridges report empty but your black ink remains, Black Only mode lets you keep printing. This feature exists on many modern printers and solves the frustration of being blocked by a single empty cartridge.
Black Only mode tells your printer to ignore color cartridge errors and use only black ink. Your printer won’t attempt to access the color cartridges during printing. This means you can complete urgent documents without waiting for replacement cartridges.
To activate Black Only mode, start by accessing your printer’s settings menu. Look for options labeled “Print Quality,” “Cartridge Settings,” or “Black Ink Only.” The exact location varies by printer model and manufacturer.
Some printers offer this option directly on the control panel. Others require you to adjust settings through the software on your computer before sending a print job. Check your printer’s manual to find the precise location in your menu system.
Important note: Black Only mode is temporary. You should replace empty color cartridges soon after using this feature. Continued use without proper color cartridges can damage your printer over time.
When you print in Black Only mode, your output appears in black and grayscale only. Color images print as black and white versions. This works well for text documents, emails, and forms that don’t require color.
Test this mode with a simple document first. Print a single page to confirm the setting works properly. If your printer still shows errors, return to the cartridge cleaning and seating steps covered earlier.
Black Only mode gives you valuable extra printing time while you arrange for new cartridges.
Manually Resetting a Cartridge Chip Safely
Cartridge chips store information about ink levels and cartridge status. These chips communicate with your printer to confirm whether a cartridge has ink remaining. When a chip malfunctions or becomes outdated after refilling, your printer shows an empty error even though ink remains inside.
Resetting a cartridge chip manually requires patience and careful handling. The process involves locating a small metal contact point on the cartridge itself. This contact communicates directly with your printer’s sensor system.
Start by powering off your printer completely and unplugging it from the wall outlet. Wait at least one full minute before proceeding. This gives your printer’s memory time to clear any stored error codes.
Remove the cartridge from your printer and examine it closely. Look for a small metal reset button or contact point on the cartridge body. Some cartridges have this located on the side or back.
Take a bent paperclip or small metal tool and press this reset point firmly for 3 to 5 seconds. You should feel slight resistance as you apply pressure. Release and wait 10 seconds before repeating this action two more times.
Reinsert the cartridge into your printer with firm, deliberate pressure. Make sure it clicks into place completely. Power your printer back on and check whether the error message disappears.
If the error persists, repeat the entire process. Sometimes chips require multiple reset attempts to respond properly. Never force any components or use excessive pressure, as this damages both the cartridge and printer contacts.
This manual reset method works best for refilled cartridges. Compatible third party cartridges may also respond to this technique, though results vary depending on chip design and manufacturer specifications.
Avoiding Common Mistakes During Override Attempts
Overriding empty cartridge errors takes care, and mistakes happen easily. Understanding what goes wrong helps you succeed.
Improper cartridge reinsertion causes most override failures. You remove the cartridge, but it doesn’t seat fully when you put it back. The printer still can’t detect it properly. Always push the cartridge straight into the carriage until you hear a clear click. Don’t force it at angles. Verify the cartridge sits flush and level before closing the access door.
Dirty metal contacts prevent your printer from recognizing cartridges even after reinsertion. Dust, dried ink, and corrosion build up on these tiny metal points. Your printer can’t communicate with the cartridge chip. Use a Q-tip barely dampened with rubbing alcohol. Gently wipe both the cartridge contacts and the printer’s contact points. Let them dry completely before reinserting anything.
Refilled cartridges trigger errors repeatedly because the chip wasn’t reset. You refill the cartridge with ink, but the chip still shows “empty” to your printer. The override won’t work if you skip the chip reset step. If you’re using refilled cartridges, you must manually reset the chip using a bent paperclip on the reset point.
Using incompatible cartridges creates detection problems too. Some third party or generic cartridges have different chip designs. Your specific printer model may not recognize them. Always verify cartridge compatibility with your printer model before purchasing refills.
Power cycling too quickly between attempts wastes time. Give your printer a full 60 seconds unplugged. This clears the printer’s memory and allows it to restart fresh. Rushing back to power on within 30 seconds often repeats the same error.
Final Thoughts
Overriding empty cartridge errors gives you a quick way to keep printing when you need it most. You save time and money by using every last drop of ink in your cartridges.
These methods work well as temporary solutions. They are not permanent fixes for empty cartridges. Your printer still needs fresh ink eventually.
Power cycling and reinserting cartridges solve many detection problems fast. These simple steps fix glitches without any special tools or technical skills.
Black Only mode helps you finish urgent print jobs when color ink runs out. You can still print documents in black and white while you wait for replacement cartridges.
Chip resets require more care and patience. Take your time with this process to avoid damaging your cartridge or printer.
Clean contacts and proper seating solve most common override problems. Many printer errors happen simply because of dust or loose connections.
Watch your print quality after any override attempt. Fading text or streaky colors mean your cartridge truly needs replacement soon.
Keep a spare cartridge on hand for when overrides stop working. This way, you avoid interruptions during important print jobs.
Remember that overriding errors extends cartridge life but doesn’t restore ink. Plan ahead and order replacements before you run completely dry.
These override techniques give you flexibility and control over your printing needs. They help you avoid unnecessary trips to buy new cartridges too soon.
With a little practice, you can handle most empty cartridge errors on your own. Understanding your printer’s features saves you time, money, and frustration in the long run.
Frequently Asked Questions
Why does my printer show an empty cartridge error when ink remains?
Your printer uses a chip sensor on each cartridge to track ink levels. This chip sends a signal to your printer when it thinks the cartridge is empty. Sometimes the chip loses contact with the printer, or the metal contacts get dirty. Reseating the cartridge often fixes this issue. Remove the cartridge, wait a few seconds, then push it back in firmly until it clicks.
You can also clean the metal contact points with a Q-tip slightly dampened with rubbing alcohol. Let the contacts dry completely before reinserting the cartridge.
Can I print in black only when my color cartridges are empty?
Yes, many printers offer a Black Only mode that lets you continue printing. This feature bypasses the color cartridge error temporarily. Check your printer’s control panel or software settings for a print mode option.
This works best for urgent documents. Remember that color cartridges still need replacement eventually. Black Only mode is a short-term solution, not permanent.
Why does my refilled cartridge still trigger an empty error?
Refilled cartridges often show empty errors because the chip wasn’t reset. The chip stores ink level data separately from the actual ink inside. Even though you added new ink, the chip still reports zero.
You need to manually reset the cartridge chip. This requires locating the reset point on the cartridge and using a bent paperclip to press it briefly. The process takes patience but solves the problem.
Will power cycling my printer fix cartridge detection errors?
Power cycling works surprisingly well for temporary glitches. Unplug your printer for about 60 seconds, then plug it back in. This resets the printer’s memory and sometimes clears false empty warnings.
This simple step resolves many detection problems. If the error returns after printing a few pages, try reinserting the cartridge or cleaning the contacts instead.

I’m the voice behind Device Dossier. As a printing technology enthusiast, I spend my time testing printers, comparing specs, and writing honest reviews to help you find the perfect printing solution. When I’m not geeking out over print quality and page yields, you’ll find me exploring the latest in tech.