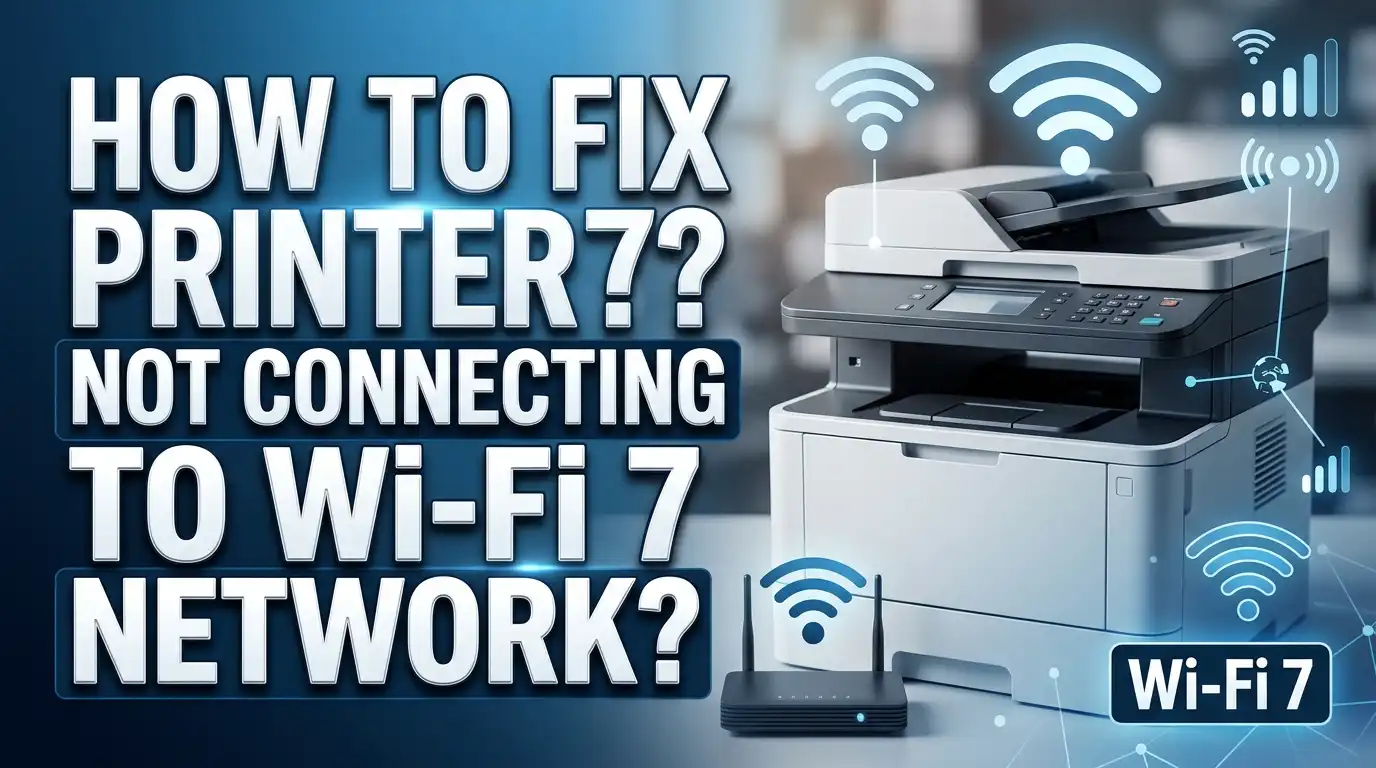
How to Fix Printer Not Connecting to Wi-Fi 7 Network?
You just upgraded to a shiny new Wi-Fi 7 router. Your laptop flies. Your streaming is flawless. But your printer? It refuses to connect.
The frustrating truth is that most printers on the market today were not built with Wi-Fi 7 in mind. Wi-Fi 7, also known as 802.11be, brings new security protocols, band configurations, and channel widths that many printers simply cannot handle.
This is not your fault. It is a compatibility gap between cutting edge router technology and printer hardware that still relies on older wireless standards. The good news is that you do not need to buy a new printer or downgrade your router.
In this guide, you will find 14 step by step solutions to fix your printer’s connection to a Wi-Fi 7 network. Each solution addresses a specific cause of the problem.
Key Takeaways
- Wi-Fi 7 routers often default to WPA3 encryption, which many printers do not support. Switching to a WPA2/WPA3 mixed mode or WPA2 only on your router is the most common fix for this issue.
- Most printers only connect on the 2.4 GHz band. Wi-Fi 7 routers use smart connect to merge all bands under one SSID. Splitting the SSIDs so your printer can find and join the 2.4 GHz network often resolves the problem immediately.
- Outdated printer firmware is a silent connection killer. Manufacturers release firmware updates that improve compatibility with newer routers. Always check for and install the latest firmware for your printer model.
- Wi-Fi Direct offers a reliable backup plan. If your printer cannot connect to the router at all, Wi-Fi Direct lets you print directly from your computer or phone without using the router as a middleman.
- A dedicated IoT or guest network is the long term solution. Many Wi-Fi 7 routers let you create a separate network with lower encryption specifically for printers and smart home devices. This keeps your main network secure while giving your printer a compatible connection.
- A simple reboot of both the printer and the router fixes more connection issues than most people expect. Always try this step first before moving to advanced solutions.
Why Printers Struggle With Wi-Fi 7 Networks
Wi-Fi 7 (802.11be) is the latest generation of wireless networking. It supports speeds up to 46 Gbps, uses 320 MHz wide channels, and operates across three bands: 2.4 GHz, 5 GHz, and 6 GHz. These features are incredible for laptops and phones but create real problems for printers.
Most consumer and office printers use Wi-Fi 4 (802.11n) or Wi-Fi 5 (802.11ac) wireless chips. These chips only understand older security protocols like WPA2. Wi-Fi 7 routers, however, default to WPA3 Personal encryption or a WPA2/WPA3 mixed mode that some printers still reject.
Another issue is band steering. Wi-Fi 7 routers often use a single SSID for all three bands and automatically push devices to the fastest band available. Printers that only support 2.4 GHz may fail to connect because the router tries to steer them to 5 GHz or 6 GHz.
Channel width also matters. Wi-Fi 7 can use extremely wide channels (up to 320 MHz) that older printer radios cannot interpret. This causes the printer to see the network but fail during the handshake process. Understanding these root causes will help you pick the right fix from the solutions below.
Restart Your Printer and Router First
This sounds basic, but it works more often than you would expect. A fresh restart clears temporary configuration errors, flushes cached network data, and forces both devices to renegotiate the connection from scratch.
Turn off your printer completely. Unplug the power cable from the wall. Do the same for your Wi-Fi 7 router. Wait a full 60 seconds. This allows both devices to fully discharge residual power and reset their network states.
Plug in the router first and wait for all indicator lights to stabilize. This usually takes about two minutes. Then plug in and power on your printer. Let it complete its startup cycle before attempting to connect to Wi-Fi.
This process is often called a “cold boot” and it resolves many intermittent connection failures. If your printer was previously connected and suddenly dropped, a cold boot is especially effective because it eliminates temporary software glitches on both ends.
Pros: Fastest and easiest solution. Requires no technical knowledge. Fixes many temporary glitches instantly.
Cons: Does not solve fundamental compatibility issues. The problem may return if the root cause is encryption or band mismatch.
Switch Your Router From WPA3 to WPA2/WPA3 Mixed Mode
This is the single most effective fix for printers that refuse to connect to Wi-Fi 7 routers. WPA3 Personal encryption is the default on most Wi-Fi 7 routers, and the majority of printers cannot authenticate with it.
Open your router’s admin panel. You can usually do this by typing the router’s IP address (often 192.168.1.1 or 192.168.0.1) into your web browser. Log in with your admin credentials.
Go to the Wireless Settings or Security section. Look for the encryption or security mode option. Change it from WPA3 Personal to WPA2 Personal + WPA3 Personal (mixed mode). If mixed mode is not available, switch to WPA2 Personal (AES) only.
Save the settings and let the router reboot. Your printer should now be able to detect the network and complete the connection.
Be aware that switching to pure WPA2 reduces your network security slightly. Mixed mode is the better choice because it allows newer devices to use WPA3 while letting older devices like printers use WPA2.
Pros: Solves the root cause for most printers. Mixed mode maintains strong security for other devices.
Cons: Pure WPA2 mode reduces overall network security. Some router interfaces make this setting hard to find.
Split Your SSID Into Separate 2.4 GHz and 5 GHz Networks
Wi-Fi 7 routers use a feature called Smart Connect or Band Steering to merge all frequency bands under a single network name (SSID). This is convenient for phones and laptops but causes problems for printers that only support 2.4 GHz.
The printer may attempt to connect, get steered to the 5 GHz or 6 GHz band, and fail. Or it may not see the network at all because the router prioritizes higher frequency bands during the connection process.
To fix this, disable Smart Connect in your router settings. Once disabled, you can assign unique names to each band. For example, name your 2.4 GHz network “HomeNetwork_2G” and your 5 GHz network “HomeNetwork_5G.” Connect your printer to the 2.4 GHz SSID.
The steps vary by router brand. In most admin panels, the option is under Wireless Settings or Advanced Wireless. Look for “Smart Connect,” “Band Steering,” or “Unified SSID” and turn it off.
After splitting the SSIDs, you may need to reconnect your other devices to their preferred bands manually.
Pros: Gives you direct control over which band the printer uses. Eliminates band steering confusion permanently.
Cons: Requires reconnecting all devices after the split. You now manage multiple network names instead of one.
Create a Dedicated IoT or Guest Network for Your Printer
Many Wi-Fi 7 routers include a dedicated Internet of Things (IoT) network or a guest network feature. This is the cleanest long term solution because it creates a separate network with lower security settings specifically for printers and smart devices.
For example, Netgear Orbi Wi-Fi 7 systems have a built in IoT network option. You enable it through the Orbi admin panel under Wireless settings. You can choose the 2.4 GHz band, set the encryption to WPA2 PSK (AES), and give it a unique name and password.
If your router does not have a dedicated IoT network, use the guest network instead. Most Wi-Fi 7 routers allow you to configure the guest network with WPA2 encryption. Connect your printer to this guest network.
This approach keeps your main Wi-Fi network on WPA3 for maximum security while giving your printer a compatible network to join. It is the best of both worlds.
Make sure the guest network allows devices on it to communicate with your local network if you need to print from computers on the main network. Some routers isolate guest devices by default, which blocks printing.
Pros: Maintains WPA3 security on your main network. Clean, long term fix. Easy to set up on most Wi-Fi 7 routers.
Cons: Guest network isolation may block printing from main network devices. Adds another network to manage.
Update Your Printer Firmware
Printer manufacturers release firmware updates to fix bugs and improve compatibility with newer routers. An outdated firmware version is a common reason printers fail to connect to Wi-Fi 7 networks.
Visit the support page for your printer brand. Search for your specific printer model and download the latest firmware file. HP, Canon, Brother, and Epson all provide free firmware updates on their websites.
If your printer is currently connected via USB or Ethernet, you can install the update directly. If the printer has no wired connection, some manufacturers offer firmware updates through their mobile apps (like the HP Smart app) using a temporary Wi-Fi Direct link.
After the firmware update, reset the printer’s network settings and reconnect it to your Wi-Fi 7 network. The updated firmware may now support WPA3 or mixed mode encryption that the old version could not handle.
Check your router’s firmware too. Wi-Fi 7 routers are still relatively new, and manufacturers push regular updates to fix device compatibility issues. Log into your router’s admin panel and look for a firmware update option.
Pros: Free to do. May permanently fix the compatibility issue. Improves overall printer performance and security.
Cons: Requires a wired connection or Wi-Fi Direct to install if the printer is offline. Some older printer models no longer receive firmware updates.
Reset Your Printer’s Network Settings
If your printer previously connected to a different network or router, old network settings can interfere with the new Wi-Fi 7 connection. A network reset clears all saved Wi-Fi credentials, IP configurations, and connection histories.
On printers with a touchscreen display, go to Settings > Network > Restore Network Settings or Restore Network Defaults. The exact path varies by brand and model.
For printers without a touchscreen, you usually need to press and hold a combination of buttons. On many HP printers, hold the Wireless button and the Cancel button together for five seconds until the wireless light flashes. On Canon printers, hold the Stop button until the alarm light flashes a specific number of times.
After the reset, the printer returns to its factory network state. You can now set it up fresh by going through the wireless setup wizard on the printer’s control panel. Select your Wi-Fi network (preferably the 2.4 GHz or IoT SSID you created earlier) and enter the password.
Pros: Clears all conflicting network data. Gives you a clean starting point. Quick and simple to perform.
Cons: You must reconfigure the printer’s Wi-Fi settings from scratch. You will lose any saved network profiles.
Set a Static IP Address for Your Printer
Wi-Fi 7 routers use DHCP to assign IP addresses automatically. Sometimes the router assigns a new IP to the printer after a reboot, or two devices get conflicting addresses. A static IP eliminates these conflicts and gives your printer a permanent address on the network.
First, connect your printer to the network using any available method. Then find the printer’s current IP address. You can print a network configuration page from the printer’s settings menu to see this information.
Log into your router’s admin panel. Go to the DHCP settings or LAN settings section. Look for Address Reservation or Static DHCP Lease. Add your printer’s MAC address and assign it a specific IP address outside the DHCP range but within the same subnet.
For example, if your router assigns DHCP addresses from 192.168.1.100 to 192.168.1.254, assign your printer a static IP like 192.168.1.50.
Save the settings and restart both the router and printer. The printer will now always receive the same IP address, which prevents connection drops caused by IP conflicts or lease expirations.
Pros: Eliminates IP conflicts and connection drops. Makes the printer easier to find on the network. Reliable long term fix.
Cons: Requires access to the router’s admin panel. Slightly more technical to configure than other solutions.
Change the Wi-Fi Channel Width on Your Router
Wi-Fi 7 supports extremely wide channels of 160 MHz and 320 MHz. These wide channels boost speed for compatible devices but can confuse older printer radios that only understand 20 MHz or 40 MHz channels.
Log into your router’s admin settings. Go to the Wireless or Advanced Wireless section. Find the channel width setting for the 2.4 GHz band. Change it from Auto to 20 MHz.
The 2.4 GHz band performs best at 20 MHz for device compatibility. Most printers were designed around this channel width. Wider channels on 2.4 GHz actually reduce reliability due to increased interference in the crowded 2.4 GHz spectrum.
While you are in the settings, consider setting a specific channel number instead of Auto. Channels 1, 6, and 11 are the standard non overlapping channels for 2.4 GHz. Picking one of these manually can improve connection stability.
Save your changes and allow the router to reboot. Attempt to connect the printer again.
Pros: Improves compatibility with older printers. Reduces interference on the 2.4 GHz band. Simple router setting change.
Cons: May slightly reduce the maximum throughput on the 2.4 GHz band for other devices. Requires router admin access.
Use Wi-Fi Direct as a Workaround
If your printer absolutely cannot connect to your Wi-Fi 7 router through any of the methods above, Wi-Fi Direct lets you bypass the router entirely. Wi-Fi Direct creates a peer to peer wireless link between your printer and your computer or phone.
Most modern printers from HP, Canon, Brother, and Epson support Wi-Fi Direct. On the printer’s control panel, look for a Wi-Fi Direct button or navigate to Network Settings > Wi-Fi Direct and enable it.
The printer will broadcast its own network name (usually something like “DIRECT_PrinterModel”). On your computer or phone, connect to this network like you would any Wi-Fi network. Enter the password shown on the printer’s display.
You can then print directly without the router acting as an intermediary. Some printer apps, like HP Smart, can discover and use Wi-Fi Direct printers automatically.
Keep in mind that Wi-Fi Direct is a point to point connection. Only the device connected to the printer’s direct signal can print. Other devices on your main Wi-Fi network will not see the printer unless they also connect to its Wi-Fi Direct signal individually.
Pros: Works regardless of router settings or compatibility. No router configuration needed. Simple to set up.
Cons: Only one device can connect at a time in most cases. You lose internet access on the device while connected to the printer’s direct signal. Not a true network printing solution.
Connect Your Printer via Ethernet Cable
If your printer has an Ethernet port, a wired connection is the most stable and hassle free solution. This completely bypasses all Wi-Fi compatibility issues. You plug a standard Ethernet cable from the printer to a LAN port on your Wi-Fi 7 router.
The router assigns the printer an IP address automatically through DHCP. Every device on the network, whether connected via Wi-Fi or Ethernet, can then send print jobs to the printer. There is no encryption mismatch, no band steering issue, and no signal strength concern.
This solution works especially well for printers in a fixed location like a home office. You get the full reliability of a wired connection while still printing wirelessly from your laptop or phone.
If your printer is far from the router, you can use a powerline adapter to extend an Ethernet connection through your home’s electrical wiring. This avoids running a long cable across rooms.
Pros: Most reliable connection method. Eliminates all Wi-Fi related issues. Works with every router regardless of settings.
Cons: Requires a printer with an Ethernet port (not all models have one). Limits printer placement to areas near the router or an Ethernet outlet. Cable management may be inconvenient.
Connect Your Printer via USB and Share It on the Network
This method works when all wireless options fail. Connect your printer to a computer using a USB cable, then share the printer over your Wi-Fi network so other devices can print to it.
On Windows, go to Settings > Bluetooth & Devices > Printers & Scanners. Select your USB connected printer, click Printer Properties, and go to the Sharing tab. Check Share this printer and give it a share name.
On Mac, go to System Settings > General > Sharing > Printer Sharing. Enable sharing for your USB printer.
Other computers on the same network can now add this shared printer. On Windows, they go to Add a Printer and browse the network for the shared printer. On Mac, the shared printer appears in Printers & Scanners settings.
The computer hosting the printer must stay powered on for other devices to print. This is a limitation, but it provides a solid workaround when Wi-Fi connection to the router is impossible.
Pros: Works with any printer and any router. No wireless configuration needed on the printer itself.
Cons: The host computer must remain on at all times. Adds latency compared to direct network printing. USB cable limits the printer’s physical location.
Remove and Re-add the Printer on Your Computer
Sometimes the problem is not the Wi-Fi connection itself but a corrupted or outdated printer profile on your computer. Windows and macOS store printer configurations that can become stale after a router change.
On Windows 11, go to Settings > Bluetooth & Devices > Printers & Scanners. Click on your printer and select Remove. Restart your computer. Then go back to the same menu and click Add Device. Windows will search for printers on the network.
On macOS, go to System Settings > Printers & Scanners. Right click on the printer and select Remove. Then click the + button to add a new printer. Select your printer from the discovered devices list.
This forces your computer to establish a fresh connection to the printer with updated drivers and network information. If the printer is on the network (even via a guest or IoT SSID), your computer should find it during the scan.
Pros: Quick and easy to do. Fixes many “printer offline” errors. Requires no changes to the router.
Cons: You may need to reinstall printer drivers. Does not fix the problem if the printer itself is not on the network.
Avoid Special Characters in Your Wi-Fi Password and SSID
Some printers have trouble connecting to networks that use special characters in the Wi-Fi name or password. Characters like apostrophes, ampersands, angle brackets, and Unicode symbols can cause authentication failures during the handshake.
Log into your router’s admin panel and check your network name and password. Remove any special characters and stick to standard letters, numbers, and basic symbols like underscores. For example, change “John’s_Network!” to “JohnsNetwork1” and simplify the password to something like “PrintReady2026.”
This is an overlooked fix that solves connection problems surprisingly often. Older printer firmware may not properly parse certain character encodings, especially UTF 8 characters outside the basic ASCII set.
After changing the SSID or password, every device will need to reconnect with the new credentials. This is a small inconvenience, but it is worth trying if other solutions have not worked.
Pros: Simple change that is easy to reverse. Fixes character encoding issues on older printers.
Cons: Requires reconnecting all devices to the network. Limits your naming and password flexibility.
When to Consider a Wi-Fi Print Server or a Newer Printer
If you have exhausted every solution above and your printer still refuses to connect, you may have a fundamental hardware limitation. Very old printers with outdated wireless chips may never support the protocols used by Wi-Fi 7 routers, even in compatibility mode.
In this case, consider a Wi-Fi print server. This is a small device that connects to your printer via USB and joins the Wi-Fi network on the printer’s behalf. The print server handles all the wireless communication. Your printer simply receives the data through USB. These devices cost relatively little and add wireless capability to any USB printer.
If you are shopping for a new printer, look for models released in 2025 or later that explicitly list Wi-Fi 6E or Wi-Fi 7 support. These printers include updated wireless chips and support WPA3 encryption natively.
Also check whether the printer supports both 2.4 GHz and 5 GHz bands. Dual band printers have far fewer connection issues with modern routers because they can use either frequency.
Pros: A print server is affordable and extends the life of older printers. A new printer with Wi-Fi 7 support eliminates the problem permanently.
Cons: A print server adds another device to manage. Buying a new printer is the most expensive option.
Frequently Asked Questions
Why does my printer see the Wi-Fi 7 network but fail to connect?
This usually happens because of a WPA3 encryption mismatch. Your printer can detect the network SSID but cannot complete the security handshake because it only supports WPA2. Switch your router to WPA2/WPA3 mixed mode to fix this. Band steering can also cause this issue if the router pushes the printer to a 5 GHz or 6 GHz band that the printer does not support.
Can I use my printer on Wi-Fi 7 without changing any router settings?
In some cases, yes. If your Wi-Fi 7 router defaults to WPA2/WPA3 mixed mode and broadcasts a combined SSID that includes 2.4 GHz, your printer may connect without issues. However, most users experience problems because Wi-Fi 7 routers use settings optimized for newer devices. You will likely need to adjust at least one router setting.
Is Wi-Fi Direct as reliable as a normal Wi-Fi connection for printing?
Wi-Fi Direct is reliable for single device printing. The connection is direct and does not depend on the router. However, it is not suitable for households where multiple devices need access to the same printer. Only one device can use Wi-Fi Direct at a time, and you lose internet access on that device while connected to the printer’s direct signal.
Will updating my printer firmware always fix the Wi-Fi 7 issue?
Not always. Firmware updates help when the manufacturer has added support for newer encryption protocols or fixed known compatibility bugs. However, if your printer’s wireless hardware physically cannot support WPA3 or certain frequency bands, a firmware update will not change that limitation. It is still worth trying because many updates do resolve connection issues.
Do I need to buy a Wi-Fi 7 compatible printer?
You do not need a Wi-Fi 7 compatible printer if the fixes in this guide resolve your issue. Most printers work fine on Wi-Fi 7 routers once you adjust the security and band settings. However, if your printer is very old and none of these solutions work, upgrading to a newer model with updated wireless support is the best long term solution.
Can I connect my printer to the Wi-Fi 7 router using an Ethernet cable and still print wirelessly from my phone?
Yes. Connecting the printer to the router via Ethernet cable makes the printer available to every device on the network. Your phone, tablet, or laptop can send print jobs wirelessly through the router to the Ethernet connected printer. This is one of the most reliable setups because it removes all Wi-Fi compatibility issues from the printer’s side.
I’m the voice behind Device Dossier. As a printing technology enthusiast, I spend my time testing printers, comparing specs, and writing honest reviews to help you find the perfect printing solution. When I’m not geeking out over print quality and page yields, you’ll find me exploring the latest in tech.