How to Fix Epson Printer Not Recognizing Compatible Cartridges?
Does your Epson printer suddenly refuse to recognize a compatible cartridge? You are not alone. This is a common problem that frustrates many printer owners.
Firmware updates often cause this issue. Epson sometimes updates its software to block third-party cartridges. This leaves you stuck with an error message instead of printed pages.
The good news is that you can fix this problem quickly. Most causes come down to simple issues like protective strips or loose cartridge placement.
In this guide, we will show you exactly how to solve this problem. You will learn the core reasons why your printer rejects cartridges.
By the end of this article, you will know how to get your printer working smoothly again. Let’s fix your printer and get you back to printing fast.
In a Nutshell
- Remove and reinsert the cartridge. Take it out, then place it firmly back into the correct slot. A loose fit often causes the printer to miss the cartridge.
- Check for protective strips. Many new cartridges have a strip covering the chip. You must peel this off before the printer can read it.
- Listen for a click. The cartridge should click into place. If it does not, the connection stays weak and the printer won’t recognize it.
- Watch out for firmware updates. Epson sometimes updates firmware to block third party cartridges. This is a common trigger for this problem.
- Keep your printer clean. Regular cleaning helps the printer read cartridges properly. Dust and debris can block the connection.
- Store cartridges the right way. Proper storage keeps the chip and contacts in good shape. This prevents future recognition issues.
Why Epson Printers Reject Compatible Cartridges
Your Epson printer rejects compatible cartridges for several specific reasons. Understanding these causes helps you fix the problem faster.
Firmware updates are the main culprit. Epson releases updates that block third party cartridges from working. Your printer’s software essentially refuses to accept them. This happens automatically when your printer connects to the internet or when you manually update it.
The cartridge chip connection matters greatly. If the protective strip stays on the chip, your printer cannot read it. The chip needs direct contact with the printer’s sensor. A loose or incomplete connection breaks this communication instantly.
Improper cartridge placement causes rejection too. Each cartridge slot has a specific design. Inserting a cartridge into the wrong slot confuses your printer. The cartridge must click firmly into place. If it sits loosely, the printer detects this and refuses to work.
Dirty printer contacts prevent proper recognition. Dust and ink residue build up over time. These deposits block the electrical connection between cartridge and printer. Your printer cannot read the cartridge data without this connection.
Poor cartridge storage damages the chip contacts. Extreme temperatures and humidity affect the cartridge. Storing cartridges horizontally or in damp areas causes corrosion. Damaged contacts make your printer reject even quality compatible cartridges.
Age and compatibility issues also play a role. Older compatible cartridges may use outdated chip technology. Your printer’s firmware might not support their specifications anymore. Some compatible cartridges simply lack the right chip design for newer Epson models.
These reasons explain why your printer rejects compatible cartridges. The good news is most of these issues have simple solutions you can apply yourself.
How Firmware Updates Affect Cartridge Recognition
Firmware updates play a significant role in how your Epson printer recognizes compatible cartridges. When Epson releases a new firmware version, it sometimes includes security measures that affect cartridge detection.
Understanding the firmware connection helps you grasp why recognition problems happen after updates. Epson designs firmware to verify cartridge authenticity. Newer updates may include stricter verification protocols that reject third party cartridges more aggressively than before.
The chip on your cartridge communicates with the printer through firmware commands. When firmware updates occur, these communication protocols can change. Your compatible cartridge may use an older chip design that no longer matches the new firmware requirements.
What happens during a firmware update? The printer receives new instructions for reading cartridge data. These instructions become more selective about which cartridges pass verification. Compatible cartridges sometimes fail because their chip information doesn’t align with updated requirements.
You can check your current firmware version in your printer settings menu. Most Epson printers display this information under device information or system settings. Knowing your firmware version helps you understand if a recent update caused your recognition issue.
Preventing firmware related problems requires awareness. Some users disable automatic updates to avoid compatibility issues. You can usually adjust update settings in your printer’s network preferences or control panel.
If recognition problems started after a firmware update, the issue likely stems from changed verification rules. The cartridge itself remains functional. The printer simply cannot validate it using new firmware standards.
Consider checking with Epson support about your specific firmware version. They can confirm whether your compatible cartridge is compatible with your current firmware. This information helps you decide whether to troubleshoot further or explore alternative solutions for your printing needs.
Step-by-Step Guide to Fix Cartridge Recognition Errors
Start by turning off your printer completely. Wait about 30 seconds before powering it back on. This simple reset often clears temporary communication errors between your cartridge and printer.
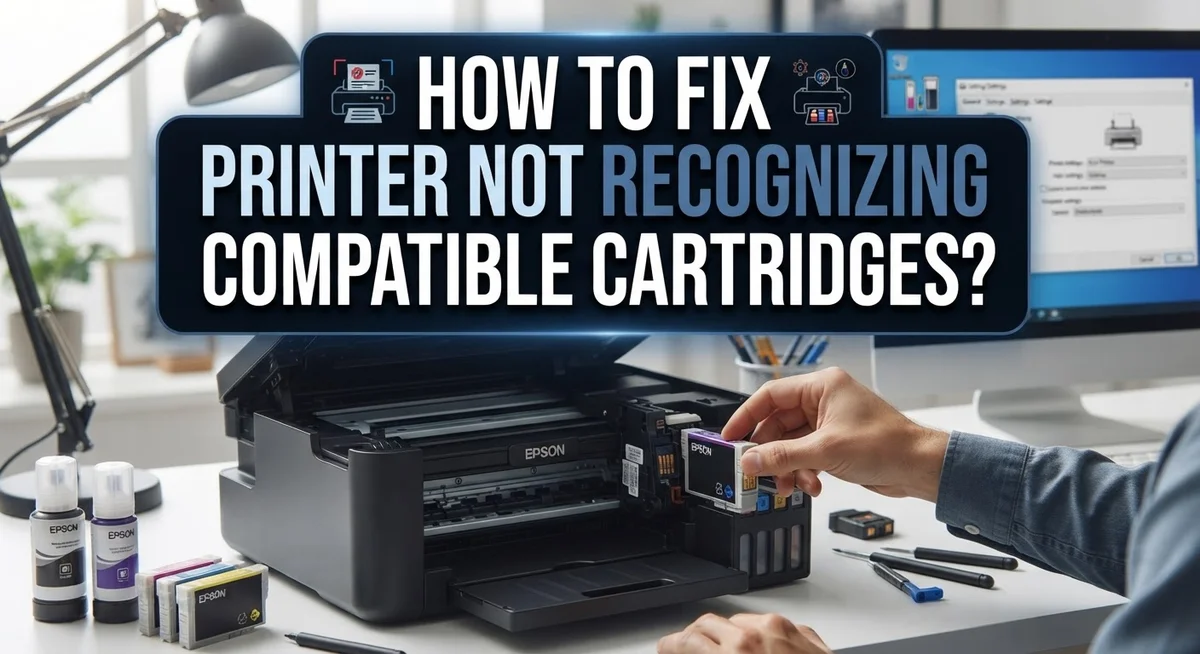
Next, open your printer’s access panel. Locate the cartridge slot that shows an error message. Gently remove the cartridge by pressing down on it until you hear a click, then pull it straight out.
Examine the cartridge chip carefully. Look for any protective strips, tabs, or covers still attached to the contact area. Remove all of these protective elements completely. The chip must be fully exposed for proper electrical contact.
Check the cartridge slot inside your printer. Use a soft, dry cloth to gently wipe the metal contacts inside the slot. Dust and debris prevent proper chip recognition. Be gentle to avoid damaging these sensitive components.
Now reinsert the cartridge firmly. Align it with the correct slot and push it in until you hear a distinct click sound. The cartridge should sit flush with the printer body. If you don’t hear a click, remove it and try again.
Close the access panel and power on your printer. Wait for the startup sequence to complete. Your printer should now recognize the cartridge.
If recognition still fails, try a different compatible cartridge if you have one available. This helps determine if the problem is with the specific cartridge or a deeper printer issue. Sometimes one cartridge has a faulty chip while others work fine.
Document what happens during each attempt. Note any error messages that appear on your printer’s display screen. This information helps identify whether the problem relates to cartridge placement, chip contact, or something else entirely.
Checking and Removing Protective Strips from the Chip
Protective strips cover the chip on your compatible cartridge. These strips keep the chip safe during shipping and storage. You must remove all strips before installing the cartridge. If you leave them on, your printer cannot read the cartridge data.
Start by locating the protective strips on your cartridge. Look at the bottom and sides where the chip sits. The strips are usually clear plastic or foil material. They cover the gold or silver contact points completely.
Gently peel back each strip slowly. Use your fingernail or a plastic tool to lift the corners. Do not use sharp metal objects as these can scratch or damage the chip. Pull the strips away at a steady pace to avoid tearing them.
Check that all strips are completely removed. Run your finger across the chip area to feel for any remaining plastic. The contact points should feel smooth and exposed. Even small pieces of protective material can block communication between the cartridge and printer.
Inspect the chip itself for any damage. Look for cracks, dents, or discoloration on the surface. If the chip appears damaged, the cartridge may not work properly even after strip removal.
Once you remove the strips, handle the cartridge carefully. Avoid touching the chip directly with your bare fingers. Oils from your skin can interfere with the connection. Hold the cartridge by its sides only.
Now your cartridge is ready for installation. The exposed chip will allow your printer to read the cartridge information. Proper strip removal is often the simple fix that gets your compatible cartridge working again.
Proper Cartridge Insertion and Seating Techniques
Proper cartridge insertion matters more than most people realize. Your Epson printer needs the cartridge to sit perfectly in its slot to recognize it. A loose or misaligned cartridge will trigger an error message every time.
Start by turning off your printer completely. This protects both the cartridge and the printer’s internal components. Open the access panel where your cartridges live. Most Epson models have a simple latch or button you press to open this area.
Now examine the cartridge slot itself. Look for any debris, dust, or dried ink inside. A clean slot ensures proper contact between the cartridge and the printer’s sensors. Use a clean, dry cloth to gently wipe the slot if needed.
Hold the compatible cartridge with both hands. Position it at a slight angle toward the slot. Push it straight in with firm, steady pressure until you hear or feel a click. That click tells you the cartridge is fully seated and locked into place.
Double-check the alignment before closing the access panel. The cartridge should sit flush against the slot with no gaps or tilting. If it feels loose, remove it and try again. Sometimes cartridges need a second or third attempt to seat properly.
Close the access panel and power on your printer. Run a test print to confirm recognition. If the printer still doesn’t recognize the cartridge, remove it again and inspect both the cartridge contacts and the slot contacts for any visible damage or dirt.
Proper seating is often the simplest fix for recognition problems. Take your time with each insertion step.
Common Mistakes That Trigger Recognition Issues
Many people make simple mistakes that cause their printers to reject compatible cartridges. Understanding these errors helps you avoid frustration and wasted time.
The most common mistake is leaving protective strips on the cartridge chip. These strips protect the chip during shipping and storage. You must remove every single strip before installation. Even one remaining strip blocks communication between the cartridge and printer. Take time to inspect the chip area carefully after removal.
Another frequent error is inserting the cartridge into the wrong slot. Each slot corresponds to a specific color or function. Check your printer manual to confirm the correct position for each cartridge type. Placing a cartridge in the wrong slot prevents recognition even if everything else is correct.
Improper seating causes many recognition failures too. The cartridge must click firmly into place. A loose cartridge cannot establish proper contact with the printer’s electrical connections. Push the cartridge straight in until you hear or feel a click. Do not force it at an angle, as this damages both the cartridge and the printer.
Dirty cartridge contacts also trigger recognition problems. Dust and debris accumulate on the metal chip over time. Gently wipe the chip with a soft, dry cloth before installation.
Finally, many people reinsert cartridges too quickly after removal. Wait a few seconds before reinstalling to allow the printer to reset its detection system. This simple pause often solves recognition issues.
These mistakes are easy to fix once you know what causes them. Take your time during installation and double-check each step. Proper handling prevents most recognition problems before they start.
Preventive Maintenance for Long-Term Printer Performance
Regular maintenance keeps your Epson printer healthy and prevents cartridge recognition issues before they start. Consistent care is your best defense against future problems.
Clean your printer’s interior every month using a soft, lint-free cloth. Dust and debris accumulate around the cartridge slots and can interfere with chip connections. Pay special attention to the metal contacts inside the printer where cartridges sit.
Handle compatible cartridges with clean, dry hands every time. Oils from your skin can damage the chip and prevent proper communication between the cartridge and printer. Store unused cartridges in their original packaging in a cool, dry location away from direct sunlight.
Print regularly, even if you don’t need documents. Printers work best when used frequently. Dormant printers develop clogs and connection issues faster than active ones. A test page once a week maintains optimal performance.
Check your printer’s firmware settings monthly. Some firmware updates automatically reject third-party cartridges. Visit your printer’s settings menu to verify the current firmware version. Keep records of any updates applied to your device.
Store cartridges upright in their boxes rather than lying flat. Horizontal storage can cause ink to settle unevenly and damage internal components. Temperature fluctuations also harm cartridge performance, so avoid storing them near heaters or air conditioning vents.
Inspect cartridge slots quarterly for visible damage or corrosion. Replace any cartridges showing signs of leaking immediately to prevent staining the printer’s interior. Prevention through routine care eliminates most recognition problems before they occur.
Troubleshooting Persistent Cartridge Errors
When your Epson printer refuses to recognize a compatible cartridge, persistent error messages can be frustrating. The good news is that most recognition errors stem from a few specific issues you can address yourself.
Start by checking your printer’s firmware version. Epson occasionally releases updates that affect how printers communicate with third-party cartridges. Visit your printer’s settings menu and look for firmware information. If a recent update occurred, this might explain the recognition problem.
Next, remove the cartridge completely and inspect the gold contact chip on its side. Wipe this chip gently with a clean, dry cloth. Sometimes dust or residue prevents proper electrical connection between the cartridge and printer. This simple step fixes many recognition errors.
Reinsert the cartridge slowly and deliberately. Listen for a distinct click sound. This click confirms the cartridge is fully seated in its slot. Partial insertion is a common cause of recognition failures.
If errors persist, try removing all cartridges and reinstalling them one at a time. This helps you identify which cartridge triggers the problem. Power off your printer between each installation and wait 30 seconds before powering back on.
Check your printer’s error log or display panel. Specific error codes can point to exact issues. Some codes indicate chip problems while others suggest connection issues.
Contact your printer’s support resources if recognition errors continue after these steps. Provide them with your exact error code and printer model number. They can determine if your printer requires a firmware adjustment or if hardware damage exists.
Remember that compatible cartridges work reliably when installed correctly. Most recognition issues resolve through proper installation and maintenance.
Final Thoughts
Fixing cartridge recognition problems does not need to be hard. Most issues come from small, simple causes.
Protective strips, wrong slots, and loose seating cause most errors. Once you spot these, fixes take just minutes.
Your Epson printer works best when you treat cartridges with care. Clean hands and proper storage go a long way.
Firmware updates sometimes block compatible cartridges without warning. Staying aware of this helps you respond quickly when problems appear.
Regular printing keeps your printer’s system active. This simple habit prevents many recognition issues before they start.
Cleaning your printer every month also matters. Dust and debris on contacts can block proper communication with cartridges.
If you follow the steps in this guide, you can solve most problems on your own. Removing, checking, and reinserting cartridges fixes many issues immediately.
Patience helps too. Rushing the reinsertion process often causes chips to misalign, leading to more errors.
Compatible cartridges work well when installed the right way. Recognition problems usually point to setup issues, not product defects.
Keep your printer’s slots clean and free from damage. A quick visual check now and then can prevent bigger headaches later.
Remember that firmware changes can shift how your printer reads cartridges. Checking for updates regularly helps you stay one step ahead.
With the right habits, your Epson printer should recognize compatible cartridges without much trouble. Careful handling and proper insertion make a real difference.
Printer issues can feel confusing at first. But with clear steps and consistent care, you can keep things running smoothly.
Your printer deserves a little attention. Simple maintenance now saves you time and frustration later.
Frequently Asked Questions
Why does my Epson printer show an error when I insert a compatible cartridge?
Your printer may display an error for several reasons. The most common cause is a protective strip still covering the chip on the cartridge. This strip blocks the electrical connection between your cartridge and printer. Remove it completely before installation. Another reason is improper seating. The cartridge must click firmly into its slot until you hear a sound. If it sits loosely, your printer cannot read it properly.
Can firmware updates prevent my printer from recognizing compatible cartridges?
Yes, firmware updates sometimes affect how your printer recognizes cartridges. Epson occasionally releases updates that add restrictions to third-party products. Check your printer’s settings menu to see your current firmware version. You can find this information in the device settings or maintenance section. If a recent update caused the problem, you may need to adjust your printer’s cartridge settings or contact support for guidance.
What should I do if my cartridge clicks into place but still shows an error?
First, remove the cartridge and inspect the gold contact chip on its side. Wipe it gently with a clean, dry cloth to remove dust or fingerprints. Next, check the cartridge slot inside your printer for debris or corrosion. Use a soft cloth to clean the slot carefully. Reinsert the cartridge slowly and press until it clicks. If the error persists, try removing all cartridges and reinstalling them one at a time to identify which one causes the problem.
Is it safe to use compatible cartridges in my Epson printer?
Compatible cartridges work safely in Epson printers when installed correctly. They function the same way as original cartridges. The key is proper installation and maintenance. Handle them with clean hands, store them upright in their boxes, and print regularly to keep your system active. Most recognition issues stem from installation mistakes, not cartridge quality.

I’m the voice behind Device Dossier. As a printing technology enthusiast, I spend my time testing printers, comparing specs, and writing honest reviews to help you find the perfect printing solution. When I’m not geeking out over print quality and page yields, you’ll find me exploring the latest in tech.