How to Bypass HP Instant Ink Cartridge Errors?
Does your HP printer show a cartridge error even with a fresh ink cartridge inside? You are not alone. This is one of the most common frustrations HP Instant Ink users face.
The good news is that most cartridge errors are easy to fix. You do not need to call support or buy new hardware right away.
In many cases, a simple removal and reinsertion process solves the problem instantly. This resets your printer and helps it recognize the cartridge again.
But there is a catch. Compatibility issues often cause these errors in the first place. If your cartridge number does not match your printer model, you will keep seeing the same warning.
This guide walks you through the exact steps to bypass HP Instant Ink cartridge errors safely. We will cover how to power cycle your printer correctly, remove and reinsert cartridges the right way, and verify compatibility before you do anything else.
We will also point out common mistakes that make errors worse, plus answer the questions people ask most about this issue. By the end, you will know exactly how to get your printer working again.
In a Nutshell
Fixing an HP Instant Ink cartridge error does not need to be complicated. Here is a quick recap of the whole process:
-
Power off first. Turn off your printer using the power button. Then unplug it from the wall for a clean reset.
-
Remove the cartridges gently. Take out each cartridge and check it for damage or dirt on the contacts.
-
Verify compatibility. Make sure every cartridge number matches your specific printer model. This step stops many false errors.
-
Reinsert with care. Place the cartridges back firmly. This simple action often resets the error state completely.
-
Avoid risky shortcuts. Skip unofficial tricks like transferring ink between cartridges. These methods can damage your printer permanently.
-
Power cycle again if needed. If the error stays, repeat the shutdown and restart steps once more.
Following this order helps you fix errors safely. It also protects your printer from unnecessary damage. Most users see results within minutes using just these steps.
Understanding HP Instant Ink Cartridge Errors
HP Instant Ink cartridge errors happen when your printer cannot recognize or communicate with the ink cartridges inside it. These errors appear as warning messages on your printer’s display screen or computer.
The most common cause is a loose connection between the cartridge and the printer. Cartridges sit in slots that read data from small metal contacts. When dust, dried ink, or debris builds up on these contacts, the printer fails to recognize the cartridge. Your printer then displays an error code instead of working normally.
Another frequent reason is cartridge incompatibility. Each HP printer model accepts specific cartridge numbers. If you insert a cartridge designed for a different printer model, your machine will reject it and show an error. This is a safety feature HP built in to prevent damage.
Sometimes the error appears even with a brand new cartridge. This happens because the cartridge’s recognition chip needs to be reset. The printer’s memory still holds information from the old cartridge, and it cannot immediately switch to the new one.
Firmware glitches also trigger false errors. Your printer’s internal software occasionally gets confused about cartridge status, especially after power interruptions or if the printer has been idle for weeks.
Age and wear affect cartridge recognition too. As cartridges age, the metal contacts can oxidize or corrode slightly. This reduces the electrical connection quality between the cartridge and printer.
Understanding these causes helps you troubleshoot effectively. Most errors stem from simple connection issues rather than broken hardware. This is good news because connection problems are easy to fix with basic cleaning and reinsertion steps. Knowing what causes the error also helps you avoid making mistakes during the fixing process.
Why Cartridge Compatibility Matters Before Troubleshooting
Cartridge compatibility is the foundation of every successful troubleshooting attempt. When your HP printer shows an error, the first question to ask is whether the cartridge actually works with your specific printer model. Many errors stem from incompatible cartridges, not from broken hardware or software problems.
Each HP printer model accepts only certain cartridge numbers. Using the wrong cartridge number triggers error messages that look identical to genuine hardware failures. This confusion leads people down the wrong troubleshooting path. They waste time on power cycles and reinsertion attempts when the real issue is incompatibility.
Finding your printer model is simple. Check the sticker on your printer’s back or bottom panel. Write down the exact model number. Then compare it against the cartridge packaging or the cartridge itself. The cartridge number should appear on both the box and the physical cartridge. If these numbers do not match your printer model, you have found your problem.
Compatibility verification prevents wasted effort. You avoid repeating unnecessary steps if you know upfront that your cartridge cannot work in your printer. This saves time and frustration. It also helps you decide whether to purchase a different cartridge or troubleshoot other causes.
Incompatible cartridges sometimes install physically, which confuses users. The cartridge fits into the slot and seems to seat properly. Yet the printer still displays an error. This happens because the printer’s firmware recognizes that the cartridge model does not belong in that specific machine.
Before you remove and reinsert cartridges, before you power cycle your printer, take two minutes to verify compatibility. Pull out your printer’s model number and your cartridge number. Compare them carefully. This single step determines whether your error is fixable through basic troubleshooting or whether you need a different cartridge entirely. Skipping this check wastes your time and delays your solution.
Step-by-Step: Removing and Reinserting Your Cartridges
Removing and reinserting your cartridges is often the fastest way to fix HP Instant Ink errors. This simple process resets the connection between your printer and the ink cartridges, which frequently resolves recognition problems.
Start by powering off your printer completely using the power button on the device. Wait a few seconds after the lights go dark. Next, unplug the printer from the electrical outlet and wait another 30 seconds. This full power down is essential because it clears the printer’s memory and prepares it for a fresh cartridge detection.
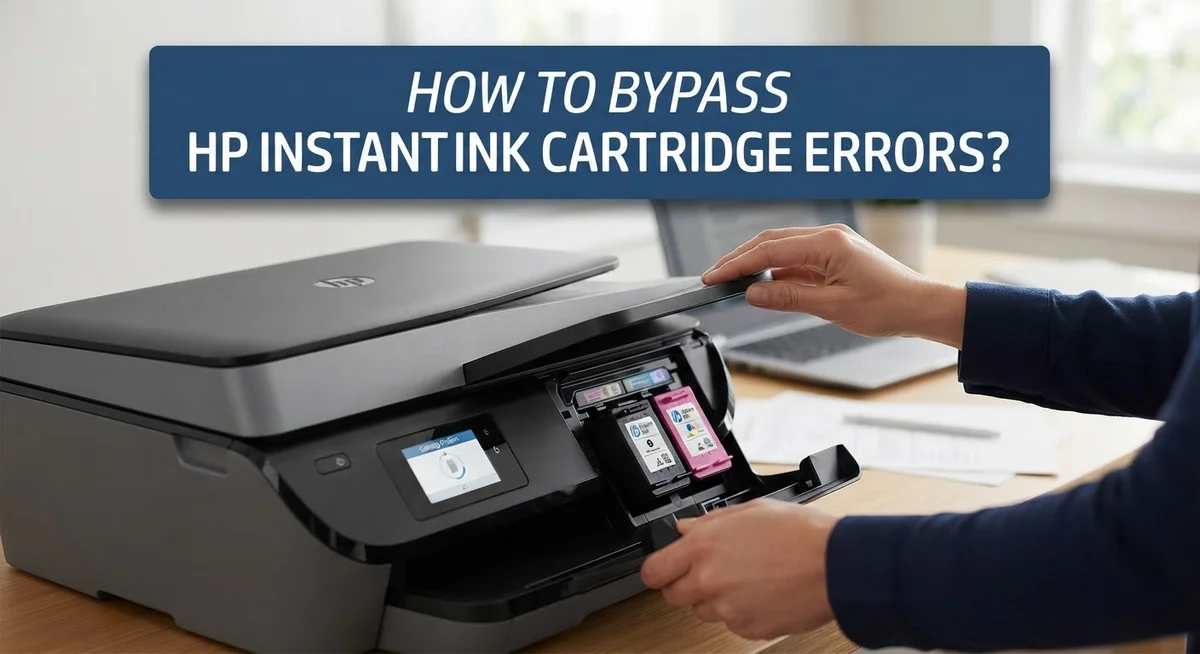
Open your printer’s cartridge access door or panel. Most HP printers have a lever or button that releases this door. Remove each cartridge slowly and carefully. Hold the cartridge by its sides, never by the print head or ink nozzles at the bottom. Place the cartridges on a clean, dry surface.
Examine each cartridge for visible damage or dirt on the metal contact points. If you see dust or debris, gently wipe the contacts with a soft, dry cloth. Do not use water or cleaning liquids on these parts.
Before reinserting, double check that each cartridge number matches your printer model. You can find your model number in the printer’s settings menu or on the device itself. Cartridge packaging always displays compatible printer models.
Reinsert each cartridge firmly into its slot. You should hear or feel a click when the cartridge seats properly. Close the cartridge access door completely. Plug the printer back into the power outlet and press the power button to restart.
Allow the printer 30 to 60 seconds to complete its startup sequence. The printer will perform an automatic cartridge detection scan. If the error disappears, your problem is solved. If the error remains after this process, the issue likely points to incompatibility or a deeper printer problem requiring additional troubleshooting steps.
Power Cycling Your Printer Correctly
Power cycling your printer correctly is one of the most effective ways to reset cartridge errors. This process clears temporary glitches that prevent your printer from recognizing the cartridges properly.
Start by pressing the power button on your printer to turn it off. Wait for all lights to stop blinking. This ensures the printer has fully shut down and is not in sleep mode.
Next, unplug the power cable from the back of your printer. Leave it disconnected for at least 30 seconds. This waiting period allows the printer’s internal memory to clear completely. During this time, any temporary error states stored in the system will reset.
While the printer is unplugged, open the cartridge access door. Remove each cartridge from its slot one at a time. Check the metal contact points on the bottom of each cartridge for dust or dried ink. Gently wipe these contacts with a lint free cloth if needed.
Verify that each cartridge number matches your printer model before reinserting. This step prevents you from installing incompatible cartridges that would trigger new errors. Your printer’s manual lists the correct cartridge numbers.
Reinsert each cartridge firmly into its slot until you hear a click. Close the cartridge access door completely. Plug the power cable back into your printer.
Press the power button to turn your printer on. Allow the printer 60 to 90 seconds to complete its startup sequence. During this time, your printer recognizes the cartridges fresh and resets its error log.
The printer may display a brief message during startup. This is normal behavior. Once the startup sequence finishes, your cartridge error should be resolved.
If the error persists after power cycling, the cartridges may be incompatible or defective. Repeat the entire process once more before moving to other troubleshooting methods.
Helpful Tips for Preventing Future Cartridge Errors
Preventing future cartridge errors starts with understanding what causes them in the first place. Most errors stem from incompatible cartridges, dirty contact points, or recognition failures. By taking simple steps now, you can avoid frustration later.
Keep your cartridge contacts clean at all times. Dust and debris accumulate on the metal contact points where cartridges connect to your printer. Use a soft, lint free cloth to gently wipe these contacts every few months. Clean contacts ensure proper communication between your printer and cartridges.
Store cartridges in a cool, dry place when not in use. Heat and humidity damage cartridge components and trigger error messages. Keep cartridges in their original packaging until you need them. This protects the delicate electronics inside.
Document your printer model number and compatible cartridge numbers. Write this information down or save it in your phone. When you need to purchase new cartridges, you can verify compatibility instantly. This simple step prevents you from buying the wrong cartridges.
Check cartridge levels regularly through your printer’s settings menu. Low cartridge warnings often precede error messages. Replace cartridges before they run completely empty. Empty cartridges sometimes fail to reset properly after reinsertion.
Handle cartridges with care during installation. Insert them slowly and firmly until you hear or feel a click. Rough handling damages the internal mechanisms that communicate with your printer.
Power cycle your printer once monthly as preventive maintenance. This resets the cartridge recognition system and clears minor errors before they become serious problems. Simply turn off your printer, unplug it for 30 seconds, and plug it back in.
Keep your printer firmware updated when possible. Updates often include fixes for cartridge recognition issues. Check your printer manufacturer’s support page periodically for available updates.
These preventive steps reduce cartridge errors significantly. You’ll spend less time troubleshooting and more time printing.
Common Mistakes That Trigger False Cartridge Errors
Many people make simple mistakes that cause their printers to display cartridge errors. Understanding these errors helps you fix them faster.
Using the wrong cartridge numbers is the most common mistake. Your printer model only works with specific cartridge numbers. If you install a cartridge designed for a different printer, your device won’t recognize it. The printer then shows an error message, even though the cartridge works fine in other machines. Always check your printer’s manual or the device itself to find the correct cartridge numbers before you buy or install anything.
Skipping the compatibility verification step causes unnecessary frustration. Many people remove a cartridge, see it looks fine, and put it right back without checking if it matches their printer model. This wastes time because the error will return. Take 30 seconds to verify the numbers match before reinserting.
Not fully powering down your printer before removing cartridges triggers false errors. Some people turn off the printer but leave it plugged in. The device stays in a partial power state and doesn’t properly reset. Always unplug your printer completely from the wall outlet. Wait a few seconds before you open the cartridge door.
Rushing the reinsertion process also creates problems. You must push each cartridge firmly until you hear a click. A loose cartridge won’t connect properly to the printer’s sensors, and an error appears. Take your time and make sure each cartridge sits completely in its slot.
Ignoring dirty metal contacts on cartridges causes recognition failures. Dust or residue on the contact points prevents proper communication between the cartridge and printer. Gently wipe these metal areas with a clean, dry cloth before reinstalling.
These mistakes are easy to avoid once you know about them.
Risks of Unofficial Workarounds and DIY Fixes
Using unofficial workarounds to fix cartridge errors carries serious risks. Many DIY fixes circulating online can damage your printer permanently. These shortcuts might seem quick, but they often create bigger problems.
One common workaround involves transferring ink between cartridges using cotton balls or similar materials. This method lacks official support from the manufacturer. The process can introduce contaminants into your printer’s internal systems. Ink residue may clog the print heads or damage sensitive electronic components.
Another risky approach involves modifying cartridge chips or contacts with external tools. People attempt this hoping to reset error codes manually. This tampering can short circuit the cartridge’s electronic components. Your printer may stop recognizing genuine cartridges afterward, even after you remove the modified ones.
Some users try to bypass error messages by ignoring them and printing anyway. This forces your printer to operate with faulty cartridges. The printer may spray ink incorrectly inside the machine. Paper jams become more likely, and internal damage accumulates quickly.
The financial impact matters too. Unofficial fixes often void your warranty coverage. If your printer breaks from a DIY workaround, you’ll pay full repair costs. Professional repairs for internal damage typically cost more than replacing the cartridge itself.
Downloading unverified software or firmware patches poses another danger. These files may contain malware or corrupt your printer’s operating system. Your device could become completely non functional after installation.
The safest approach always involves official troubleshooting methods. Power cycling your printer resets cartridge errors without any risk. Verifying cartridge compatibility takes just minutes. Contacting manufacturer support provides guidance specific to your situation.
Protecting your printer investment means avoiding shortcuts. Official solutions work reliably and maintain your warranty protection. Taking time for proper troubleshooting prevents expensive damage later.
Final Thoughts
Fixing HP Instant Ink cartridge errors does not need to be hard. Most problems disappear once you remove the cartridge and put it back correctly. This simple action resets the printer’s recognition system.
Always check your cartridge numbers first. This single step prevents most false error messages. Your printer model determines which cartridges will work properly.
Power cycling remains your best friend during troubleshooting. Turn off the printer completely. Unplug it from the wall. Wait a few moments before restarting.
Skipping steps often leads to repeated errors. Take your time during each stage of the process. Rushing creates more problems than it solves.
Official methods protect your printer and your warranty. They also save you time in the long run. Unofficial shortcuts might seem faster but often backfire.
Cartridge errors can feel frustrating when you need to print something quickly. Staying calm helps you think through the steps clearly. Most issues get fixed within a few minutes.
Keep this guide handy for future reference. Printer errors tend to happen again over time. Having a clear process ready saves you stress later.
Remember that compatibility checks matter more than people realize. Many errors trace back to mismatched cartridge numbers. Double checking this detail saves you extra troubleshooting steps.
Your printer works best when you follow proper procedures. Simple actions like clean removal and careful reinsertion go a long way. These small habits prevent bigger headaches down the road.
Trust the basic steps before trying anything complicated. HP designed these procedures for a reason. They work for most common cartridge error situations.
Printing should feel simple and stress free. With the right approach, cartridge errors become a minor inconvenience rather than a major problem. Stick to proven methods and your printer will serve you well for years to come.
Frequently Asked Questions
Why does my printer show a cartridge error when the cartridge is new?
New cartridges sometimes trigger errors due to compatibility issues. Your printer model requires specific cartridge numbers. If you installed the wrong cartridge type, your printer won’t recognize it. Always verify the cartridge numbers match your printer model before installation.
Another reason involves the protective tape. New cartridges have a plastic seal that must be removed completely. If part of the tape remains, your printer can’t read the cartridge properly. Check that all packaging materials are gone before inserting the cartridge.
Does removing and reinserting the cartridge actually fix the error?
Yes, this simple step works surprisingly well. When you remove and reinsert a cartridge, you reset the printer’s cartridge recognition system. This action clears temporary errors that occur during normal use.
The process works best when combined with a full power cycle. Turn off your printer completely, wait 30 seconds, then power it back on. This gives your printer time to refresh its memory and recognize the cartridge fresh.
What should I check before trying any troubleshooting steps?
Verify cartridge compatibility first. Look at your printer’s model number and compare it to the cartridge numbers. Incompatible cartridges cause false error messages that no troubleshooting step will fix.
Inspect the cartridge’s metal contacts for dirt or dust. Clean contacts help your printer recognize the cartridge correctly. Use a soft, dry cloth to gently wipe the metal areas.
Can I bypass cartridge errors by ignoring the warning messages?
No, ignoring error messages creates bigger problems. Your printer displays these warnings for safety reasons. Attempting to print with a cartridge error can damage your printer’s internal components or void your warranty coverage.
Address the error properly using official troubleshooting methods instead.

I’m the voice behind Device Dossier. As a printing technology enthusiast, I spend my time testing printers, comparing specs, and writing honest reviews to help you find the perfect printing solution. When I’m not geeking out over print quality and page yields, you’ll find me exploring the latest in tech.