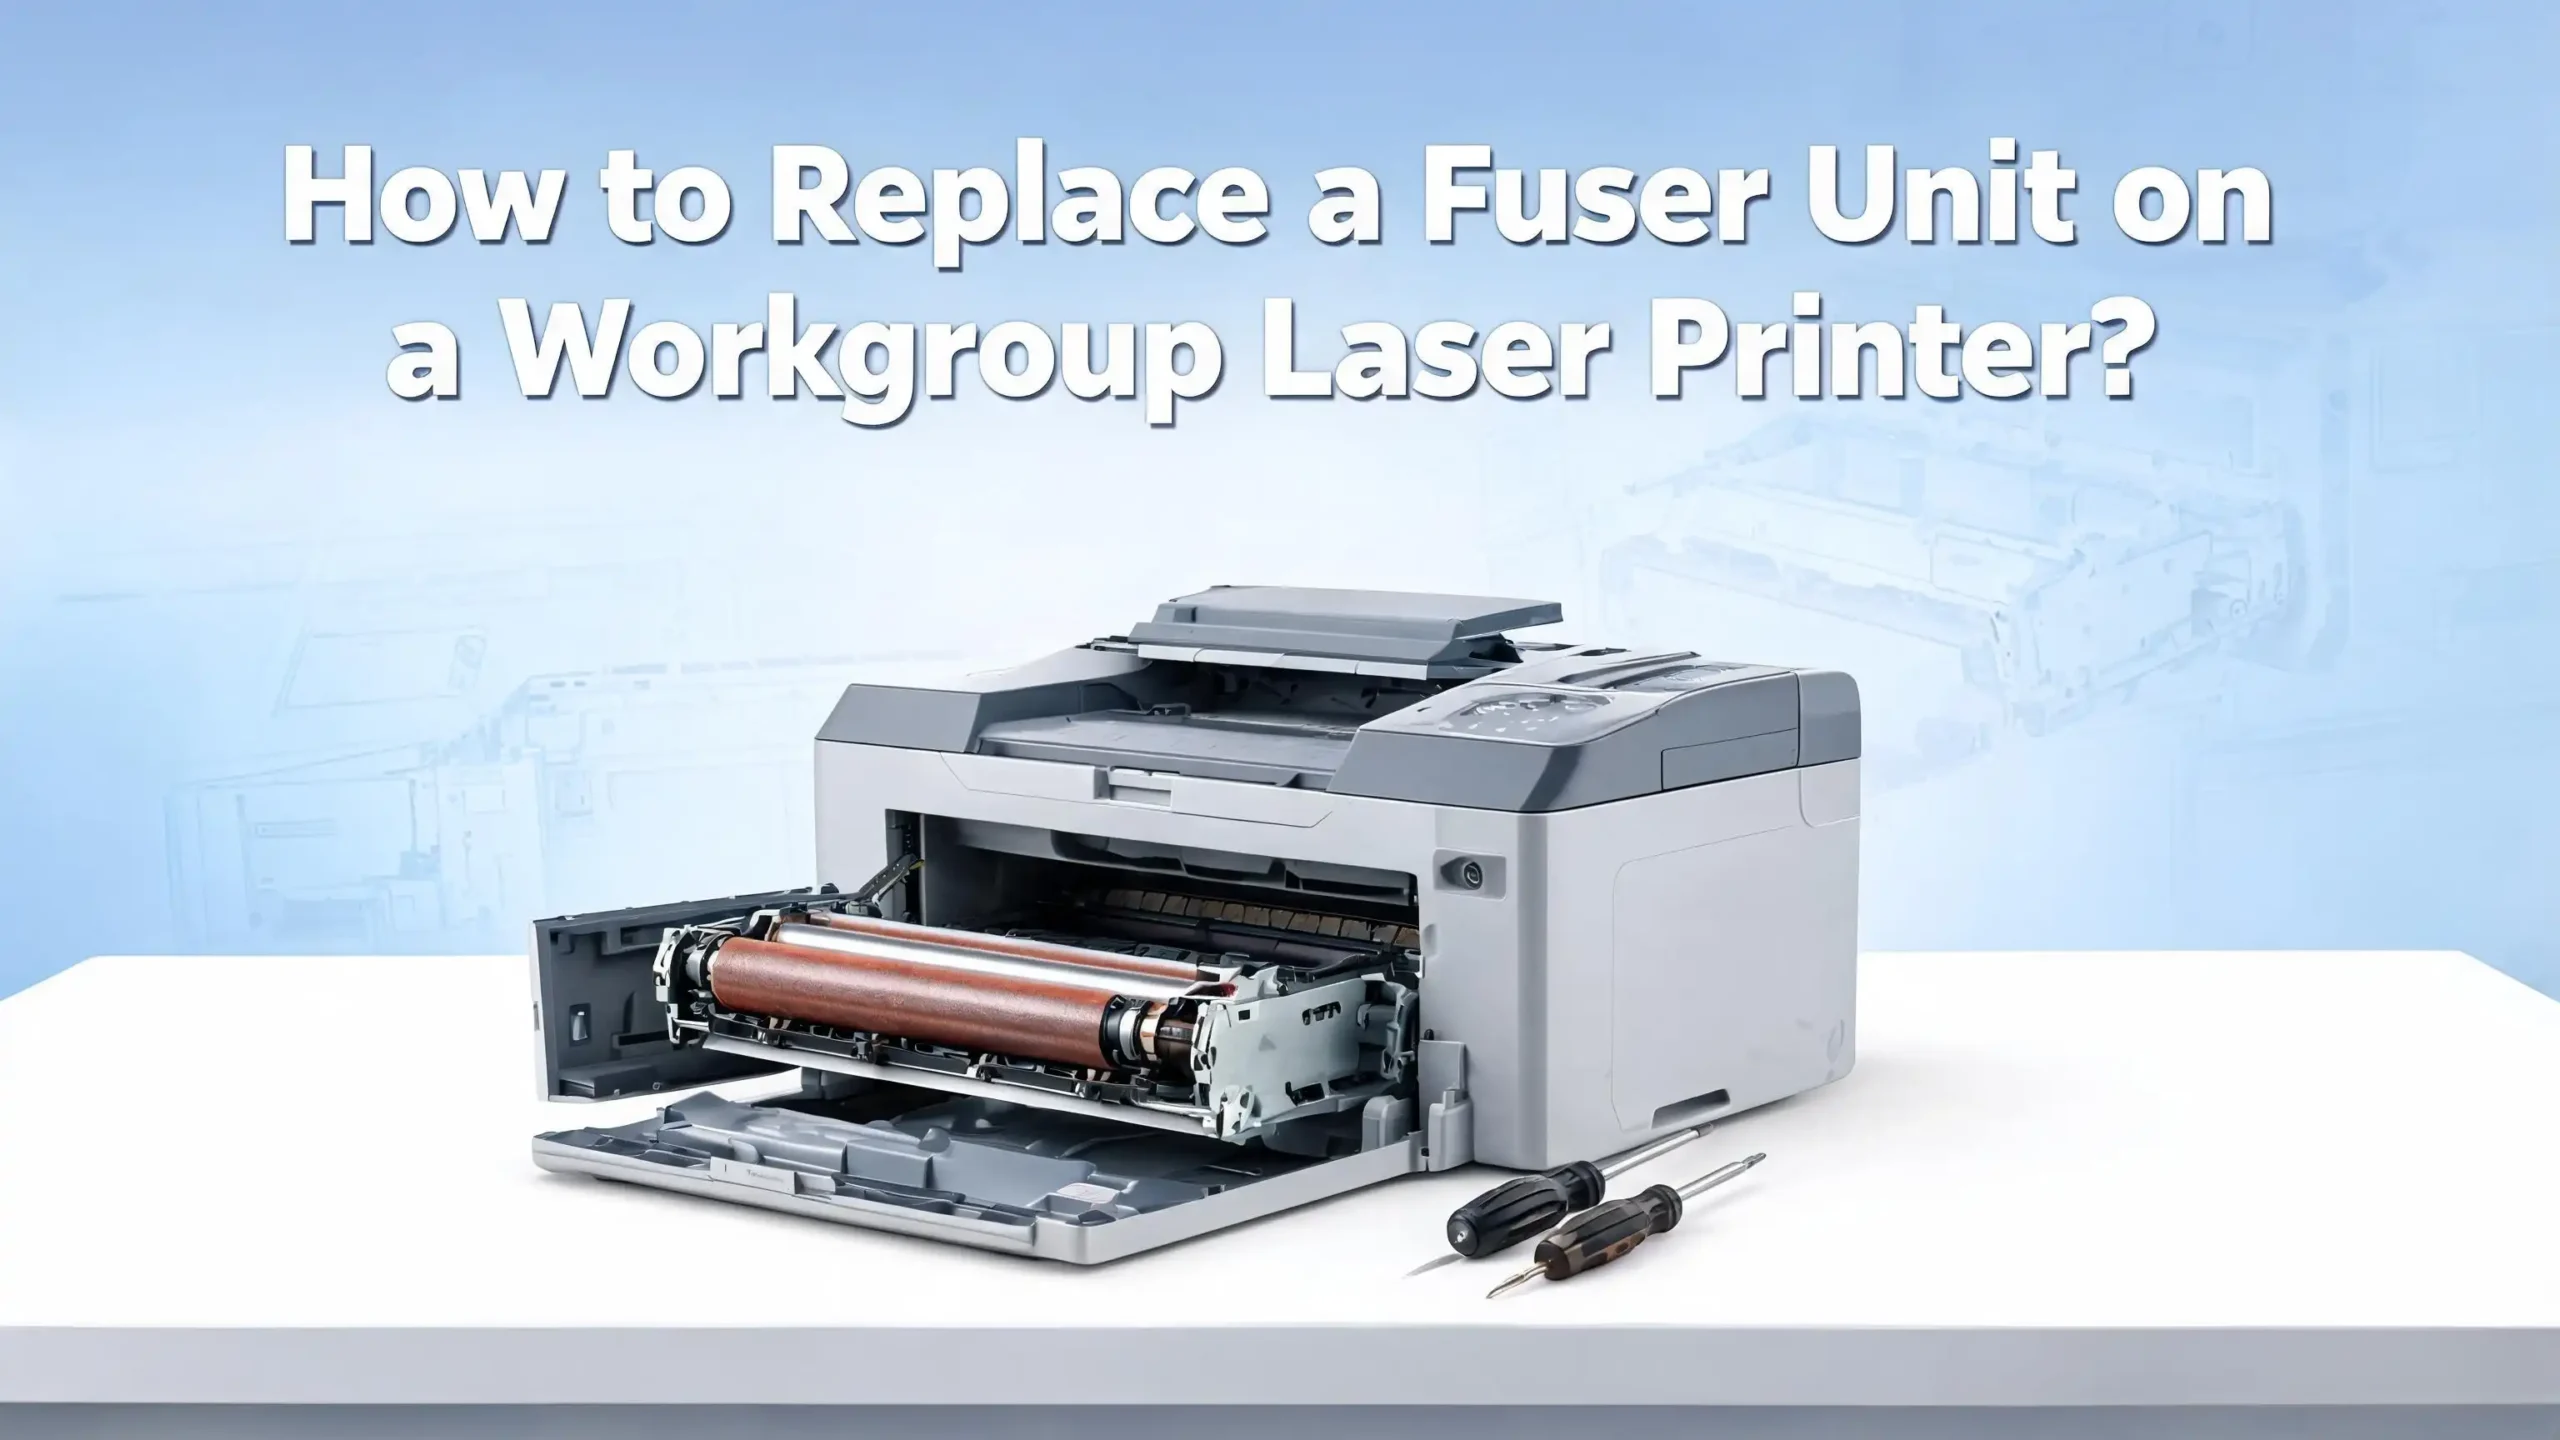
How to Replace a Fuser Unit on a Workgroup Laser Printer?
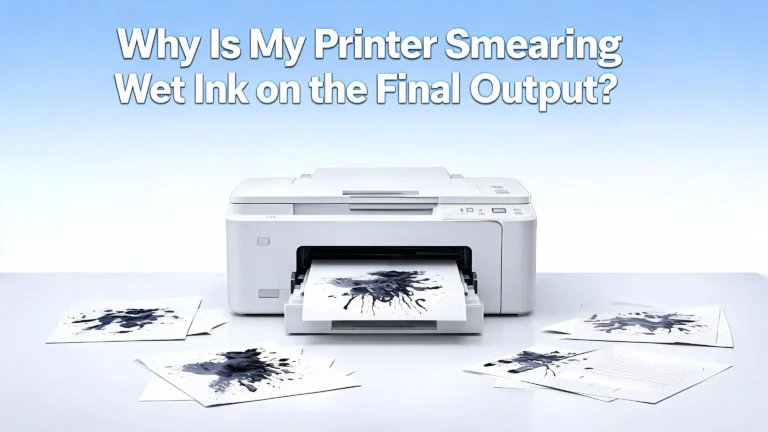
Your workgroup laser printer just produced another page covered in smudges, streaks, and toner that rubs right off the paper. You have already replaced the toner cartridge, cleaned the drum, and even run a few test pages.
The fuser is the component inside every laser printer that uses heat and pressure to permanently bond toner powder onto paper. Over time, the rollers wear down, the heating element loses efficiency, and print quality drops fast. In a busy office environment where a workgroup printer handles thousands of pages every week, fuser wear happens even faster.
The good news? You do not need to call a technician or buy a new printer. With the right replacement part and about 20 to 30 minutes, you can swap the fuser yourself and restore your printer to full performance. This guide walks you through every step, from spotting the warning signs to running your first clean test page after installation.
Key Takeaways
- A fuser unit bonds toner to paper using heat and pressure. It is one of the most critical components inside your workgroup laser printer. Without a working fuser, toner sits loosely on the page and smudges at the slightest touch.
- Fusers have a limited lifespan of 75,000 to 300,000 pages depending on your printer model and how heavily you use it. Office printers that handle high daily volumes reach this limit faster and need more frequent replacement.
- Common signs of a failing fuser include smudged prints, paper jams near the rear output area, ghosting or repeated images, wrinkling, and error messages on the printer display that say “Replace Fuser” or show a 50.X service code.
- You can replace the fuser yourself in about 20 to 30 minutes with no special tools. Most workgroup laser printers from HP, Brother, Lexmark, and Xerox design the fuser as a user replaceable part that slides in and out of a rear compartment.
- Always let the printer cool down for at least 30 minutes before touching the fuser. The internal temperature can reach 200°C during operation, and handling it too soon can cause serious burns.
- After installing a new fuser, you should reset the fuser page counter on your printer. This ensures accurate tracking of the new unit’s lifespan and prevents false replacement warnings in the future.
What Is a Fuser Unit and Why Does Your Printer Need One
A fuser unit is the assembly inside a laser printer that applies heat and pressure to bond toner particles permanently onto paper. It sits near the rear of the printer, and every sheet of paper passes through it during the final stage of the printing process.
The fuser contains two main parts. The upper roller (or fuser film sleeve) generates heat, reaching temperatures around 180°C to 200°C. The lower roller, called the pressure roller, pushes the paper firmly against the heated surface. Together, they melt the toner powder into the paper fibers, creating a durable, smudge free image.
Without a functioning fuser, toner would simply sit on top of the paper as a loose powder. You could wipe it off with your finger. Every laser printer depends on this component for final output quality.
In workgroup laser printers that serve multiple users in an office, the fuser handles significantly higher page volumes than a personal desktop model. This increased demand accelerates wear on the rollers, bushings, and heating elements. That is why fuser replacement is one of the most common maintenance tasks for office printing equipment.
How the Fusing Process Works Inside a Laser Printer
Understanding the fusing process helps you appreciate why this component matters so much. The process happens in a fraction of a second, but it involves precise coordination between heat, pressure, and timing.
First, the printer’s imaging drum transfers toner particles onto the paper in the desired pattern. At this point, the toner is just sitting on the surface. The paper then moves into the fuser assembly, where the upper roller heats up and melts the toner.
Simultaneously, the pressure roller pushes the paper firmly against the heated surface. This combination of heat and force drives the melted toner deep into the paper fibers. As the paper exits the fuser and cools, the toner hardens and becomes a permanent part of the page.
The printer’s control board monitors the fuser temperature through small sensors called thermistors. These sensors ensure the rollers stay within the correct temperature range. If the temperature drops too low, toner will not bond properly. If it rises too high, the paper may curl, scorch, or jam.
This entire sequence repeats for every single page. In a workgroup environment printing hundreds or thousands of pages per day, the fuser goes through continuous heating cycles that gradually degrade the rollers, film sleeves, and internal gears.
Signs Your Fuser Unit Needs Replacement
Recognizing the warning signs early saves you from wasted paper, poor print quality, and potential damage to other printer components. Here are the most reliable indicators that your fuser has reached the end of its life.
Smudged or easily rubbed off toner is the clearest sign. If you can wipe toner off a freshly printed page with your finger, the fuser is not generating enough heat or pressure to bond the toner to the paper.
Ghosting or repeated images appear as faint duplicate images on the page. This happens when the fuser film sleeve develops wear marks that transfer residual toner onto subsequent pages.
Vertical lines or streaks running down the page often indicate a ripped or damaged fuser film sleeve. The damaged section cannot apply even heat, leaving visible marks on every print.
Wrinkled or creased pages result from uneven pressure or heat distribution. The paper may also curl excessively as it exits the printer. Frequent paper jams near the rear output suggest worn fuser gears, broken sensor flags, or deteriorated rollers that cannot grip and feed the paper smoothly.
Unusual noises from the rear of the printer also point to fuser problems. A humming sound indicates early gear wear. A grinding noise means the gears or drive assembly are significantly worn. A squeaking or chirping sound signals worn bushings or delivery rollers inside the fuser.
Finally, your printer may display a “Replace Fuser” message or a 50.X error code on the control panel. These alerts mean the printer has detected a fuser malfunction or that the fuser has reached its rated page count.
How Long Does a Fuser Unit Last in a Workgroup Printer
Fuser lifespan varies by printer model, usage volume, and the type of media you print on. Most manufacturers rate their fusers between 75,000 and 300,000 pages. Entry level workgroup printers fall on the lower end of that range, while high volume enterprise models last longer.
Several factors shorten fuser life. Heavy daily print volume is the most obvious one. A workgroup printer handling 2,000 pages per day will burn through a fuser much faster than one printing 200 pages per day.
Paper weight and type also matter. Thick cardstock, labels, and envelopes require higher fuser temperatures to bond toner properly. Running these media types frequently forces the fuser to operate at elevated temperatures, which accelerates roller and sleeve wear.
Environmental conditions play a role too. High humidity in the office weakens toner bonding and forces the fuser to work harder. Poor ventilation around the printer causes heat to build up, stressing internal components.
You can check your fuser’s remaining life from the printer’s control panel. Most workgroup printers let you print a supplies status page or access the information through the settings menu. Look for a “Fuser Life” or “Maintenance Kit” percentage. Once it drops below 10%, plan your replacement soon.
Tools and Supplies You Need Before Starting
One of the best things about replacing a fuser unit on a workgroup laser printer is that most models require no special tools. The fuser is designed as a user replaceable component, and manufacturers build the removal and installation process around simple hand operations.
Here is what you should have ready before you begin. A Phillips head screwdriver may be needed on some models to remove a side panel or protective cover. A flat head screwdriver or plastic spudger can help release stubborn clips.
You need the correct replacement fuser unit for your specific printer model. Every fuser is designed for a particular printer series with specific voltage, heat range, and physical dimensions. Check your printer’s model number and cross reference it with the fuser part number in your printer’s manual or on the manufacturer’s website.
Lint free cloths or paper towels are useful for cleaning any loose toner that may have accumulated in the fuser compartment. Compressed air can help blow dust and debris out of the printer’s interior.
An anti static wrist strap is optional but recommended. Static electricity can damage sensitive electronic components inside the printer. Working on an ESD safe surface adds another layer of protection.
Finally, have a clean, flat workspace with good lighting. You will be working with the printer’s rear panel open, and visibility matters for connecting cables and seating the fuser correctly.
Safety Precautions Before You Begin the Replacement
The fuser operates at extremely high temperatures, and skipping safety steps can lead to serious burns or electrical shock. Take these precautions seriously before you open the printer.
Turn off the printer completely using the power button, then unplug the power cord from the wall outlet. Do not rely on simply turning off the power button. Disconnecting the cord eliminates all electrical risk.
Wait at least 30 minutes for the fuser to cool down. During normal operation, the fuser rollers reach temperatures between 180°C and 200°C. Even after the printer powers off, the internal components retain significant heat for a long time.
Place the printer on a stable, flat surface where it will not tip or slide while you work. Workgroup laser printers can weigh 30 to 60 pounds, and shifting weight during disassembly can cause the printer to fall.
Avoid touching the fuser rollers or film sleeve on the new unit. Oils from your skin can create hot spots on the roller surface, leading to print defects on the new fuser. Handle the replacement unit by its frame or plastic handles only.
If your workspace has carpet, use an anti static mat or touch a grounded metal surface before handling internal components. Static discharge can damage the printer’s control board.
Step by Step Guide to Removing the Old Fuser Unit
Now that you have your tools ready and the printer has cooled down, follow these steps to safely remove the old fuser. While the exact process varies slightly between manufacturers, the overall approach is consistent across most workgroup laser printers from HP, Brother, Lexmark, and Xerox.
Step 1: Open the rear door or rear output bin of the printer. On most models, this panel swings down or lifts off entirely. Some printers have a rear cover that is secured with a single screw or plastic clips.
Step 2: If your printer has a duplex unit (automatic two sided printing accessory), remove it first. The duplexer typically slides out after pressing a release button or tab. Set it aside on a clean surface.
Step 3: Locate the fuser unit inside the rear compartment. It is a large rectangular assembly positioned horizontally across the paper path. Look for blue or green release levers on each side of the fuser. These color coded handles indicate user serviceable parts.
Step 4: Press or rotate the release levers to unlock the fuser from its mounting brackets. Some models use a locking tab that you push inward, while others use a lever you rotate upward.
Step 5: Gently slide the fuser straight out of the printer. If it has a cable connector, carefully disconnect it before fully removing the unit. Note which side the connector attaches to so you can replicate the connection with the new fuser.
Step 6: Place the old fuser on a flat surface and let it cool completely before disposal. Inspect the fuser compartment inside the printer for any loose toner, paper debris, or foreign objects. Clean the area with a lint free cloth or compressed air.
Step by Step Guide to Installing the New Fuser Unit
With the old fuser removed and the compartment clean, you are ready to install the replacement. This process is essentially the reverse of removal, but there are a few important details to get right.
Step 1: Remove the new fuser from its packaging. Take off all protective tape, orange shipping locks, and packing materials. Failing to remove these items is one of the most common installation mistakes and will cause immediate paper jams or error messages.
Step 2: Hold the new fuser by its plastic handles or frame. Do not touch the rollers, film sleeve, or any exposed surface. Fingerprints on the roller surface create defects on printed pages.
Step 3: Align the fuser with the mounting rails inside the printer. The unit should slide in smoothly along the guides. Do not force it. If you feel resistance, pull the fuser back out and check the alignment.
Step 4: Push the fuser firmly into position until it clicks or locks into place. Engage both release levers to secure the unit. You should hear or feel a definite click on each side.
Step 5: Reconnect any cable connectors that you disconnected during removal. Match the connector colors (white to white, blue to blue) and make sure each plug seats fully.
Step 6: Reinstall the duplex unit if your printer has one. Slide it back into position until it locks. Close the rear door or reattach the rear cover.
Step 7: Plug the power cord back into the wall outlet and turn the printer on. The printer will run an initialization cycle that heats the new fuser and calibrates it.
How to Reset the Fuser Page Counter After Installation
Most workgroup laser printers track fuser usage through a built in page counter. After installing a new fuser, you need to reset this counter to zero. If you skip this step, the printer will continue to display “Replace Fuser” warnings and may even reduce print speed or refuse to print.
The reset process differs by manufacturer. On HP printers, many models reset the fuser counter automatically during the initialization cycle after you install a new maintenance kit. If the message persists, access the printer’s service menu through the control panel and look for a “New Maintenance Kit” or “Reset Supplies” option.
On Brother printers, the process usually involves entering a service mode. Press and hold the Home button, then enter a specific code sequence (often *2864) to access the maintenance menu. Select the fuser option and press the reset button. Exit the menu and confirm the reset by checking the parts life display, which should now show 100% remaining.
On Xerox printers, press the Machine Status button, go to the Tools tab, select Troubleshooting, then Resets. Choose the fuser reset option and confirm. Lexmark printers typically display a reset prompt automatically after detecting a new fuser.
Check your printer’s user manual for the exact reset steps for your model. Running the printer without resetting the counter will not damage anything, but it will generate false alerts and prevent you from accurately tracking the new fuser’s actual remaining life.
Running a Test Print and Verifying Proper Installation
After the printer finishes its initialization cycle, you should verify that the new fuser is working correctly before sending large print jobs. This step catches installation errors early and gives you confidence in the repair.
Print a configuration page or test page from the printer’s control panel. Most workgroup printers have this option under the Reports or Information menu. The test page will show text, graphics, and solid fill areas that reveal any issues with toner bonding.
Examine the test page carefully. The toner should be firmly bonded to the paper. Try rubbing a solid black area with your finger. If no toner comes off, the fuser is heating and pressing correctly. Check for even coverage across the entire page with no streaks, ghosting, or faded areas.
Look for wrinkles or creases in the paper. If the page comes out wavy or curled, the fuser may not be seated properly. Turn off the printer, let it cool, and reseat the fuser by removing and reinstalling it.
Print a supplies status page to confirm the printer recognizes the new fuser and has reset the page counter. The fuser life should show a high percentage (90% to 100% depending on the model).
If everything checks out, your fuser replacement is complete. Send a few normal print jobs to confirm consistent quality across multiple pages and paper types.
Common Mistakes to Avoid During Fuser Replacement
Even though fuser replacement is straightforward, a few common errors can cause problems. Knowing what to watch for helps you get it right the first time.
Not letting the printer cool down is the most dangerous mistake. People in busy offices often try to rush the process and end up with burns on their hands from the hot rollers. Always wait a full 30 minutes, even if you are in a hurry.
Forgetting to remove all packing materials from the new fuser causes immediate jams. Shipping tape, foam inserts, and orange locking clips must all come off before installation. Check both ends and the roller area.
Touching the fuser rollers with bare hands leaves fingerprint oils that cause dark spots or streaks on prints. Always handle the fuser by its frame or the designated grip areas.
Installing the wrong fuser model can physically fit in some cases but will cause temperature errors, paper jams, or damage. Double check the part number against your specific printer model before ordering.
Skipping the counter reset leads to ongoing “Replace Fuser” messages and inaccurate supply tracking. Take the extra two minutes to reset the counter through your printer’s control panel or service menu.
Forcing the fuser into the slot when it does not align properly can bend mounting brackets or break locking tabs. If the fuser does not slide in smoothly, remove it and try again with careful alignment.
Fuser Replacement Cost and When to Replace the Whole Printer
Replacement fusers for workgroup laser printers typically cost between $100 and $400 depending on the printer model and the type of fuser (standard vs. maintenance kit). Maintenance kits, which include the fuser along with pickup rollers and separation pads, cost slightly more but address multiple wear items at once.
The cost of professional installation usually ranges from $50 to $150 if you hire a technician. Since you can do the replacement yourself in under 30 minutes, doing it at home or in the office saves that labor fee entirely.
Compare the fuser cost against the price of a new printer. If your workgroup laser printer is less than five years old and in otherwise good condition, replacing the fuser is almost always the smarter financial choice. A $200 fuser extends the life of a printer that originally cost $800 to $2,000.
However, if your printer is over seven years old, has multiple worn components beyond the fuser, and replacement parts are becoming difficult to source, it may be time to consider a new machine. Look at the total cost of upcoming maintenance against the price of a comparable new model.
As a general rule, if the repair cost exceeds 50% of the replacement cost of the printer, buying new makes more sense. But for most workgroup printers in their prime service years, a fuser swap is one of the best return on investment maintenance tasks you can perform.
Preventive Maintenance Tips to Extend Fuser Life
Replacing a fuser is easy, but making it last longer saves you money and downtime. These practical tips help you get the most pages out of every fuser unit.
Use the correct paper weight setting on your printer. If you frequently print on thick stock or labels, adjust the printer’s media type setting. This tells the fuser to increase temperature appropriately rather than running hot by default.
Keep the printer in a well ventilated area. Printers generate significant heat during long print runs. Placing the printer in a cramped corner or enclosed cabinet traps heat and shortens fuser life. Leave at least six inches of clearance on all sides.
Control humidity in the printing environment. High moisture levels weaken toner bonding and force the fuser to compensate with higher temperatures. Aim for a room humidity level between 30% and 60%.
Clean the printer’s interior every time you replace toner cartridges. Remove loose toner particles and paper dust from the paper path and fuser area. Built up debris can scratch rollers and reduce heating efficiency.
Use quality toner cartridges that are compatible with your printer model. Low grade toner with inconsistent melting points forces the fuser to work harder and wears it out faster.
Install firmware updates from your printer’s manufacturer. These updates sometimes include improvements to fuser temperature management and power regulation that can extend the life of your fuser.
Frequently Asked Questions
Can I replace the fuser unit myself or do I need a technician?
Yes, you can replace the fuser yourself. Most workgroup laser printers design the fuser as a user replaceable component. The process takes about 20 to 30 minutes and requires no special tools. The fuser slides in and out of the printer’s rear compartment using color coded release levers. As long as you follow basic safety steps like letting the printer cool down and unplugging the power cord, this is a safe and straightforward repair for anyone comfortable with basic hardware tasks.
How do I know which fuser is compatible with my printer?
Check your printer’s model number on the front panel or on a label inside the toner compartment. Cross reference that model number with the fuser part number listed in your printer’s user manual or on the manufacturer’s support website. Every fuser is built for a specific printer series with matching voltage, temperature range, and physical dimensions. Using the wrong fuser can cause errors or damage.
Will replacing the fuser fix paper jams?
It depends on the cause of the jam. If paper jams occur near the rear output area and are accompanied by wrinkled or creased pages, a worn fuser is the likely culprit. Damaged fuser gears, worn sensor flags, or deteriorated pressure rollers can all cause paper to misfeed in that area. Replacing the fuser resolves these specific types of jams. However, jams caused by worn pickup rollers in the paper tray require separate attention.
What does a 50.X error code mean on my printer?
A 50.X error code is a fuser related error on HP laser printers. The number after 50 identifies the specific issue. For example, 50.2 indicates a fuser warm up failure, meaning the printer cannot reach the correct temperature in the expected time. The code 50.3 signals overheating, and 50.4 points to a high temperature sensor fault. In most cases, reinstalling or replacing the fuser resolves these errors.
How often should I replace the fuser on a busy office printer?
In a workgroup environment handling 2,000 to 5,000 pages per day, you may need to replace the fuser every 6 to 18 months. The exact interval depends on your printer model’s rated fuser life (typically 75,000 to 300,000 pages) and your daily print volume. Monitor the fuser life percentage on your printer’s supplies status page and plan the replacement before it drops below 10%.
Can I clean a fuser instead of replacing it?
Cleaning the fuser can temporarily improve print quality by removing surface debris from the rollers. However, cleaning cannot fix internal mechanical wear, damaged film sleeves, cracked rollers, or worn gears. If your fuser has reached its rated page count or is displaying error codes, replacement is the only reliable solution. Cleaning works best as a preventive step during routine maintenance, not as a substitute for replacement.
I’m the voice behind Device Dossier. As a printing technology enthusiast, I spend my time testing printers, comparing specs, and writing honest reviews to help you find the perfect printing solution. When I’m not geeking out over print quality and page yields, you’ll find me exploring the latest in tech.