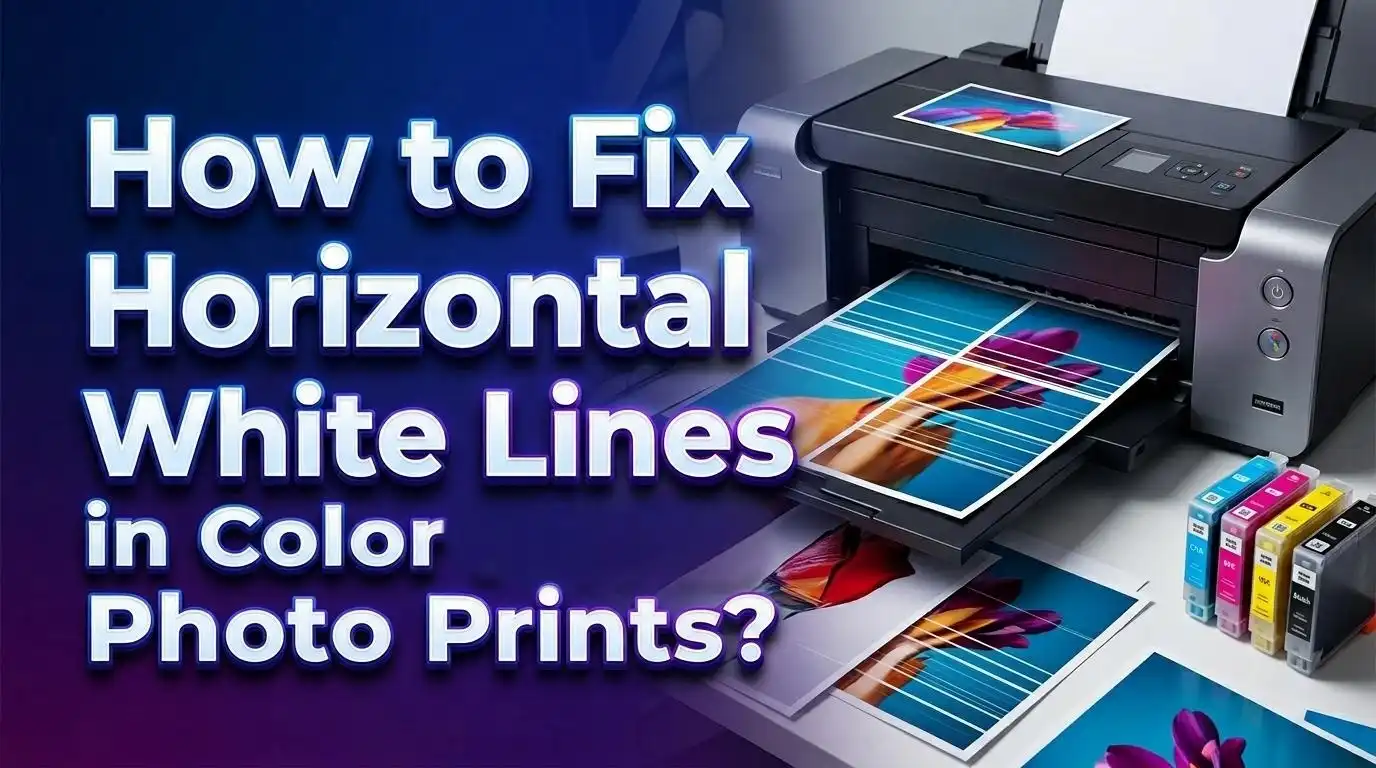
How to Fix Horizontal White Lines in Color Photo Prints?
A photo print should look smooth, rich, and clean. So it feels frustrating when thin white lines run across the image and ruin skin tones, skies, and dark areas. The good news is that this problem is usually fixable at home.
In most cases, horizontal white lines come from clogged nozzles, poor print alignment, wrong paper settings, low ink flow, or dirty parts inside the printer. Sometimes the issue is small and goes away after one maintenance step.
This guide gives you simple steps that help you find the real cause and fix it. You will learn what to test first, what to avoid, and how to stop the lines from coming back.
Key Takeaways
- Start with a test, not a guess. Print a nozzle check, print quality report, or internal test page before changing anything. This step shows whether the problem comes from clogged nozzles, weak color flow, or a printer hardware issue.
- Inkjet printers usually cause this problem through clogged print head nozzles. If one color does not spray evenly, the printer leaves tiny blank gaps. Those gaps show up as horizontal white lines across photos. A cleaning cycle often helps, but too many cleaning cycles waste ink.
- Wrong settings can create lines even when the printer is healthy. Fast print mode, poor paper choice, low quality mode, and the wrong media setting can all cause banding. A simple settings change can fix the issue with no repair at all.
- Alignment matters more than many people think. If the print head is slightly out of position, the ink dots do not land where they should. That creates visible stripes in areas with soft color, like blue skies or skin tones. Alignment is one of the safest fixes to try.
- Cleaning helps, but only the right cleaning helps. Software cleaning is the first step. Manual cleaning is for stubborn problems and should be done gently. Rough cleaning can damage sensitive parts.
- If the lines stay after cleaning, alignment, and setting changes, check supplies and hardware. Low ink, old cartridges, damaged drums, dirty rollers, paper dust, and worn parts can all create the same symptom. At that point, a deeper clean or a part replacement may be the real answer.
What Horizontal White Lines Usually Mean
Horizontal white lines in color photo prints usually point to a break in ink or toner coverage. The printer is trying to place color across the page, but small parts of that color path are missing. That missing color creates thin pale gaps that your eye sees as lines.
On an inkjet printer, the most common cause is a partially clogged print head nozzle. A print head sprays tiny drops of ink in rows. If a few nozzles are blocked, the printer cannot lay down a full pass of color. That gap becomes a white line or light band. This is why the problem often shows up in photos before it appears in plain text.
On a laser printer, the issue can come from the drum, transfer system, toner flow, or dirt on internal parts. That is less common for home photo printing, but it still happens. If you see very even repeated lines, a rotating part may be involved.
Another common cause is simple misalignment. The printer may still spray ink, but the dots land slightly off target. That creates banding that looks like white or faded lines across a smooth image.
Pros of identifying the symptom first
- You save time.
- You avoid random fixes.
- You waste less ink and paper.
Cons of skipping this step
- You may clean the printer when settings are the real problem.
- You may replace ink too soon.
- You may miss a hardware fault.
Think of the lines as a clue. They are not the problem by themselves. They are the visible sign of a print path that has broken somewhere.
Identify Your Printer Type Before You Try Any Fix
Before you start maintenance, confirm whether you have an inkjet printer or a laser printer. This step matters because the repair path is different. Many people waste time using the wrong method on the wrong machine.
If you print glossy or semi gloss photos at home, you probably use an inkjet printer. Inkjet models are more likely to show horizontal white lines from clogged nozzles, dried ink, or alignment issues. These printers also have built in cleaning tools that are meant for this exact problem.
If your printer uses toner cartridges and is mostly used for office documents, it may be a laser printer. Laser printers can print color too, but their white line problems usually come from the drum, toner delivery, transfer parts, or dirty internal surfaces. The fix is less about nozzle cleaning and more about cleaning or replacing parts.
A quick way to tell is to check the supplies. If the machine uses liquid ink cartridges or refill tanks, it is an inkjet. If it uses dry toner cartridges, it is a laser printer. This one check can save you from trying the wrong fix.
Pros of knowing the printer type
- You choose the right maintenance tools.
- You avoid unnecessary cleaning steps.
- You get faster results.
Cons of ignoring the printer type
- You may waste expensive supplies.
- You may touch parts you should not touch.
- You may assume the printer is broken when it only needs the correct setup.
Most color photo line problems in home use are inkjet issues. So if your printer is an inkjet, start with nozzle and alignment checks first.
Run a Nozzle Check or Test Page Before Changing Anything
Your first real fix is not a fix at all. It is a test. Print a nozzle check, print quality report, or built in test page from the printer menu. This page gives you a clean view of what each color is doing.
If you see broken grids, missing segments, faded blocks, or uneven color bars, you likely have clogged nozzles or weak ink flow. If one color looks weak, that color is causing the line pattern in your photos. This test takes the guesswork out of the problem.
If the test page looks clean, the printer may be fine mechanically. In that case, the issue may come from paper type settings, print quality mode, or the image file itself. That is why the test should come first.
Look closely at cyan, magenta, yellow, and black. Even a small break in one color can create visible white lines in a photo. A sky photo may show cyan problems more clearly. A warm portrait may show magenta or yellow issues first.
Pros of using a test page
- It helps you isolate the faulty color.
- It tells you if cleaning is needed.
- It helps you track whether each fix works.
Cons of skipping the test page
- You may repeat steps that do nothing.
- You may blame the paper or file by mistake.
- You may miss a supply problem.
Print the same test again after each change. That way, you can measure improvement instead of guessing. If the pattern improves, keep going. If it does not change at all, move to the next cause.
Clean the Print Head the Safe Way
If your nozzle check shows gaps or missing lines, the next step is print head cleaning. Start with the printer’s own cleaning tool from the control panel or printer software. This pushes ink through the nozzles and clears light clogs.
Run one normal cleaning cycle. Then print another nozzle check. If the pattern improves but still has gaps, run one more cycle. In many cases, two cycles are enough. More is not always better. Too many cleanings waste ink and can heat parts inside the printer.
If normal cleaning does not help, some printers offer deep cleaning or power cleaning. Use that only if needed. It can fix stubborn dried ink, but it uses much more ink than a standard cycle. That is why it should be a later step, not your first move.
If your printer allows manual print head cleaning, follow the user guide carefully. Use a soft lint free cloth and distilled water if the guide allows it. Be gentle. Do not scrape the nozzles. Do not use tap water. Do not flood the contacts. Let parts dry fully before reinstalling.
Pros of software cleaning
- It is easy and safe.
- It works well for light clogs.
- It requires no disassembly.
Cons of software cleaning
- It uses ink.
- It may not clear a heavy clog.
- It can be overused.
Pros of manual cleaning
- It can help with stubborn dried ink.
- It gives you direct access to dirty areas.
Cons of manual cleaning
- It takes more care.
- It can damage parts if done roughly.
- It is not suitable for every model.
Always test after each cleaning cycle so you know whether the printer is truly improving.
Align the Print Head to Fix Uneven Color Placement
If the nozzle check looks mostly good but your photos still show horizontal white lines, the next likely cause is print head alignment. Alignment tells the printer exactly where each pass of ink should land. If that timing or position is slightly off, the result can be faint banding across a photo.
This issue shows up most often in smooth areas. You may see it in skies, skin, shadows, or any background with soft color. Text may still look fine, which makes the problem confusing. That is why alignment is often missed.
Most printers include an alignment tool in the maintenance menu. The printer will print a pattern, then either read it automatically or ask you to choose the best looking boxes. Follow the steps slowly. Make sure the paper is loaded straight and sits flat in the tray.
After alignment, print the same photo or the same test image again. In many cases, the lines become much lighter or disappear. Alignment is one of the safest and most useful fixes because it does not waste as much ink as repeated cleaning.
Pros of alignment
- It is low risk.
- It often fixes banding fast.
- It helps even healthy printers print better photos.
Cons of alignment
- It will not fix clogged nozzles.
- It may need clean paper and steady loading.
- It may not help if the real issue is low ink flow.
Do alignment after cleaning, not before, if your nozzle check shows missing lines. A clogged nozzle can make alignment less accurate. But if the nozzle check looks clean, alignment should be one of your first choices.
Check Ink Levels, Cartridge Health, and Ink Flow
A printer can show horizontal white lines even when the screen says there is still ink left. Low ink, trapped air, old cartridges, poorly seated tanks, or weak venting can interrupt flow and create gaps during photo printing.
Start by checking the ink or toner level in the printer menu or app. Then do a visual check if your printer allows it. On tank printers, look for very low chambers or bubbles in the lines. On cartridge printers, make sure each cartridge clicks into place and the vent area is clear.
If you recently installed a new cartridge, make sure all protective tape was removed. This small mistake can block airflow and create poor output. If the cartridge is old, dried out, or has been unused for a long time, print quality may drop even before it is fully empty.
For refill tank printers, confirm that the printer has completed any charging or ink priming step required after a refill. If the system has air in the line, the printer may print with gaps until flow stabilizes.
Pros of checking supplies early
- It is quick.
- It solves many hidden print issues.
- It helps you avoid unnecessary deep cleaning.
Cons of ignoring supply health
- You may keep cleaning a printer that simply needs fresh ink.
- You may ruin photo paper during repeated tests.
- You may misread a flow problem as a hardware fault.
A healthy ink path is essential for smooth photos. If one color is weak, every fix after that becomes less effective. Make sure the basics are solid before you move deeper into troubleshooting.
Match the Paper Type and Print Quality Settings
Printer settings affect photo quality more than many users expect. If the paper type in the printer driver does not match the paper in the tray, the printer may apply the wrong amount of ink or move the paper at the wrong rate. That can cause visible white lines or banding.
For example, glossy photo paper usually needs a different setting than plain paper or matte photo paper. The printer uses that setting to control droplet size, drying, and pass pattern. If you print a photo on glossy paper while the driver is set to plain paper, the print may look thin, streaky, or uneven.
Open the print dialog and check three things. First, confirm the exact paper type. Second, raise print quality from standard to high or best for photo work. Third, make sure the paper size matches the sheet you loaded. A mismatch can affect feed timing and image placement.
This step is simple, but it fixes many cases that look like hardware failure. If your test page looks fine and only photos show lines, settings are a very strong suspect.
Pros of correcting paper settings
- It costs nothing.
- It improves color and detail.
- It can solve banding without maintenance.
Cons of higher quality settings
- Printing takes longer.
- The printer may use more ink.
- Some papers dry more slowly.
Use photo settings for photo paper. That sounds obvious, but it is easy to miss when a printer driver keeps old settings from a previous job. Always check before you print important pictures.
Turn Off Fast Print or Bidirectional Printing for Better Photos
Many printers offer fast print mode or bidirectional printing. These features help the printer work quicker by printing in both directions as the head moves back and forth. That speed is useful for drafts, but it can create horizontal lines in photo prints.
When bidirectional printing is active, the printer must place ink precisely while moving both left and right. If timing is even slightly off, the dots do not line up perfectly. The result can be faint stripes, especially in large soft color areas. This is one reason photos may show lines even when documents look normal.
Open the print settings and look for options such as high speed, economy, draft, or bidirectional printing. Turn those off for your next test print. Then set print quality to high or best. The print will take longer, but photo output is often much smoother.
This fix is especially helpful if the lines appear at regular intervals and the nozzle check looks clean. In that case, the printer may not be clogged at all. It may simply be printing too fast for the image quality you want.
Pros of turning off fast modes
- It improves dot placement.
- It reduces visible banding.
- It is a free fix.
Cons of turning off fast modes
- Printing takes more time.
- Ink use may rise a little.
- It may not fix a real clog.
For photo printing, speed should never be the main goal. Clean coverage matters more. If you care about image quality, use slower settings and let the printer work with more precision.
Clean the Rollers, Drum, and Paper Path if Lines Stay
If cleaning and setting changes do not fix the problem, look at the physical paper path. Dust, paper fibers, dried ink, and toner residue can interfere with print quality. This is more common if the printer sits open, is used often, or has handled low quality paper.
For inkjet printers, check for paper dust inside the machine and on feed rollers. Wipe accessible areas gently with a lint free cloth. If the manual allows it, run a paper path cleaning or roller cleaning function. Dirty feed parts can affect how evenly the paper moves under the print head.
For laser printers, inspect the drum and toner area carefully. White horizontal lines may come from a dirty or worn drum, toner delivery issue, or debris on internal rollers. Some models allow a manual drum cleaning step. If the drum surface looks scratched or damaged, cleaning may not be enough.
Do not touch delicate surfaces with bare fingers. Oils from skin can make the problem worse. Handle internal parts only if your printer guide says it is safe.
Pros of physical cleaning
- It removes debris that software cannot fix.
- It can restore smooth feeding.
- It helps both print quality and reliability.
Cons of physical cleaning
- It takes more care.
- It may not help if the issue is electronic.
- Some parts are easy to damage if handled roughly.
A clean paper path supports a clean print. If your lines appear with many files and many paper types, internal dirt is worth checking.
Update the Driver and Firmware if the Problem Started Suddenly
Sometimes the printer hardware is fine, but the software side is not. If horizontal white lines started after a system update, driver change, or long period of no use, check the printer driver and firmware.
Start by removing any old or duplicate printer entry from your computer. Then install the latest driver from the printer maker. Restart the computer and print the same test image again. A fresh driver can fix incorrect color handling, bad quality defaults, or communication issues between the computer and printer.
Firmware updates can also improve print routines and maintenance functions. This is more useful if your printer behaves oddly, skips maintenance steps, or shows poor results despite normal nozzle patterns. Still, use firmware updates carefully. Do not interrupt the process once it begins.
Resetting print preferences can help too. Some line problems come from old saved settings that force low quality output or wrong media options. A clean software reset is sometimes all you need.
Pros of updating software
- It can solve hidden setting issues.
- It improves printer communication.
- It may restore normal maintenance tools.
Cons of updating software
- It takes a little time.
- It may not help a hardware issue.
- A poor setup process can cause new confusion.
Try this step if the problem appeared suddenly without any clear print head clog or supply issue. It is not the first fix, but it is a smart one when the usual causes do not explain the problem.
Know When a Part May Be Worn Out or Damaged
If you have tried testing, cleaning, alignment, settings, paper checks, and supply checks, but the same white lines stay in the same pattern, a part inside the printer may be worn or damaged. This is more likely on older printers or printers that sit unused for long periods.
In inkjet printers, the print head itself may be failing. A damaged nozzle row can create the same band every time, even after cleaning. On some models, the print head can be replaced. On others, the cost may be too high compared with the value of the printer.
In laser printers, a worn drum, damaged roller, or transfer issue can cause repeated lines. If the spacing of the lines is very regular, a rotating part is a strong suspect. Regular repetition often points to a mechanical pattern.
Watch for warning signs such as no improvement after several correct fixes, recurring banding in the same place, grinding noises, ink leaks, or visible scratches on accessible parts. These signs suggest that maintenance alone may not be enough.
Pros of considering part failure early
- You stop wasting ink and paper.
- You make a clearer repair choice.
- You avoid endless trial and error.
Cons of replacing parts
- Cost can be high.
- Installation may be tricky.
- The printer may still need calibration after replacement.
A printer is a machine, and machines wear out. If every basic fix fails, the problem may no longer be a cleaning issue. It may be a repair decision.
How to Prevent Horizontal White Lines from Coming Back
Once your prints look good again, a few simple habits can keep them that way. Prevention matters because dried ink and poor settings often return slowly, then show up right when you need an important photo.
Print something in color at least once every week or two if you use an inkjet printer. This keeps ink moving through the nozzles and lowers the chance of clogs. Even a small color test page can help. Do not let the printer sit for months without use.
Store paper in a clean, dry place. Curled, damp, or dusty paper can feed poorly and affect image quality. Always load the printable side correctly. Keep the tray clean and avoid mixing different paper types in the same stack.
Use the correct paper setting for every print job. Turn off draft or fast mode for photos. Run a nozzle check at the first sign of fading instead of waiting until the lines become severe. Small maintenance early prevents bigger problems later.
Pros of preventive care
- Better print quality over time.
- Fewer cleaning cycles.
- Longer printer life.
Cons of poor maintenance
- More clogging.
- More wasted ink.
- More ruined photo paper.
Good printers often fail from neglect, not from age alone. A little regular care keeps color output smooth and helps you avoid the same frustrating white line problem later.
Frequently Asked Questions
Why do white lines show only on photos and not on normal documents
Photos use smooth color blends and large filled areas, so even a tiny gap in ink placement becomes easy to see. Normal documents use more text and solid edges, which can hide light banding. This is why a printer can seem fine for office pages but still fail on photo prints.
How many print head cleaning cycles should I run
Start with one cleaning cycle, then print a nozzle check. If the pattern improves, run one more cycle. In most cases, two or three tries are enough. If there is no change at all, stop and check settings, supplies, or hardware instead of wasting more ink.
Can the wrong paper really cause horizontal white lines
Yes. The paper setting controls how the printer applies ink and moves the sheet. If the selected paper type does not match the real paper, the result can be streaks, weak coverage, or banding. This is a common cause when the printer test page looks normal but photo prints still look bad.
Should I replace cartridges before I try alignment
If the printer shows low ink, weak color blocks, or poor nozzle results in one color, check supplies first. If ink levels look healthy and the nozzle check is mostly clean, alignment is a smart next step. The best order is test page, supply check, cleaning if needed, then alignment.
Do laser printers get horizontal white lines too
Yes, but the cause is different. Laser printers usually have line issues from the drum, toner flow, transfer parts, or debris inside the machine. They do not use wet ink nozzles like inkjet printers. So the fix is more about cleaning internal parts or replacing worn components than running a nozzle clean.
If you want, I can also turn this into a polished blog format with a meta description, slug, and SEO title options.
I’m the voice behind Device Dossier. As a printing technology enthusiast, I spend my time testing printers, comparing specs, and writing honest reviews to help you find the perfect printing solution. When I’m not geeking out over print quality and page yields, you’ll find me exploring the latest in tech.