How to Reinstall Corrupted Printer Drivers on Windows 11?
Is your printer suddenly acting up on Windows 11? Maybe it won’t print at all. Or it spits out garbled pages full of strange symbols.
These issues often point to one culprit: corrupted printer drivers. When drivers get damaged, your printer and computer stop talking properly.
The good news? You can fix this yourself without calling tech support.
This guide walks you through the entire process of removing broken drivers and installing fresh ones. We will cover simple checks first, like cables and wireless connections.
In a Nutshell
- Check hardware first. Make sure cables are secure or wireless connection is stable. This simple step often gets skipped but saves time later.
- Remove the printer completely. Go to Settings > Bluetooth & devices > Printers & scanners. Select your printer and choose Remove.
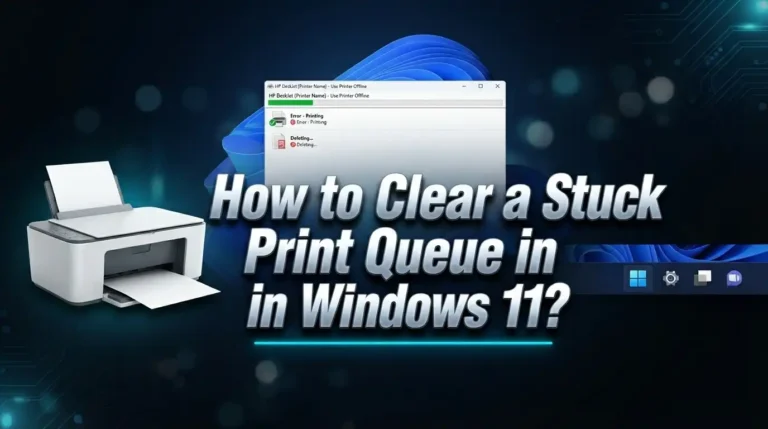
- Reset the print spooler service. Open an Admin Command Prompt and stop the service. This clears stuck jobs causing driver conflicts.
- Delete pending print jobs. Leftover jobs can block a fresh driver install. Clear them before moving forward.
- Download fresh drivers. Visit your printer manufacturer’s website for the latest compatible version. Avoid outdated or generic drivers.
- Reinstall through Settings. Add your printer back using Windows Settings or the manufacturer’s installer file.
- Run the troubleshooter if needed. Windows 11’s Get Help app offers automated fixes for stubborn issues.
- Restart between each step. This ensures changes apply correctly and prevents leftover corruption.
Signs Your Printer Driver Is Corrupted
Your printer driver becomes corrupted when files get damaged, missing, or outdated. Recognizing the signs early helps you fix the problem fast.
One clear sign is when your printer stops responding to print commands. You click print, but nothing happens. The job disappears from your queue, or it sits stuck in the print spooler forever.
Another common indicator is error messages. Windows might show “printer offline” even though it’s plugged in and powered on. You could also see messages about an unknown device or a yellow exclamation mark next to your printer in Device Manager.
Your printer may print garbled text or strange characters instead of your actual document. Pages come out blank, partially printed, or with random symbols. This happens when the driver can’t communicate correctly with the hardware.
Performance problems point to driver issues too. Printing becomes extremely slow, or your computer freezes when you try to print. The spooler service might crash repeatedly, forcing you to restart your computer.
Connection problems are another red flag. Your printer disappears from the devices list in Windows Settings. You can’t find it under “Printers and scanners” anymore, even though the hardware works fine.
If your printer worked fine before a Windows update, corrupted drivers likely caused the change. The update may have overwritten your current drivers with incompatible versions.
Pay attention to these signs because they tell you exactly what’s wrong. Most of these symptoms disappear after you remove the broken driver and install a fresh copy. Don’t ignore these warnings because they only get worse over time, making your printer completely unusable.
Before You Begin: Hardware and Connection Checks
Before you reinstall your printer drivers, check your hardware first. This step saves time and prevents frustration later.
Start by examining your physical connections. If your printer uses a USB cable, unplug it from both the printer and your computer. Wait about 30 seconds, then plug it back in firmly. Make sure the cable has no visible damage or kinks. A loose or damaged cable often causes connection problems that look like driver corruption.
For wireless printers, verify your network connection. Check that your printer connects to the same WiFi network as your Windows 11 computer. Look at your printer’s display panel or settings menu to confirm the network name and signal strength. Weak WiFi signals can cause printing failures that seem like driver issues.
Next, power cycle your printer completely. Turn off your printer using its power button. Wait 60 seconds. Then turn it back on. This simple restart clears temporary errors and refreshes the printer’s memory.
Check your printer’s physical condition too. Make sure the paper tray has paper loaded correctly. Remove any jammed paper if you see any stuck inside. Verify that toner or ink cartridges have adequate supply. Low ink levels sometimes trigger error messages that confuse users into thinking drivers are broken.
Finally, restart your Windows 11 computer. A fresh system restart clears software conflicts and prepares your device for driver reinstallation.
These hardware checks take just 5 minutes. They solve many printing problems without needing driver changes. Only proceed to driver removal if your printer still doesn’t work after completing these basic checks.
How to Remove a Corrupted Printer Driver in Windows 11
Start by opening Settings on your Windows 11 computer. Click on Bluetooth & devices from the left menu. Select Printers & scanners to see all connected printers.
Find your corrupted printer in the list. Click on it once to highlight it. A Remove button will appear on the right side. Click this button to begin the removal process.
Windows will ask you to confirm the removal. Select Yes when the confirmation dialog appears. This step removes the printer from your system completely.
Next, you need to stop the print spooler service. This service manages all print jobs waiting in your queue. Press the Windows key and R together to open the Run dialog. Type services.msc and press Enter.
Look for Print Spooler in the services list. Right click on it. Select Stop from the menu. This stops the service from running.
Now open File Explorer and navigate to this folder: C:\Windows\System32\spool\PRINTERS. Delete all files inside this folder. These files represent stuck print jobs that may be causing problems.
Go back to the services window. Right click on Print Spooler again. Select Start to restart the service.
Restart your Windows 11 computer completely. This gives your system a fresh start after removing the corrupted driver. Once your computer restarts, you are ready to reinstall the printer driver.
The removal process takes about 10 minutes total. Taking time with each step prevents installation problems later. Incomplete removal often causes new drivers to install incorrectly.
Resetting the Print Spooler Service
The print spooler service manages all print jobs waiting to print on your computer. When this service gets stuck or corrupted, your printer stops working properly. Resetting it often fixes printing problems without needing a full driver reinstall.
Access the Services window first. Press the Windows key and type “services.msc” into the search box. Click the result to open the Services application. This window shows all background services running on your Windows 11 system.
Find Print Spooler in the list. Scroll down through the services until you locate “Print Spooler.” This service handles all your printing tasks. Right click on it to see your options.
Stop the service completely. Select “Stop” from the menu. Wait a few seconds for the service to shut down. You should see the status change from “Running” to “Stopped.”
Clear out stuck print jobs. Open File Explorer and navigate to C:\Windows\System32\spool\PRINTERS. This folder contains all pending print jobs. Delete every file inside this folder. These files often cause the spooler to malfunction.
Restart the Print Spooler service. Go back to the Services window. Right click on Print Spooler again. This time select “Start” to turn the service back on. The status should change to “Running.”
Restart your computer. A full restart ensures all changes take effect properly. Power down your computer completely. Wait 30 seconds, then power it back on.
This reset clears corrupted data from the print spooler. Your printer should respond normally to print commands after this process. If problems continue, you may need to reinstall your printer driver completely.
Step-by-Step: Reinstalling Printer Drivers on Windows 11
Once you’ve removed the corrupted driver and reset the print spooler service, you’re ready to reinstall fresh drivers. This step brings your printer back to working condition.
Start by downloading the latest driver from your printer manufacturer’s official website. Visit their support page and search for your exact printer model. Download the driver file to your computer. This ensures you get the correct, updated version.
Next, open Settings on your Windows 11 computer. Go to Bluetooth and devices, then select Printers and scanners. Click the “Add device” button at the top of the window. Windows will search for available printers on your network or connected via USB.
If your printer appears in the list, select it and choose “Add device.” Windows will automatically install the basic driver. Your printer should now show as ready to use.
For a more complete installation, run the manufacturer’s driver installer file you downloaded earlier. Double click the file and follow the on screen instructions. This installs additional software and features specific to your printer model.
After installation completes, restart your computer. A full restart ensures all driver components load properly.
Test your printer by printing a test page. Open Settings again, find your printer, and select “Print a test page.” If the page prints successfully, your driver reinstallation worked.
If problems persist, use the Get Help app built into Windows 11. Search for “Get Help” in your start menu and run the printer troubleshooter. This automated tool diagnoses remaining issues and suggests fixes.
The entire reinstallation process typically takes 15 to 20 minutes from start to finish.
Using the Windows Troubleshooter and Get Help App
Windows 11 includes built in tools that help fix printer problems automatically. The Get Help app and Windows Troubleshooter work together to identify and resolve driver issues without manual steps.
To access the troubleshooter, open Settings and go to System > Troubleshooting > Other troubleshooters. Scroll down to find “Printer” in the list. Click the three dots next to it and select “Run.” This automated tool scans your system for printer related problems.
The troubleshooter checks several things. It verifies your printer connection status. It confirms drivers are installed correctly. It tests communication between your computer and printer. The tool runs diagnostics and generates a report showing what it found.
If problems exist, the troubleshooter offers solutions automatically. It may restart the print spooler service. It might download missing drivers from Windows Update. It can disable conflicting software. Most issues resolve within minutes.
The Get Help app provides additional support. Open it by pressing Windows key and typing “Get Help.” Search for “printer” or “driver” problems. This app connects to Microsoft support resources and community solutions. You can follow guided steps or watch video tutorials.
Run the troubleshooter after reinstalling drivers. This confirms everything works properly. If your printer still fails, the troubleshooter generates detailed error codes. Write down these codes for reference.
These tools save time and reduce frustration. They handle technical tasks without requiring command line knowledge. Most users resolve corrupted driver issues using just the troubleshooter and Get Help app. If automated fixes don’t work, you have error information to share with manufacturer support.
Mistakes to Avoid During Driver Reinstallation
Many people make critical errors when reinstalling printer drivers. These mistakes delay the process and sometimes create new problems.
Skipping hardware checks is the first major mistake. Before touching any software, verify your printer cables are secure. If your printer connects wirelessly, confirm it’s on the same network as your computer. A loose cable or disconnected device wastes hours of troubleshooting.
Incomplete driver removal causes reinstallation failures. Simply deleting the printer from Settings isn’t enough. You must also stop the Print Spooler service and clear pending print jobs from your system folders. Leaving old driver files behind confuses Windows during the fresh installation.
Rushing through the process leads to problems. Don’t skip the restart steps between removing and reinstalling drivers. Your computer needs time to fully clear old driver files from memory. Restarting ensures Windows recognizes the new installation properly.
Downloading drivers from the wrong source creates issues. Never grab drivers from random websites or generic driver update tools. Always download directly from your printer manufacturer’s official website. Third party sources often contain outdated or corrupted files.
Ignoring error messages during installation is a mistake. If you see warnings or errors, read them carefully. They tell you what’s blocking the installation. Common issues include insufficient permissions or conflicting software running in the background.
Not testing after reinstallation leaves problems undetected. Print a test page immediately after installation completes. This confirms your driver works correctly. If printing fails, you’ll know the reinstallation didn’t work and can troubleshoot further.
Taking time to avoid these mistakes saves frustration and gets your printer working faster.
Preventing Future Driver Corruption
Preventing future driver corruption keeps your printer running smoothly. The best approach is to maintain your system regularly and avoid common pitfalls that damage drivers.
Start by keeping Windows 11 updated through official channels. Microsoft releases patches that fix compatibility issues between your operating system and printer drivers. Check Settings > Update & Security > Windows Update regularly. These updates protect your system from corruption that stems from software conflicts.
Next, manage automatic driver updates carefully. While Windows can update drivers automatically, this sometimes causes conflicts with printer software. If you experience repeated corruption after updates, disable automatic driver updates through Group Policy. Open the Group Policy Editor and navigate to Computer Configuration > Administrative Templates > Windows Components > Windows Update. Set “Configure Automatic Updates” to “2 Notify for download and auto install.” This gives you control over when updates happen.
Keep your printer firmware current as well. Visit your printer manufacturer’s support page monthly and check for firmware updates. Updated firmware works better with new driver versions and reduces compatibility problems.
Protect your system from malware, which frequently corrupts drivers. Use Windows Defender or another reputable security tool. Run scans weekly to catch threats early. Malware often targets system files, including printer drivers.
Avoid downloading drivers from unofficial sources. Stick only to your printer manufacturer’s official website. Third party driver sites sometimes bundle corrupted or outdated files that cause problems immediately.
Finally, create regular system restore points. Go to Settings > System > About > System protection and enable restore points. If corruption occurs, you can roll back your system to a previous working state without losing important files.
Final Thoughts
Fixing corrupted printer drivers on Windows 11 does not need to feel hard. You now have a clear path to follow. Removing old drivers completely and installing fresh ones solves most printer problems.
The process is simple when you break it into steps. Check your hardware first. Remove the old printer properly. Reset the print spooler service. Then install a clean driver from the manufacturer.
Patience matters more than speed here. Rushing through removal or skipping restarts often causes the same problems to return. Taking your time saves you from repeating steps later.
Remember that Windows 11 gives you built in tools to help. The troubleshooter and Get Help app catch issues you might miss. Use them as a safety net, not a replacement for proper driver installation.
Most printer issues come from the same few causes. Outdated drivers, incomplete removal, or automatic updates gone wrong top the list. Once you understand these patterns, future fixes become much faster.
Your printer setup does not need constant attention if you maintain it well. Regular updates and careful driver management prevent most corruption issues from happening again.
If problems persist after trying these steps, do not panic. Some printers need a firmware update, or your USB port might need testing with another device. These small checks often reveal the real issue.
Printer problems feel frustrating in the moment, but they are almost always fixable. With the right steps and a bit of patience, you can get your printer working again without calling for outside help.
Keep this guide handy for next time. Printer driver issues can happen again, but now you know exactly what to do.
Frequently Asked Questions
Why does my printer stop working after a Windows 11 update?
Windows updates sometimes change driver compatibility. Your printer driver may become outdated or corrupted during the update process. The quickest fix is to restart your print spooler service and then reinstall the driver fresh from your printer manufacturer’s website.
Where do I find the option to remove my printer in Windows 11?
Go to Settings and select Bluetooth & devices. Click Printers & scanners. Find your printer in the list and click it once. Select Remove device. This step is essential before reinstalling, as it ensures complete removal of old driver files.
What is the print spooler service and why does it matter?
The print spooler manages all print jobs sent to your printer. When drivers corrupt, the spooler can get stuck with old or broken commands. Stopping and restarting this service clears pending jobs and often fixes communication problems between Windows 11 and your printer.
Can I use Windows automatic driver updates, or should I disable them?
Windows automatic updates work fine for most users. However, if your printer driver keeps corrupting, you can disable automatic updates via Group Policy and instead download drivers manually from your manufacturer’s official website. This gives you more control over which versions install.
What should I do if my printer still doesn’t work after reinstalling the driver?
Run the Get Help app troubleshooter built into Windows 11. It walks through common fixes automatically. If that fails, check your printer’s physical connection, restart both devices, and download the absolute latest driver version from the manufacturer. Persistence usually solves the issue.

I’m the voice behind Device Dossier. As a printing technology enthusiast, I spend my time testing printers, comparing specs, and writing honest reviews to help you find the perfect printing solution. When I’m not geeking out over print quality and page yields, you’ll find me exploring the latest in tech.