Why Does My Printer Make a Grinding Noise When Starting Up?
Does your printer sound like it’s grinding gears every time you turn it on? That strange noise can feel alarming, especially if you need to print something fast.
The good news is that this problem is common. Most printers make grinding sounds because of simple mechanical issues inside the machine.
You might have a paper jam hiding in the tray. Dirty feed rollers could also be the culprit. Sometimes, worn out slider blocks or gears cause the friction you hear.
This article explains why your printer grinds during startup. We will walk through the most frequent causes, from stuck paper to dirty components.
In a Nutshell
- Grinding noise almost always means friction. Something inside your printer is rubbing, stuck, or worn down. It rarely means the printer is broken beyond repair.
- Paper jams are the top cause. Small torn pieces often hide in trays or the rear panel. You must remove every scrap for the noise to stop.
- Dry slider blocks cause friction too. These small parts help the print head glide smoothly. When they dry out, they grind against the rail.
- Dirty rollers and debris cause trouble. Dust, hair, or small objects can get stuck in the carriage path. This blocks smooth movement and creates noise.
- A simple power reset can help. Turning your printer off and back on sometimes clears minor glitches. Try this before deeper cleaning.
- Cleaning usually comes before replacing parts. Most grinding issues improve with a good clean. Only replace parts if cleaning does not fix the sound.
What Causes a Grinding Noise During Printer Startup
A grinding noise during printer startup signals mechanical friction or an obstruction inside. Your printer’s internal parts are rubbing against each other or something is blocking their movement.
The most common culprit is a paper jam. Small torn pieces often hide deep in paper trays or behind the rear access panel. These fragments jam the carriage as it tries to move during startup, creating that grinding sound.
Worn slider blocks are another frequent cause. These small plastic or rubber components help your print head glide smoothly across the printer. When they dry out or wear down, they create friction and grinding noises as the carriage moves.
Dirty or worn paper feed rollers can also produce grinding sounds. Dust, hair, and debris accumulate on these rollers over time. When they try to grip paper during startup, the friction creates the grinding noise you hear.
Debris in the carriage path causes similar problems. Foreign objects like bits of paper, toner dust, or small plastic pieces can get stuck in the mechanical components. Your printer tries to move the carriage anyway, resulting in grinding.
Sometimes a loose gear or roller is responsible. Vibration and normal wear can loosen these parts. When the printer powers on, loose components rattle and grind against other parts.
The key point is this: grinding noise means something physical needs attention. It is not a software issue. Your printer is telling you that internal friction or obstruction exists. This is why physical inspection and cleaning should always come before replacement. Start by opening access panels and looking for obvious problems like stuck paper or debris.
How Worn Slider Blocks and Gears Lead to Grinding Sounds
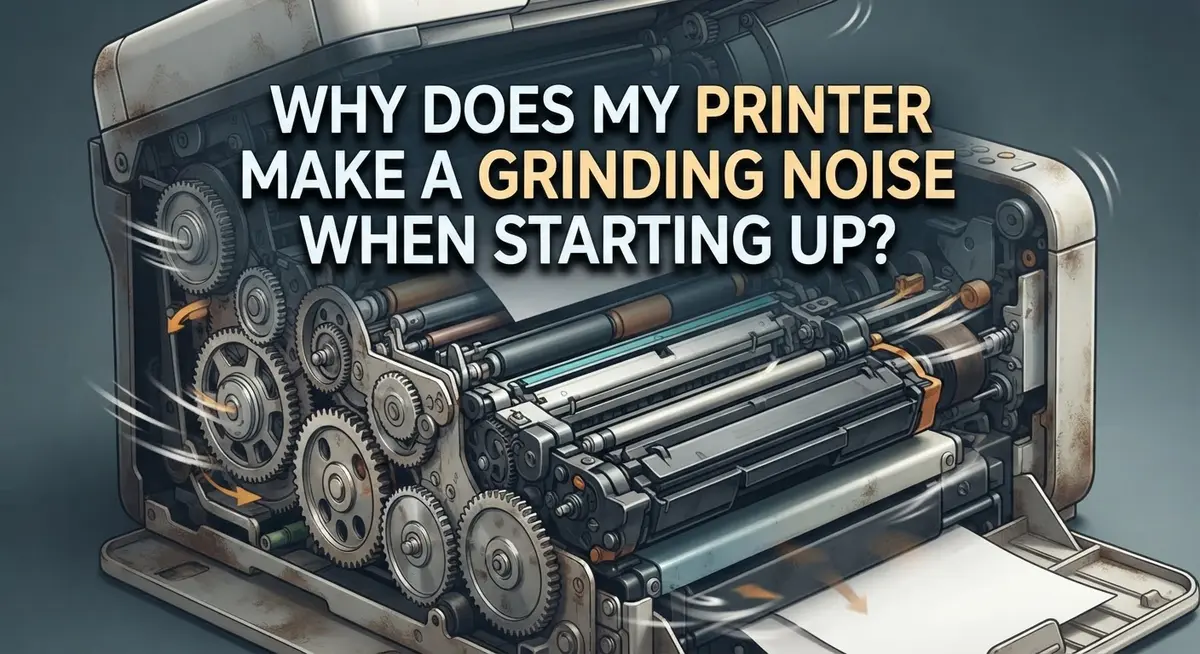
Slider blocks are small plastic or metal parts that guide your print head across the paper. When these components wear down or dry out, they create friction. This friction produces that grinding sound you hear during startup.
Here’s how the problem develops. Your printer’s carriage moves back and forth thousands of times. Each movement relies on slider blocks to reduce friction and keep motion smooth. Over time, these blocks lose their protective coating or develop cracks. The print head then rubs directly against metal rails instead of gliding smoothly.
Worn gears create a similar issue. Printers use gears to transfer power and control movement. When gear teeth wear down or break, they don’t mesh properly. The result is grinding or clicking sounds as the gears slip against each other.
Debris makes both problems worse. Dust, paper fragments, and dried ink accumulate on slider blocks and gears. This buildup increases friction and accelerates wear. Even small particles can cause noticeable grinding noise.
To check for worn slider blocks, power off your printer first. Open the access panels carefully. Look at the rails where your print head moves. You might see visible damage, discoloration, or rough spots on the slider blocks. Gears should look smooth with intact teeth.
The key is catching wear early. If your printer grinds during startup, inspect these mechanical parts right away. Cleaning often helps before replacement becomes necessary. Dried slider blocks sometimes respond to gentle cleaning and lubrication with appropriate printer maintenance products. However, truly worn blocks need replacement to restore quiet operation.
Step-by-Step Diagnostic Process to Identify the Source
Start by turning off your printer completely. Wait 30 seconds before powering it back on. Listen carefully to where the grinding sound comes from. Does it happen in the front, back, or inside the machine?
Open your printer’s access panels. Most printers have a rear panel or top cover that lifts off easily. Look inside the paper path with a flashlight. Check for torn paper pieces, small debris, or foreign objects stuck in tight spaces. Torn paper often hides in corners where you cannot see it immediately.
Remove all paper from the input tray and rear tray. Pull out any visible paper jam pieces gently. Check underneath the tray too. Incomplete paper removal is a common mistake that keeps the grinding noise going.
Next, locate the paper feed rollers. These rubber or plastic wheels pull paper into your printer. Spin them by hand if you can access them. Feel for rough spots, debris wrapped around them, or sticky residue. Wipe them clean with a dry cloth.
Inspect the carriage path where your print head moves back and forth. Look for dust buildup, hair, or small objects blocking movement. A blocked carriage cannot move freely and creates grinding sounds during startup.
Check all visible gears and moving parts. Gears should spin smoothly without resistance. If a gear feels stuck or rough, something is blocking it.
After cleaning everything thoroughly, power on your printer again. Listen for changes in the sound. If grinding continues, the issue likely involves worn mechanical parts that need professional attention or replacement. Document what you found during inspection to share with a repair technician if needed.
How to Inspect and Clear Paper Jams and Debris
Start by powering off your printer completely. Safety comes first when working inside mechanical components.
Open all access panels on your printer. Most models have a front cover and a rear panel that lift or slide open. Look for any visible paper fragments, torn pieces, or crumpled sheets stuck inside.
Check the paper input tray and output tray carefully. Paper jams often hide in these areas. Remove all paper from both trays and set it aside. Don’t force anything out. If paper tears, small pieces remain inside and cause grinding sounds later.
Inspect the rear panel area thoroughly. Many printers have a rear access door specifically for removing jammed paper. Open it and look inside with a flashlight if needed. This is a spot people frequently skip, yet debris accumulates here easily.
Locate your paper feed rollers. These rubber or plastic cylinders pull paper through the machine. Look for paper dust, debris, or foreign objects wrapped around them. Use a soft, dry cloth to gently wipe each roller clean. Don’t use water or solvents on these parts.
Check the carriage path where your print head moves. Run your fingers along this track carefully to feel for obstacles. Remove any dust, hair, or small objects you find. Make sure the carriage moves freely from side to side without resistance.
Examine all visible gears and moving parts. Look for loose components or anything blocking movement. Tighten any obviously loose parts if you can access them safely.
After clearing everything, power your printer back on. Listen for the grinding noise. Most grinding issues disappear after thorough cleaning and debris removal. If noise continues, worn internal parts may need professional attention.
Cleaning Feed Rollers and the Carriage Path Correctly
Cleaning your paper feed rollers and carriage path is one of the most effective ways to stop grinding noise. Start by powering off your printer completely and unplugging it for safety.
Open all access panels to reach the internal components. Most printers have panels on the front, rear, or sides. Take your time and note where each panel goes so you can reassemble them correctly.
Locate your paper feed rollers. These are rubber or foam cylinders that grab paper and move it through the printer. Look for visible dirt, dust, or dried paper residue on their surfaces. Dirty rollers create friction and grinding sounds.
Use a lint free cloth slightly dampened with distilled water to wipe each roller gently. Rotate the rollers by hand as you clean to reach all sides. Do not use harsh chemicals or solvents, as these can damage the rubber material.
Next, inspect the carriage path. This is the track where your print head slides back and forth. Remove any visible dust, paper fragments, or debris using a soft brush or dry cloth. A clean carriage path allows smooth movement without grinding.
Check inside the paper input and output areas. Torn paper pieces often hide in corners and crevices. Remove everything you find.
After cleaning, leave the printer open for a few minutes to allow any moisture to dry. Reassemble all panels carefully and plug the printer back in. Power it on and listen for changes in the startup sound.
If grinding persists after thorough cleaning, the problem likely involves worn mechanical parts that require replacement rather than cleaning alone.
When Grinding Noises Signal a Deeper Mechanical Issue
A grinding noise during startup usually means your printer has a mechanical problem that needs attention. This sound comes from friction or an obstruction inside the machine, not from normal operation.
Worn slider blocks are the most common cause. These plastic or metal guides help your print head move smoothly across the paper. When they wear down, the carriage rubs against metal parts and creates that grinding sound. The problem gets worse over time if you ignore it.
Damaged gears produce similar noises. Your printer uses multiple gears to move paper and position the print head. When teeth on these gears wear out or break, grinding happens during startup as the motor tries to move everything into position.
Paper jams often cause grinding too. Stuck paper or torn pieces can block the carriage from moving freely. When your printer powers on, the motor forces the carriage against the obstruction, creating that grinding sound. This is why checking for paper is your first step.
Debris in the carriage path creates friction that sounds like grinding. Dust, paper fragments, or other particles accumulate inside your printer over time. They get in the way of moving parts and cause noise during startup.
The key difference between a minor issue and a major one is whether you catch it early. A grinding noise that lasts just a few seconds might mean loose debris. A grinding noise that continues or gets louder means worn parts need replacement soon.
Always power off your printer before inspecting anything inside. Physical inspection is the only way to know exactly what’s wrong.
Common Mistakes That Make the Problem Worse
Many people make mistakes that turn a simple grinding noise into a serious printer problem. Understanding what NOT to do is just as important as knowing what to do.
Forcing the carriage to move is one of the biggest errors. When your printer grinds during startup, the carriage is usually stuck or blocked. Pushing it manually can bend metal parts or damage the rail system. Let the printer do its work. If it won’t move on its own, something is blocking it. Find and remove the obstruction instead.
Ignoring small debris is another common mistake. People often clean the obvious areas but miss tiny pieces of paper or dust in tight spaces. These small particles create friction against moving parts. Friction causes that grinding sound. Spend extra time checking corners and crevices near the carriage path.
Using the wrong cleaning materials makes things worse. Water that’s too wet can damage circuits. Rough cloths can scratch rollers and rails. Always use lint free materials and barely dampened cloths with distilled water only.
Continuing to use your printer when grinding starts is a serious error. Many people ignore the noise and keep printing. This accelerates wear on mechanical parts. What started as a worn slider block becomes a damaged gear or bent carriage. Stop using your printer immediately when you hear grinding.
Skipping the power reset before inspection is also problematic. Some grinding noises come from firmware glitches, not physical problems. Power off your printer completely. Wait 30 seconds. Power it back on. This simple step sometimes solves the issue without any physical work needed.
Preventive Maintenance Tips to Avoid Future Grinding Noises
Regular maintenance stops grinding noises before they start. You don’t need expensive service calls if you follow these simple steps.
Check your printer monthly. Open all access panels and look for paper scraps, dust, or debris. Even tiny pieces can cause grinding when your printer powers on. Remove anything you find with your fingers or tweezers. Pay special attention to corners and tight spaces where debris hides.
Clean your rollers every three months. Dirty rollers slip instead of gripping paper properly, which forces your printer to work harder. This extra strain creates grinding sounds. Wipe each roller gently with a slightly damp cloth. Let everything dry completely before closing the panels.
Replace paper trays regularly. Worn trays don’t hold paper straight, which causes jams. Jams lead to grinding noises when your printer tries to move paper through a blocked path. Check that your trays fit snugly and that paper sits flat inside them.
Use quality paper. Cheap paper sheds fibers and creates dust inside your printer. This dust accumulates on gears and moving parts. Quality paper reduces debris buildup significantly.
Keep your printer in a clean space. Dust in the air settles on your printer’s internal components. A dusty environment means more frequent cleaning. Place your printer away from fans, open windows, and high traffic areas.
Power cycle your printer weekly. Shut it off completely for 30 seconds, then turn it back on. This resets internal mechanisms and clears temporary errors that might cause grinding.
These habits cost you almost nothing but save you hundreds in repairs. Consistency matters more than intensity. Small efforts every month prevent big problems later.
Final Thoughts
A grinding noise on startup is your printer’s way of asking for help. It usually points to friction, blockage, or worn parts inside.
The good news is most causes are fixable. Paper jams, debris, and dirty rollers cause a lot of these noises. You can clear these problems yourself with patience and care.
Worn slider blocks and damaged gears need more attention. These parts wear down over time through normal use. If cleaning does not stop the grinding, replacement parts may be necessary.
Start with the simple fixes first. Open your printer and check every tray. Look for stuck paper, dust, or small objects that do not belong there.
Clean the rollers and carriage path next. This step solves many grinding issues without any extra cost. Regular cleaning also prevents future problems from building up.
Do not ignore a grinding noise, even if it seems minor. Small issues grow into bigger repairs when left alone. Acting early saves you time, money, and stress.
Preventive care matters just as much as fixing current problems. Monthly checks catch debris before it causes damage. Quality paper and clean rollers keep your printer running smoothly.
Your printer works hard every day. Giving it a little attention goes a long way. A few minutes of maintenance can prevent hours of frustration later.
If grinding continues after you try these steps, professional help may be needed. Some mechanical issues need trained hands and proper tools. Do not hesitate to seek support when problems go beyond simple fixes.
Your printer can run quietly again. With the right care, that grinding noise does not have to return.
Frequently Asked Questions
Is a grinding noise always a sign of serious damage?
No. A grinding noise usually means something is rubbing or stuck inside your printer. Most causes are fixable without replacing major parts. The noise often comes from paper jams, debris, or dry slider blocks. Start by turning off your printer and looking inside for obvious problems like torn paper pieces or dust buildup.
Can I keep using my printer while it makes grinding noises?
You should stop using it right away. Continuing to print can make the problem worse. If something is already grinding, more paper going through will increase the friction and damage. Power off your printer and inspect it first.
What should I check first when I hear grinding on startup?
Check your paper path for obstructions. Open all access panels and look for stuck paper, torn pieces, or debris. Pay special attention to the rear panel where paper scraps hide easily. Remove any paper you find, even small torn bits. Then inspect the carriage area to make sure nothing blocks its movement.
Why does cleaning the rollers help stop grinding?
Dirty rollers lose grip on paper. When rollers can’t grip properly, paper doesn’t feed straight. This forces your printer to work harder, creating grinding sounds. Clean rollers let paper move smoothly through the machine again. Use a soft, dry cloth to wipe them gently.
When should I call for professional help?
If grinding continues after you clean the paper path, remove debris, and inspect the carriage, professional service may be needed. Worn gears or damaged slider blocks require replacement. A technician can diagnose internal damage that you cannot see.

I’m the voice behind Device Dossier. As a printing technology enthusiast, I spend my time testing printers, comparing specs, and writing honest reviews to help you find the perfect printing solution. When I’m not geeking out over print quality and page yields, you’ll find me exploring the latest in tech.