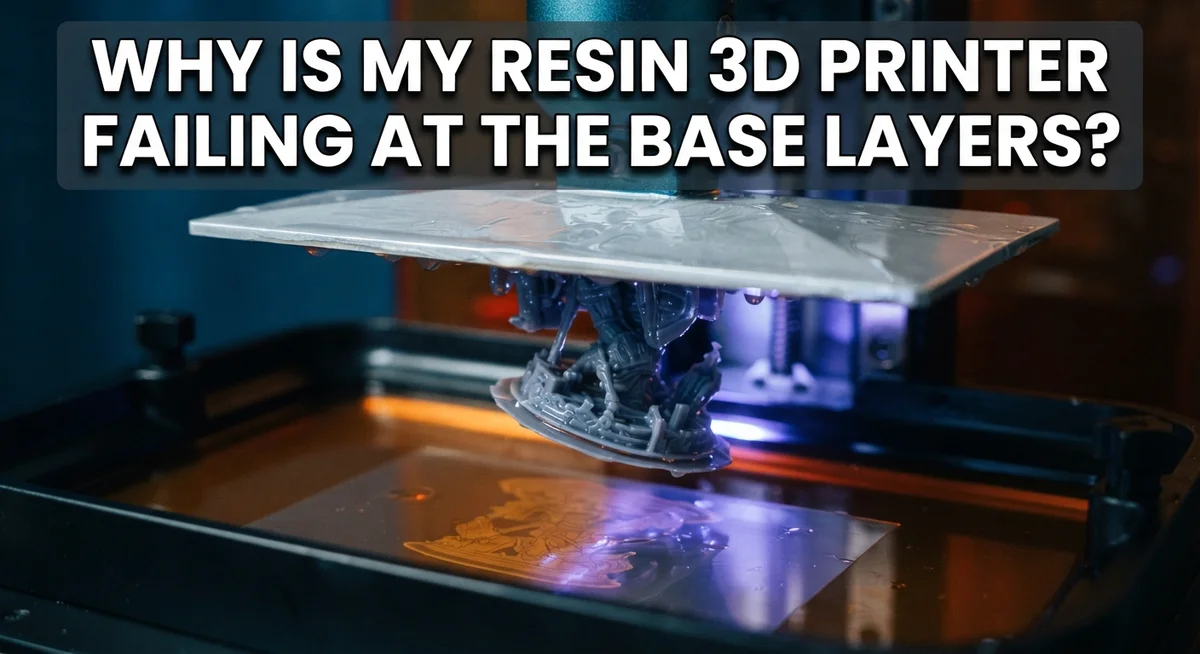
Why Is My Resin 3D Printer Failing at the Base Layers?
Your resin printer starts a job. You feel excited. Then you check the build plate and see nothing there.
Or worse, you find a messy blob stuck to the FEP film instead of your model.
Base layer failures are one of the most frustrating problems in resin printing. They happen right at the start, wasting your time and resin.
The good news? These failures almost always come from a few fixable causes.
Weak adhesion to the build plate is often the first culprit. Your print needs a strong bond to survive the early layers.
This article breaks down why your resin 3D printer fails at the base layers. We will look at the real reasons behind flat spots, non-adhesion, and mid-print collapses.
In a Nutshell
- Weak adhesion happens when the build plate is not level or exposure time is too short. Always check your leveling before each print.
- Over-curing makes the bottom layers too hard and brittle. This creates a rigidity mismatch that leads to cracks or breaks.
- Unmixed resin is a sneaky cause of failed prints. Always shake or stir your resin well before you start.
- Support failures can pull your model away from the plate. Weak or poorly placed supports cannot handle peel forces during printing.
- Excessive plate compression against the screen can damage your first layers. This often creates flat spots or uneven surfaces.
- Exposure time is the key setting to watch. Too little causes poor sticking; too much causes rigid, fragile layers.
Understanding How Base Layers Form and Why They Matter
Base layers are the foundation of every resin print. They determine whether your entire model succeeds or fails before it even gets started.
When resin cures under UV light, it hardens from a liquid into a solid plastic. The base layers do this first. They must stick firmly to your build plate while also staying strong enough to support the weight of everything printed above them.
Why base layers matter so much comes down to physics. These first few layers experience the most stress. They endure repeated peeling forces as the build plate lifts away from the resin vat after each exposure cycle. If they are too weak, they crack or separate. If they stick too well, they rip apart when the printer tries to lift.
Base layers also set the tone for print quality. If they cure unevenly, your model starts tilted or warped. This problem multiplies as you add more layers on top.
The connection between base layers and upper layers is critical too. Each new layer must bond properly to the one below it. Poor adhesion at the base creates a weak link that fails under the weight of subsequent layers.
Temperature plays a role here as well. Cold resin flows differently than warm resin. This affects how layers cure and how well they stick together.
Understanding these mechanics helps you diagnose failures. A model that breaks at the base usually signals one of a few specific problems. Either the base layers did not cure properly, they did not stick to the plate, or they experienced too much force during the peel cycle. Recognizing which issue affects your print lets you make targeted fixes instead of guessing.
Common Causes of Base Layer Failure
Your resin printer fails at the base layers for several specific reasons. Understanding each one helps you fix the problem quickly.
Incorrect exposure time is the most common issue. If your exposure time is too short, the resin doesn’t cure fully. Your model won’t stick to the build plate and falls into the vat. If exposure time is too long, the bottom layers cure too hard and become brittle. This creates a rigidity mismatch with upper layers, causing cracks and breaks.
Build plate leveling problems prevent proper contact with the resin surface. An uneven plate leaves gaps in some areas. The resin in those gaps doesn’t cure correctly, and adhesion fails. Your print either doesn’t stick or sticks unevenly, leading to warping and breakage.
Unmixed resin causes inconsistent curing throughout your print. Resin components separate over time, especially in cooler temperatures. When you print without mixing thoroughly, some layers get too much hardener and others get too little. This creates weak spots that break easily.
Excessive build plate compression damages your base layers before printing even starts. Pushing the plate too hard against the screen creates unnecessary stress. The pressure can crush freshly cured resin or prevent proper resin flow.
Poor support structure puts too much stress on your base layers. Inadequate or badly placed supports can’t hold your model properly. The peeling forces during printing pull your model away from the plate instead of supporting it.
Unstable or failed supports during printing cause mid print failures. Your model shifts or tilts as the plate moves up and down. This breaks the connection between base layers and the rest of your print.
How to Properly Level Your Build Plate
Leveling your build plate is the foundation of successful prints. This single step prevents most base layer failures before they start.
Start by cleaning your build plate thoroughly. Remove any dried resin or dust. A clean surface helps you see exactly where the plate sits relative to your printer’s screen.
Lower your build plate until it almost touches the screen. You want a gap so small that a piece of standard paper barely fits between them. This distance matters because it determines how much resin fills your first layer.
Use the paper test method. Slide a sheet under the build plate corner by corner. You should feel slight resistance as you pull the paper out. If it slides freely, your plate is too high. If the paper tears or won’t move, your plate is too low.
Check all four corners of your build plate. Many plates aren’t perfectly flat, so each corner may need adjustment. Take your time here. Spend a few minutes getting this right.
Some printers have a leveling feature in their software. Use it if available. It walks you through the process step by step.
After leveling, raise your build plate to the proper starting height. Your printer’s manual specifies this distance, usually between 5 and 8 millimeters from the screen.
Proper leveling ensures even resin distribution across your entire first layer. Uneven gaps cause some areas to cure too much while others don’t cure enough. This creates weak spots that fail during printing.
Check your leveling before every print job. Plates can shift slightly over time. A quick verification takes just a few minutes and saves failed prints.
Calibrating Exposure Time for Bottom Layers
Exposure time controls how long UV light hits your resin during each layer. For bottom layers, this setting is critical because it determines adhesion strength to your build plate.
Start by understanding your printer’s default settings. Most machines suggest a base exposure time between 8 to 12 seconds per layer. Your specific resin type and printer model will have different requirements, so check your resin manufacturer’s guidelines first.
Too little exposure creates weak base layers. Your print sticks to the FEP film instead of the build plate, or it barely adheres at all. You’ll see flat spots where the model didn’t cure properly.
Too much exposure causes the opposite problem. Your base layers cure so hard that they become rigid and brittle. This rigidity mismatch between hard bottom layers and softer upper layers creates internal stress, leading to breakage.
The sweet spot exists where your base layers cure just enough to bond firmly to the plate without becoming overly rigid. Test this by increasing exposure time in small increments, usually 1 to 2 seconds at a time.
Print a simple test model and observe where failure occurs. If your print pulls away from the plate entirely, increase exposure time. If it sticks perfectly but breaks during removal or mid print, decrease exposure time slightly.
Keep detailed notes of your settings and results. Document the exposure time, resin brand, ambient temperature, and outcome. This log becomes invaluable when troubleshooting future prints.
Temperature affects resin viscosity and cure speed, so seasonal changes may require exposure adjustments. Your calibration isn’t permanent. Review and adjust as conditions change.
Resin Mixing and Temperature Effects on Adhesion
Resin temperature and mixing directly affect how well your base layers stick to the build plate. Cold resin becomes thick and flows poorly, which prevents it from filling gaps between the plate and your model. Warm resin flows smoothly but may cure too quickly, creating weak bonds.
Check your resin’s temperature before printing. Most resins work best between 20 and 25 degrees Celsius. If your studio is cold, let the resin sit at room temperature for 30 minutes before use. Never heat resin directly with a heat gun or flame, as this damages the material.
Unmixed resin is a silent killer of base layer adhesion. Pigments and additives settle at the bottom of the container over time. When you pour unstirred resin, the top layers lack the proper chemical balance needed for strong curing.
Stir your resin thoroughly for at least 2 to 3 minutes before each print session. Use a clean stick and mix from the bottom upward. This ensures uniform consistency throughout the entire container.
Temperature affects how fast your resin cures. Warmer resin cures slightly faster, while cooler resin cures slower. This means your exposure time settings may need adjustment with seasonal changes.
If your base layers fail during winter, try increasing exposure time slightly. During summer, you might need to decrease it. Keep your workspace at a consistent temperature whenever possible.
Poor mixing combined with temperature swings creates unpredictable curing. You get weak adhesion in some spots and over curing in others. This inconsistency causes your model to peel away from the plate or break apart during the print.
Support Structure and Peel Force Considerations
Support structures carry your print from the build plate to your model. Weak or poorly placed supports cause base layer failures because they transfer excessive peel forces directly downward.
When your printer pulls the build plate away from the screen each layer, it creates force. Good supports distribute this force evenly. Bad supports concentrate it in one spot, snapping your base layers apart.
Place supports strategically to avoid direct stress on your model’s connection point. Supports should angle away from the build plate at 45 degrees when possible. This reduces the straight downward pull that damages fragile base layers.
The peel force itself deserves attention. Every time the build plate lifts, resin tries to stick to the screen. This creates resistance. If your base layers are too soft or thin, they cannot handle this repeated stress. They separate from the plate before your model fully forms.
You can reduce peel force by adjusting your printer settings. Slower lift speeds mean gentler pulling. Some printers let you increase the delay between layers, giving resin time to flow back under your model. This cushions the impact.
Check support diameter and count before printing. Too few supports fail under stress. Too many create their own problems by over constraining your model. Most prints need 3 to 5 supports per 100 square millimeters of base contact area.
Inspect your supports after each failed print. Look for bending, cracking, or separation from the build plate. These signs tell you exactly where forces became too strong. Adjust your support layout, reduce lift speed, or increase bottom layer exposure time based on what you find.
Common Mistakes That Lead to Base Layer Failures
Base layer failures often stem from mistakes that are easy to fix once you understand them. The most common error is over compressing your build plate against the screen. When you tighten the plate too much, you create excessive pressure that prevents proper resin flow and increases peel forces beyond what your fresh layers can handle.
Another frequent mistake is insufficient bottom layer exposure. Many users assume their printer’s default settings will work for every resin type. This is wrong. Each resin brand and color cures differently, so your base layers might not harden enough to bond with the plate. Test prints reveal this quickly.
Poor support design causes base layer failures too. Supports that are too thin or positioned too close together cannot distribute stress evenly. Your model’s weight pulls unevenly, and the base layers snap under unbalanced forces.
Neglecting resin mixing before printing creates silent failures. Pigments and resins separate over time, especially in warmer conditions. Unmixed resin cures inconsistently, leaving some base layers weak while others over cure.
Ignoring temperature effects is another trap. Resin viscosity changes with room temperature. Cold resin flows poorly and doesn’t bond well. Warm resin cures too fast and becomes brittle. Your base layers need the right temperature window to perform correctly.
Finally, many users fail to inspect their build plate and FEP film regularly. Scratches, residue, and wear reduce adhesion dramatically. A damaged surface makes even perfect exposure settings fail. Clean your plate thoroughly and check for damage before assuming your settings are wrong.
Troubleshooting Specific Base Layer Problems
When your base layers fail, the problem usually falls into a few specific categories. Understanding which one affects your print helps you fix it faster.
Adhesion failure to the build plate happens when your print simply won’t stick. This occurs when your leveling is off, your exposure time is too low, or your resin sits too cold. Start by releveling your build plate using a piece of paper and gentle pressure. Then increase your bottom layer exposure time by 2 to 3 seconds and try again.
Weak interlayer connections cause your print to break apart during printing rather than after. The layers don’t bond strongly to each other. This means your exposure time is actually too low overall. Your resin needs more light to cure each layer properly. Increase exposure gradually in 1 second increments until layers hold together.
Over curing creates the opposite problem. When bottom layers cure too hard, they become rigid and brittle. The layers above them can’t flex slightly during the peel cycle. This rigidity mismatch causes cracking or complete separation. Reduce your bottom layer exposure time slightly if you notice this pattern.
Excessive peel forces damage your model before it even finishes printing. Your build plate pulls too hard against the screen. Check that your build plate isn’t compressed too tightly. Loosen the compression slightly and verify your supports can handle the stress.
Flat spots on your print signal insufficient exposure. Your resin didn’t cure completely, leaving soft spots. These weak areas can’t support upper layers. Increase exposure time for your base layers specifically.
Test each adjustment separately so you know which change actually solved your problem.
Final Thoughts
Base layer failures feel frustrating, but they rarely come from one single cause. Most problems trace back to a small combination of leveling, exposure, and resin condition.
Your printer gives you clues each time a print fails. A flat spot points to weak exposure. A print that won’t stick points to leveling or plate cleanliness.
Take these failures as information, not setbacks. Each one tells you exactly what to fix next.
Start with the basics every single time. Level your build plate properly. Mix your resin fully. Check your exposure settings against your resin type.
These three steps solve most base layer issues on their own. Skipping any one of them invites trouble later.
Temperature and support design matter too. They work alongside your core settings rather than replacing them.
If your room runs cold, expect to adjust exposure slightly. If your model needs support, place it thoughtfully to reduce peel force.
Patience makes a real difference here. Change one setting, run a test print, and watch what happens.
Jumping between multiple changes at once hides the real problem. You end up guessing instead of knowing.
Keep notes on what works for your specific resin and printer. Your setup has its own personality, and small adjustments add up over time.
Once you dial in your settings, base layer failures become rare. Your printer will hold prints firmly from the very first layer.
Success with resin printing comes down to consistency. Clean plates, proper mixing, correct exposure, and smart supports work together every time.
Master these fundamentals, and your base layers will stop failing. Your prints will finally match the quality you expect.
Frequently Asked Questions
Why does my print stick to the FEP film instead of the build plate?
Your exposure time is too low. When the bottom layers don’t cure enough, they lack the strength to separate from the FEP film. Increase your exposure time gradually by 1 to 2 seconds and test again. You should also verify your build plate is level. An uneven plate creates gaps where resin pools, causing weak spots. Check that your resin is properly mixed before printing. Unmixed resin has inconsistent viscosity, which affects how light travels through it during curing.
What causes flat spots on my base layers?
Flat spots mean your bottom layers aren’t getting enough light exposure. The resin doesn’t cure completely, so the layer stays partially soft. This happens most often with new resin types or when room temperature drops. Start by adding 2 to 3 seconds to your bottom layer exposure time. If that doesn’t work, check your FEP film for scratches or cloudiness. Damaged film blocks light and prevents proper curing. You might also be over-compressing your build plate against the screen. Ease off the pressure slightly and relevel.
How do I know if my supports are failing?
Failed supports usually show as prints that break mid job or collapse during printing. Inspect your support structure before you start. Use adequate support diameter and spacing based on your model size. Thin or sparse supports can’t handle the peel forces your printer creates. After each failed print, examine where the break occurred. If it happened near a support, that support wasn’t strong enough. Reposition supports away from thin sections and add more where needed.
Why is my resin not sticking to the build plate at all?
This points to leveling issues or adhesion problems. First, relevel your build plate carefully. The plate should be close enough to the screen that a thin piece of paper slides with slight resistance. Second, check your resin condition. Old or improperly stored resin loses adhesive properties. Mix your resin thoroughly for at least 2 minutes before every print. Finally, clean your build plate with isopropyl alcohol and let it dry completely before printing.

I’m the voice behind Device Dossier. As a printing technology enthusiast, I spend my time testing printers, comparing specs, and writing honest reviews to help you find the perfect printing solution. When I’m not geeking out over print quality and page yields, you’ll find me exploring the latest in tech.