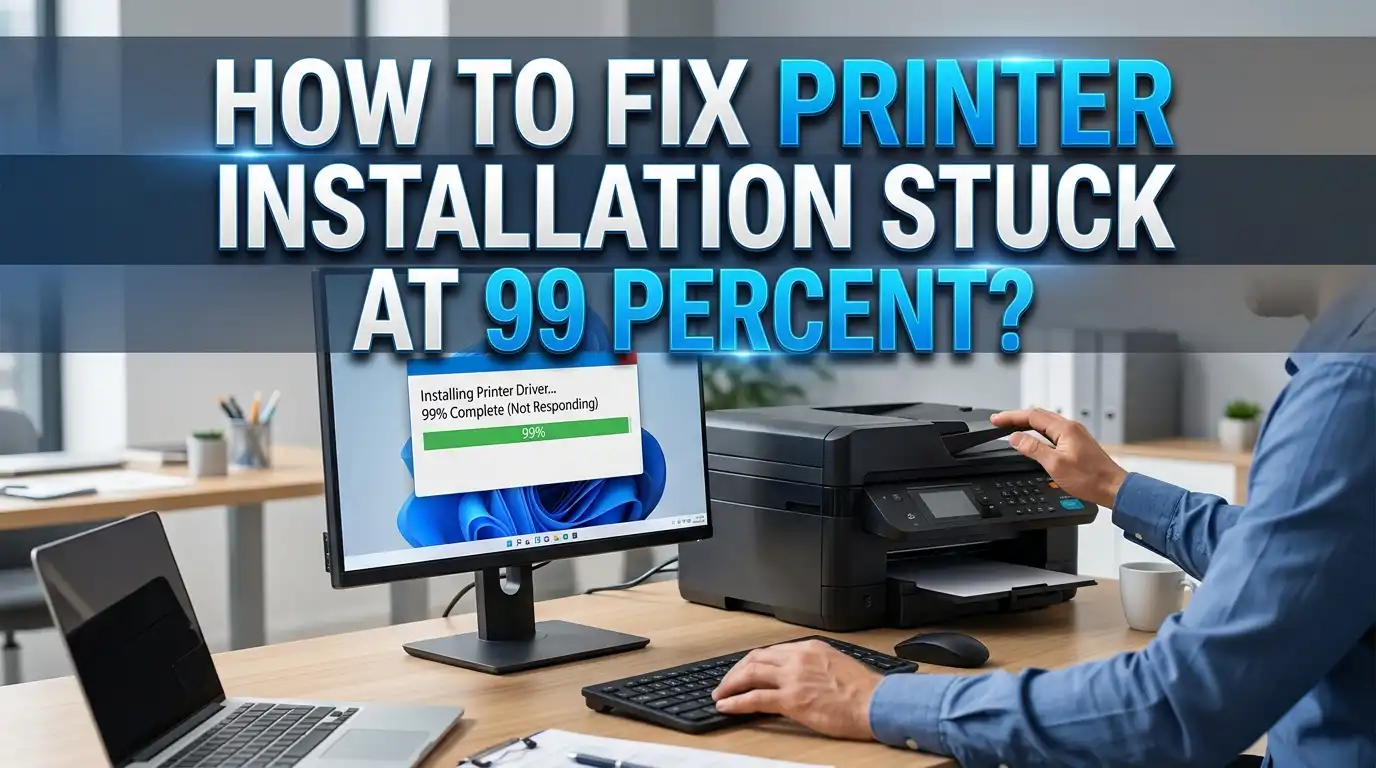
How to Fix Printer Installation Stuck at 99 Percent?
You just bought a new printer or you are setting up an existing one on a new computer. The installation progress bar moves along smoothly. It reaches 50 percent, then 75 percent, and then 99 percent. And then it stops. Minutes pass. Nothing happens. The bar stays frozen at 99 percent, and you start wondering if something went wrong.
This is one of the most common and frustrating problems that printer users face on Windows 10 and Windows 11. The printer installation gets stuck at 99 percent, sometimes throwing a fatal error and sometimes just sitting there forever. The good news is that this problem is fixable. You do not need to be a tech expert or call a professional to get past this issue.
In this guide, you will find clear, practical, and step by step solutions to fix a printer installation stuck at 99 percent. Each method addresses a different possible cause, from print spooler conflicts to antivirus interference.
Key Takeaways
- The print spooler service is the most common cause of printer installations freezing at 99 percent. Stopping the spooler, clearing its files, and restarting it can resolve the issue in most cases. This should be your first troubleshooting step before moving on to other methods.
- Antivirus and firewall programs can block printer driver installation by flagging installer files as suspicious. Temporarily disabling your security software during the installation process often allows the setup to complete without freezing.
- Startup programs and background applications create conflicts that prevent the installer from finishing. Performing a clean boot removes these conflicts and gives the printer software a clear path to install properly.
- Corrupted or outdated printer drivers from previous installations leave behind files that interfere with new setups. Fully removing old drivers through Device Manager and Print Server Properties clears the way for a fresh installation.
- Using the Windows built in printer setup instead of the manufacturer’s full software package can bypass the 99 percent freeze entirely. Windows includes basic drivers for most printers, and you can always add the full software later.
- Running the installation as an administrator gives the installer the permissions it needs to write files and registry entries. Right clicking the setup file and selecting “Run as administrator” solves permission related stalls.
Why Does Printer Installation Get Stuck at 99 Percent
Understanding why your printer installation freezes helps you choose the right fix. The installation process involves several steps. The installer copies files, registers drivers, configures the print spooler, and writes entries to the Windows registry. The 99 percent mark is typically where the final registration and configuration happens.
A conflict during this final stage causes the progress bar to freeze. The print spooler service may be holding onto old print jobs or corrupted data. Background applications can interfere with the installer’s ability to write to the registry. Security software may block critical files from being placed in system folders.
Driver remnants from previous printer installations are another frequent cause. If you had a different printer installed before, or if a previous attempt at installing the current printer failed, leftover files can create conflicts. The new installer tries to overwrite or register files that are already locked by the system.
Network issues also play a role, especially with wireless printers. If the installer is trying to configure a network connection and cannot reach the printer, it may hang at 99 percent while waiting for a response that never comes. USB connection issues can cause similar problems if the cable is faulty or the port is not working.
Stop and Restart the Print Spooler Service
The print spooler is a Windows service that manages all print jobs and printer communication. A stuck or corrupted spooler is the number one reason printer installations freeze at 99 percent. Stopping this service, clearing its cached files, and restarting it can immediately resolve the issue.
Press the Windows key + R on your keyboard to open the Run dialog box. Type services.msc and press Enter. This opens the Services window. Scroll down the list until you find Print Spooler. Right click on it and select Stop.
Next, open File Explorer and go to C:\Windows\System32\spool\PRINTERS. Delete all files inside this folder. These are cached print jobs and temporary data that may be causing the conflict. Do not delete the folder itself. Only remove the files inside it.
Go back to the Services window. Right click on Print Spooler again and select Start. You can also double click the service, set the Startup Type to Automatic, and then click Start. Close the Services window and try your printer installation again.
This fix works because it gives the print spooler a completely clean slate. Any corrupted data or stuck jobs that were blocking the installation are removed. Many users report that this single step solves the 99 percent freeze problem.
Remove Old Printer Drivers Completely
Leftover driver files from previous printers or failed installations can block a new printer setup. Windows may try to reuse old drivers that are incompatible or corrupted. Completely removing these old drivers before a fresh installation is essential.
Open the Control Panel and go to Devices and Printers. Right click on any printer listed there and select Remove device. Do this for every printer that is no longer connected to your computer. This removes the basic configuration but not the driver files.
To remove the actual driver files, press Windows key + R, type printui /s /t2, and press Enter. This opens the Print Server Properties window on the Drivers tab. Select the driver you want to remove and click Remove. When prompted, select Remove driver and driver package and click OK.
If the driver will not remove because it is “in use,” stop the Print Spooler service first using the method described in the previous section. Then try removing the driver again. Once all old drivers are deleted, restart your computer and attempt the installation with a fresh download from the manufacturer’s website.
This step is especially important if you see a fatal error message after the installation stalls at 99 percent. Conflicting driver files are the most likely cause of that specific error.
Perform a Clean Boot Before Installing
A clean boot starts Windows with only the essential services and drivers running. This eliminates conflicts from third party applications that may interfere with the printer installation. Background programs like cloud sync tools, VPN software, and system utilities often cause installation freezes.
Press Windows key + R, type msconfig, and press Enter. This opens the System Configuration window. Click on the Services tab. Check the box that says Hide all Microsoft services at the bottom. Then click Disable All. This turns off all third party services.
Next, open Task Manager by pressing Ctrl + Alt + Delete and selecting Task Manager. Click the Startup tab. Disable every item in the list by selecting each one and clicking Disable. Make a note of which items were enabled so you can turn them back on later.
Restart your computer. After the restart, your system will be running with minimal programs and services. Try the printer installation now. In many cases, the installation will complete successfully without freezing at 99 percent.
After the installation finishes, go back to msconfig and the Task Manager to re-enable your startup items and services. Restart your computer once more to return to your normal configuration.
Temporarily Disable Antivirus and Firewall
Antivirus programs and Windows Firewall can block printer driver installation files. The security software may flag installer components as potential threats, especially when the installer attempts to write to system folders or modify the Windows registry.
Before disabling your antivirus, save any open work. Then right click the antivirus icon in your system tray (bottom right corner of the taskbar). Most antivirus programs offer an option to temporarily disable protection. Select a time frame like 15 or 30 minutes. This gives you enough time to complete the installation.
For Windows Firewall, open the Control Panel and go to System and Security then Windows Defender Firewall. Click Turn Windows Defender Firewall on or off in the left panel. Select Turn off Windows Defender Firewall for both private and public network settings. Click OK.
Run the printer installation now. Once the setup completes, immediately turn your antivirus and firewall back on. Leaving your security software disabled for extended periods exposes your computer to threats.
If your antivirus was the cause, you may need to add an exclusion for the printer software in your antivirus settings. This prevents the same problem from happening during future updates or reinstallations.
Use Windows Built In Printer Setup
The full software packages from printer manufacturers include extra utilities, scanning software, and configuration tools. These large installers are more likely to get stuck at 99 percent. Using the Windows built in printer setup skips all of that and installs only the essential driver.
Go to Settings then Bluetooth & Devices then Printers & Scanners. Click Add device or Add a printer or scanner. Windows will search for available printers on your network and connected via USB.
If Windows finds your printer, click Add device next to its name. Windows will automatically download and install the correct driver. This process is faster and less prone to errors than using the manufacturer’s full installer.
If your printer does not appear in the list, click The printer that I want isn’t listed or Add manually. Select Add a local printer or network printer with manual settings. Choose the correct port (USB for wired, Standard TCP/IP for network). Windows will show a list of manufacturers and models. Select yours and click Next.
This method installs a basic driver that handles printing. You may lose access to advanced features like scanning or ink level monitoring. But it gets your printer working immediately. You can always install the full software package later once the basic driver is in place.
Run the Installer as Administrator
Some printer installations fail at 99 percent because the installer does not have sufficient permissions to write files to protected system directories. Running the installer with administrator privileges gives it full access to the folders and registry keys it needs.
Find the installer file you downloaded from the manufacturer’s website. Right click on the file and select Run as administrator. If a User Account Control prompt appears, click Yes to allow the program to make changes.
If you are using a CD that came with the printer, open File Explorer and browse the CD contents. Find the setup.exe file, right click it, and select Run as administrator. Do not use the autorun feature, as it may not launch the installer with elevated permissions.
You should also check that your Windows user account has administrator rights. Go to Settings then Accounts. Under your account name, you should see Administrator. If it says Standard User, you need to switch to an administrator account or ask your system admin to run the installation.
This fix is particularly important on work computers or shared family PCs where user accounts may have restricted permissions. The installer cannot complete its final steps without the right to modify system files and registry entries.
Update Windows Before Installing the Printer
Outdated Windows components can cause printer driver installations to fail. Microsoft regularly releases updates that include new printer drivers and compatibility fixes. Running Windows Update before installing your printer ensures your system has the latest components.
Open Settings and go to Windows Update. Click Check for updates. Let Windows download and install all available updates. This may take several minutes. Restart your computer if prompted.
Pay special attention to optional updates. Click on Advanced options and then Optional updates. Look for any driver updates listed there. Printer drivers often appear in this section. Select them and click Download & Install.
After all updates are installed and your computer has restarted, try the printer installation again. An updated system has fewer compatibility conflicts and is more likely to complete the installation without hanging at 99 percent.
Windows Update also refreshes system components like the print spooler service and core printing libraries. If these components were outdated or corrupted, the update process repairs them. This alone can fix the installation freeze without any other troubleshooting.
Check Your USB Cable and Connection
A faulty or loose USB connection can cause the printer installation to stall. The installer reaches 99 percent and then waits for a communication handshake with the printer that never completes. Physical connection problems are easy to overlook but simple to fix.
Unplug the USB cable from both the printer and the computer. Inspect the cable for visible damage, bent pins, or frayed ends. Try a different USB cable if you have one available. Cheap or very long USB cables can cause intermittent connection drops that disrupt installations.
Plug the cable into a different USB port on your computer. Avoid using USB hubs or extension cables. Connect the printer directly to a port on the computer itself. Front panel USB ports sometimes have weaker power delivery, so try a port on the back of a desktop computer.
For wireless printers, make sure the printer and computer are on the same Wi-Fi network. Check that the printer’s wireless function is turned on. Many printers have a wireless status light or a button that displays the connection status. Print a network configuration page from the printer’s menu to verify its IP address and network name.
If you are installing a network printer, try connecting it via USB first. Complete the installation over USB, and then switch to the wireless connection afterward. This bypasses any network related installation issues entirely.
Delete Temporary Files and Clear the Registry
Temporary files from failed installation attempts can accumulate and cause conflicts. Clearing these files gives the installer a fresh environment to work with. Windows stores temporary files in several locations that you can safely clean.
Open the Run dialog with Windows key + R. Type %temp% and press Enter. This opens your user temporary files folder. Select all files with Ctrl + A and delete them. Some files may be in use and cannot be deleted. Skip those files and delete everything else.
Next, use the Disk Cleanup utility. Type Disk Cleanup in the Windows search bar and open the app. Select your system drive (usually C:). Check the boxes for Temporary files, Temporary Internet Files, and Previous Windows installations if listed. Click OK and then Delete Files.
For a deeper clean, type %temp% again in the Run dialog and delete any remaining files. Then type temp (without the percent signs) and clear that folder as well. These steps remove gigabytes of unnecessary data that can slow down installations.
After clearing temporary files, restart your computer. Then download a fresh copy of the printer installer from the manufacturer’s official website. Do not reuse an old installer file. A fresh download ensures you have the most current version without any file corruption.
Use the Windows Printer Troubleshooter
Windows includes a built in troubleshooter that can automatically detect and fix common printer problems. This tool checks the print spooler, driver status, network connectivity, and other components that affect printer installation.
On Windows 11, open Settings and go to System then Troubleshoot then Other troubleshooters. Find Printer in the list and click Run. The troubleshooter will scan your system and attempt to fix any issues it finds.
On Windows 10, open Settings and go to Update & Security then Troubleshoot then Additional troubleshooters. Select Printer and click Run the troubleshooter. Follow any on screen prompts.
The troubleshooter may ask you to select the printer you are having trouble with. If the printer is not listed, select the option that says My printer is not listed. The tool will then run a broader set of diagnostics.
After the troubleshooter completes, it will show you what problems it found and whether it was able to fix them. Review the results carefully. Even if the troubleshooter cannot fix the problem automatically, its diagnostic report tells you what is wrong. You can use that information to apply a targeted fix from the other methods in this guide.
Reinstall the Printer Using Safe Mode
If none of the standard methods work, installing the printer in Windows Safe Mode can bypass all third party conflicts. Safe Mode loads Windows with only the minimum required drivers and services. This creates the cleanest possible environment for installation.
To enter Safe Mode, open Settings and go to System then Recovery. Under Advanced startup, click Restart now. Your computer will restart to a blue options screen. Select Troubleshoot then Advanced options then Startup Settings then Restart.
After the restart, press 4 or F4 to start in Safe Mode. If you need network access for a wireless printer, press 5 or F5 for Safe Mode with Networking.
Once in Safe Mode, run the printer installer. The installation is much more likely to complete because no background programs or third party services are running. After the installation finishes, restart your computer normally.
Your printer should now appear in your list of devices and work correctly. If the installation still fails in Safe Mode, the installer file itself may be corrupted. Download a new copy from the manufacturer’s website and try one more time.
Contact Manufacturer Support as a Last Resort
If you have tried every method in this guide and the installation still freezes at 99 percent, it is time to reach out to the printer manufacturer’s support team. They have access to diagnostic tools and specialized knowledge about their specific products.
Visit the manufacturer’s official support website. Most brands like HP, Canon, Epson, and Brother have live chat, phone support, and remote assistance options. Remote assistance is particularly helpful because a support agent can connect to your computer and see the problem firsthand.
Before contacting support, gather the following information. Write down your printer model number, the Windows version you are using, and the exact error message you see if any. Also note which troubleshooting steps you have already tried. This saves time and helps the agent jump straight to advanced solutions.
Some manufacturers offer specialized uninstaller tools that remove every trace of their printer software. HP has the HP Print and Scan Doctor. Epson provides an uninstaller utility. These tools clean up leftover files and registry entries that standard uninstallation methods miss.
The manufacturer may also provide a different version of the driver or an alternative installation method that works better with your specific Windows configuration. Their support teams deal with the 99 percent installation freeze regularly and often have quick solutions.
Prevent the Problem From Happening Again
Once your printer is installed and working, a few preventive steps will help you avoid this problem in the future. Keeping your system clean and updated reduces the chance of installation conflicts.
Always download printer drivers from the official manufacturer website. Third party driver download sites often provide outdated or modified files that cause installation problems. Bookmark your printer manufacturer’s support page for easy access.
Keep Windows Update running on a regular schedule. Automatic updates ensure your system has the latest printer support files and security patches. Go to Settings then Windows Update and make sure automatic updates are enabled.
Uninstall printer software properly when you stop using a printer. Do not just unplug the device and forget about it. Remove the printer from Devices and Printers, then remove the driver from Print Server Properties. This prevents old drivers from conflicting with future installations.
Run Disk Cleanup monthly to remove temporary files that build up over time. Keep your antivirus software updated but review its settings to make sure it is not blocking legitimate software installations. Adding your printer software folder to the antivirus exclusion list prevents future interference.
Why does my printer installation freeze at exactly 99 percent?
The 99 percent mark is where the installer performs its final configuration steps. These include registering the driver with Windows, configuring the print spooler, and writing entries to the system registry. Any conflict during these steps causes the progress bar to stop at 99 percent. The print spooler service holding corrupted data, third party software interference, and insufficient permissions are the most common causes.
Can I cancel a printer installation stuck at 99 percent?
Yes, you can cancel the installation. Open Task Manager by pressing Ctrl + Alt + Delete. Find the installer process in the list and click End Task. If the cancel button in the installer is not responding, Task Manager is the safest way to stop the process. After canceling, clear the print spooler files and restart your computer before trying again.
Will a stuck printer installation damage my computer?
A printer installation stuck at 99 percent will not damage your computer. However, it may leave behind partial driver files and registry entries that need to be cleaned up. These leftover files can cause future installation attempts to fail. Use the methods described in this guide to remove old drivers and temporary files before starting a fresh installation.
Should I use the manufacturer’s full software or the Windows basic driver?
If the manufacturer’s full software package keeps getting stuck, use the Windows built in driver first. Go to Settings then Printers & Scanners and add the printer manually. The basic driver handles standard printing functions. You can install the full software package later once the basic driver is working. The full package adds features like scanning software and ink management tools.
Does this problem happen on both Windows 10 and Windows 11?
Yes, the printer installation freeze at 99 percent occurs on both Windows 10 and Windows 11. The troubleshooting steps are nearly identical for both operating systems. The menus and settings may look slightly different, but the methods like clearing the print spooler, performing a clean boot, and running the troubleshooter work the same way on both platforms.
How long should I wait before deciding the installation is stuck?
Give the installation at least 20 to 30 minutes at 99 percent before concluding it is stuck. Some printer software packages are large and the final configuration steps can take time, especially on older computers. If the progress bar has not moved and your hard drive activity light is not blinking after 30 minutes, the installation has likely frozen and you should proceed with troubleshooting.
I’m the voice behind Device Dossier. As a printing technology enthusiast, I spend my time testing printers, comparing specs, and writing honest reviews to help you find the perfect printing solution. When I’m not geeking out over print quality and page yields, you’ll find me exploring the latest in tech.